How to Trim a Video Clip in QuickTime Player

With technology and many new devices, man has made his life easy. Video editing has become an essential part of our lives as we save our memories, workloads, and creational content in digital form in the form of videos. Apple's QuickTime media player is a simple player that provides the options of trimming, rearranging, and rotating videos and video clips.
QuickTime player is helpful for people with Mac devices, but users with windows can use alternative software and third-party tools. In this article, we'll provide methods for how to trim video in QuickTime Player and other alternative tools. Go through the article for depth knowledge of video trimming and editing.
Part 1. How to Trim Video in QuickTime Player
QuickTime Player is the default media player created by Apple. Users can use QuickTime's interface for free on their Mac. Other than a media player, QuickTime can be used to cut and trim videos and video clips. And it allows you to rearrange, and rotate the videos in high quality.
The process for using QuickTime Player is straightforward. Users with little knowledge of how to trim videos can easily use QuickTime to solve the issue of how to trim videos in QuickTime Player. Let's look at the step-by-step guide to trimming a video in QuickTime.
It also helps merge two different clips sourced from various video clippings. As you perform trims of a video into multiple segments, you can use these segments to create a new video altogether. The same applies to any audio file. Moreover, the 60x processing speed reduces the overall time, which is beneficial when you have multiple video files to attend to. Now you can see the guide to use TunesKit Video Cutter on MacBook to cut a Video.
How to Trim Video on QuickTime Player
Step 1 Open the QuickTime Player
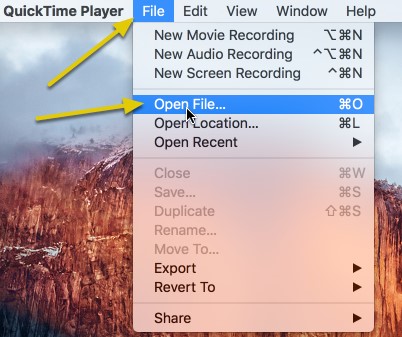
Open the QuickTime Player on your Mac computers. You can find the player on your Mac from the 'Application folder'.
Step 2 Find a Video
After opening the QuickTime player, a new window will appear on the screen. Here in the search bar, you have to choose your targeted video. After selecting the video or video clip, click on 'Open'.
Step 3 Trim the Video
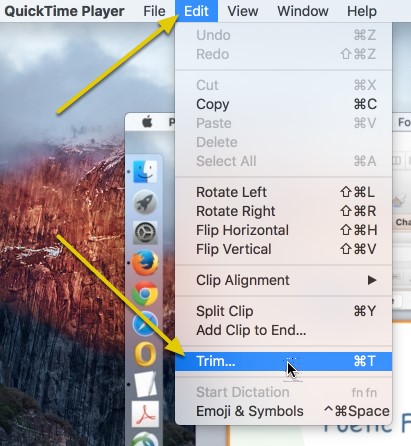
After selecting the video, tap on the Edit button and click on Trim. A Trim bar will come in front of you. Trim the video with the yellow handles on both sides of the video and cut it to your required length.
Step 4 Save and Export
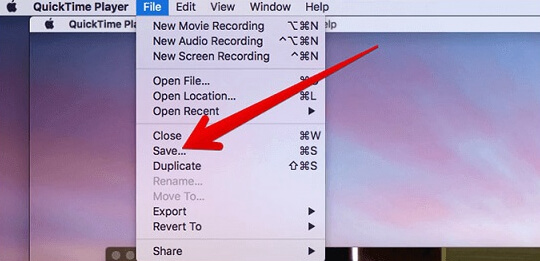
Now you have successfully trimmed your selected video in simple steps. Save and export the file to your local folder.
Part 2. Alternative to QuickTime Player to Trim Video – TunesKit Video Cutter
TunesKit Video Cutter is a multi-tasker for trimming and joining the videos or video clips in high quality. It provides 100% lossless quality, trimming, editing, and converting options. With TunesKit Video Cutter, users can trim, edit with effects, and then convert it to multiple devices and media and audio formats.
For using TunesKit Video Cutter, install and launch it on your Mac or Windows device. Once you have launched the software, you can easily follow the guidelines.
Why Choose TunesKit Video Cutter?
- Trim videos in QuickTime easily
- Trim video on QuickTime with zero quality loss
- Support lots of output formats and devices
- Friendly interface and easy to use
- Cut MPEG Video without quality loss
How to Trim Videos Using TunesKit Video Cutter
Step 1Add Video to TunesKit Video Cutter
Open the software on your Mac device and add a video file to it. You can drag and drop the video. Or click the 'Open' button to add the video.
Remember: One video can be trim at a time.

Step 2 Select the Section for Cut
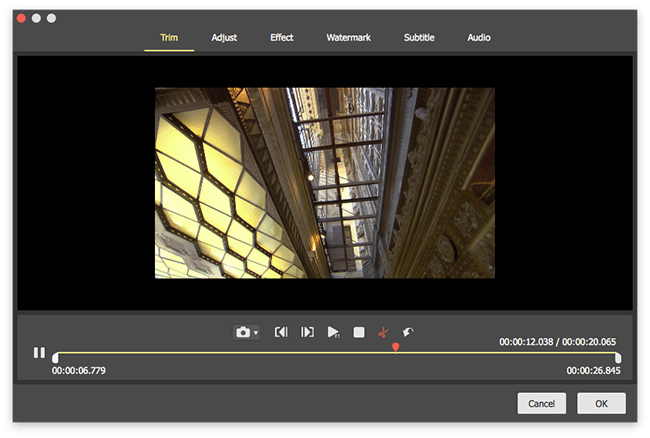
After adding the video file, it will start playing in the background, and you'll have options to edit it. For selecting the required section, you can use the slide bar. Or you can cut the part with the starting and ending times.

Step 3 Edit the Selected Section
Once you have set the trimming timings, you can customize your video clip with TunesKit video Cutter's amazing effects. Click on the 'Edit' button and select editing options like brightness, crop, rotate, subtitles, and watermarks of your choice.
Step 4 Set Output Preferences
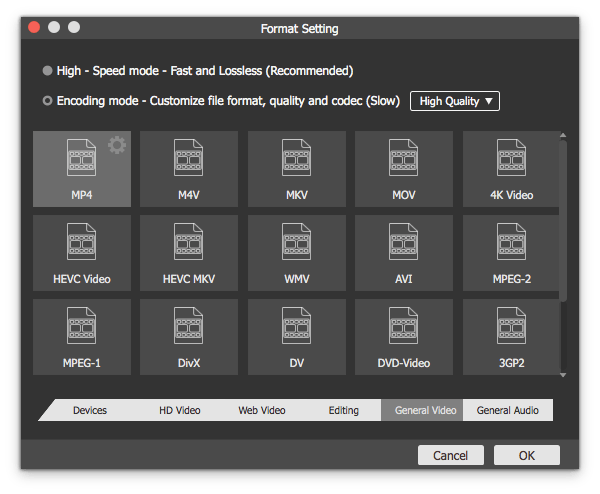
After editing and customizing the video clip, it's time to save the file in a local folder. Click the 'Format' button and select output formats like M4V, MPEG, MKV, and AVI. You can also set parameters like size, bit rate, and codec.
Step 5 Start the Trimming Process
Click "Start" to begin the trimming process of the selected section from the video into small clips. After completing, browse to the destination folder to check the file.

Part 3. Alternative to QuickTime Play to Trim and Edit Video – AceMovi
AceMovi Video Editor is an excellent option for people unaware of any kind of video trimming, editing, rotating, and filmmaking. Users can use AceMovi on both Windows and Mac devices. Also, them can send the trimmed section to other media players and devices.
The process for using AceMovi is very easy and helpful, especially for beginners. With simple steps, you can trim video and make your work easy. The step-by-step instruction is as follows:
How to Trim and Edit Video via AceMovi
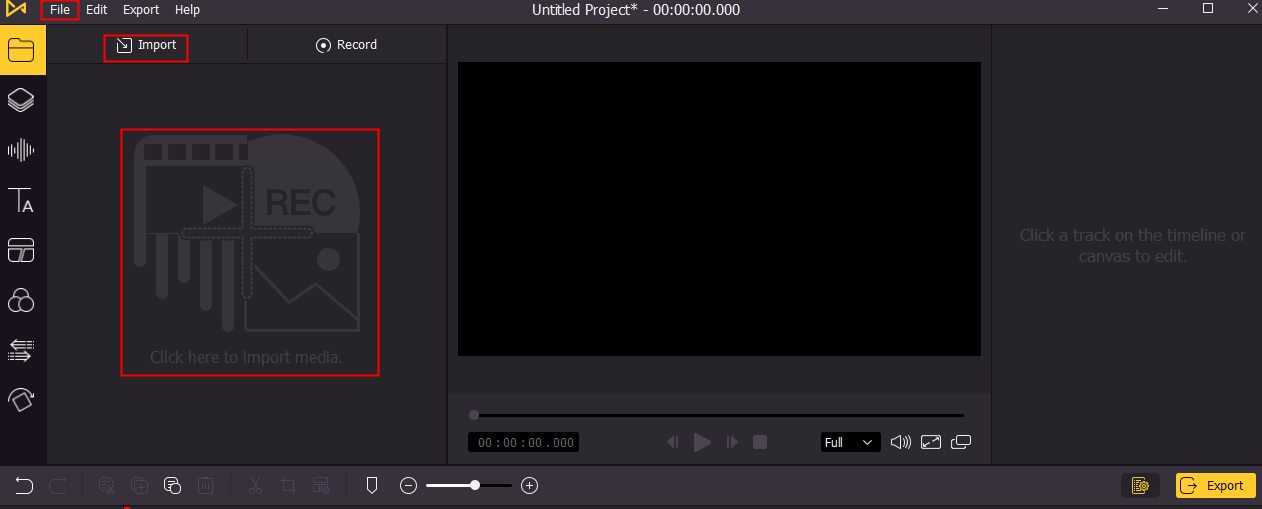
Step 1: Install and launch AceMovi Video Editor on your Mac or Windows device. Select a video and add it to the AceMovi. Click the 'Import' button or the '+' icon at the top corner of the menu bar. You can also drag and drop the video.
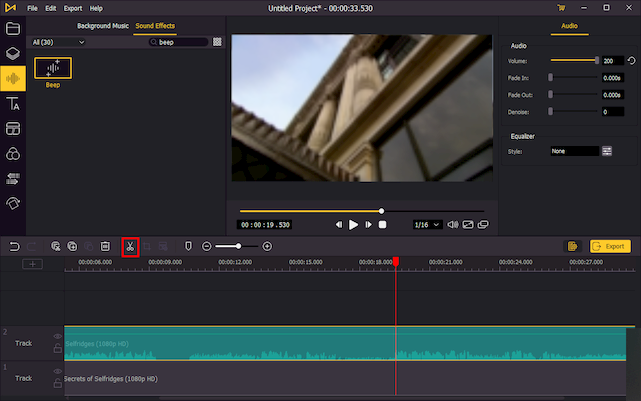
Step 2: To trim the video clip, click on the beginning time and tap the 'Cut' button, then turn to the ending time and tap the 'Cut' button again. Next, right-click the unwanted part the select 'Delete'.
Step 3: On the right side of the main interface, you'll see editing options. Here you can edit, customize and trim your video with options like brightness, crop, volume, saturation, hue, and other effects.

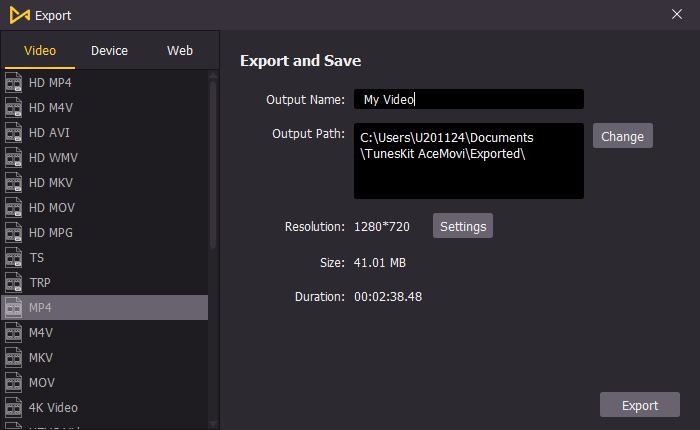
Step 4: After editing and customizing the video, click the 'Export' button and save the file to your local folder.
Part 4: Conclusion
Finding the best video trimming and editing tool is challenging as the internet is full of many options. But to select the one, you must keep in mind some essential things like quality, speed, safety, and compatibility with your device.
QuickTime player, TunesKit Video Cutter, and AceMovi video editor are the recommended tools for creating amazing videos, with their unique and valuable editing options. Try them and find the best one for you.
