2 Ways to Trim H.264 Video without Re-Encoding
Trimming H.264 video can often be frustrating when the video editor you are working on demands you to re-encode the video into different formats. The things become especially difficult for a novice video editor who doesn't want to compromise on the quality of the video.
Is there a way to trim H.264 video without losing the quality of the video? In this article, we will be discussing two easy ways of trimming H.264 without re-encoding. The software reviewed in the context below is easy to use and will retain the high quality of H.264 videos. So, let's get started.
Part 1. How to Trim H.264 Video via TunesKit Video Cutter
TunesKit Video Cutter is a desktop-based software that trims and cuts your videos into smaller segments without losing the quality of the content. It is a comprehensive video editing program lending users various tools, filters, and effects. Users can not only trim videos but can also split H.264 video and merge multiple clips into a new file without compromising on the video quality.
The biggest benefit you get with TunesKit Video Cutter is the accuracy level. The software allows you to trim H.264 video with precision by adjusting the temporal interval to milliseconds. And you also have basic and advanced editing options with it, such as adding effects, watermarks, titles, and more. Finally, you can save the edited H.264 video files into a range of different output formats including MPEG, MP4, MOV, M4V, and more. Here is a step-by-step guide on how to trim H.264 video using the all-rounder TunesKit Video Cutter.
Key Features of TunesKit Video Cutter
- Support trimming video on Windows and Mac
- Trim H.264 video with zero quality loss
- Provide both lossless and recording modes
- Support multiple video and audio output formats
How To Trim H.264 video
Step 1 Download and Install the Software
Download the software on your computer. Then click on the TunesKit Video Cutter icon to launch it on your computer screen.
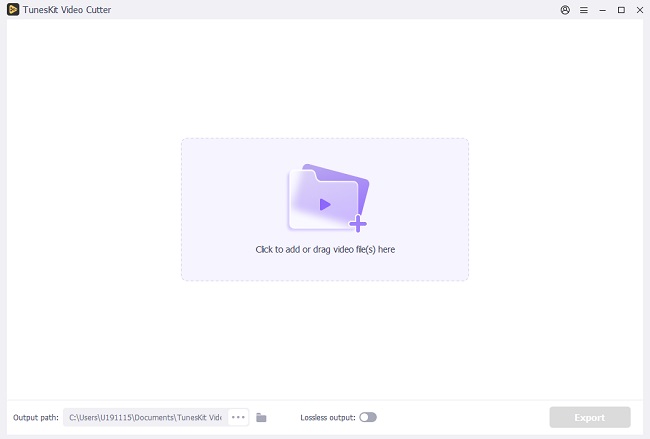
Step 2 Import H.264 Video into the Video Editor
Next, you have to import the desired H.264 video into the video editor. Click on the "Open" button to select the video file, or you can open the folder and drag the H.264 video into the main interface.
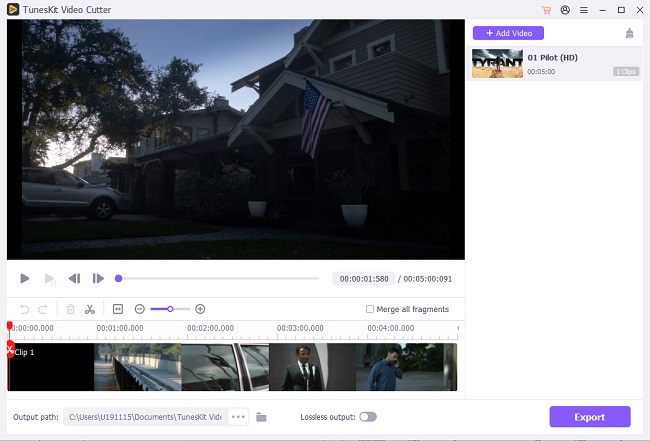
Step 3 Trim the Video
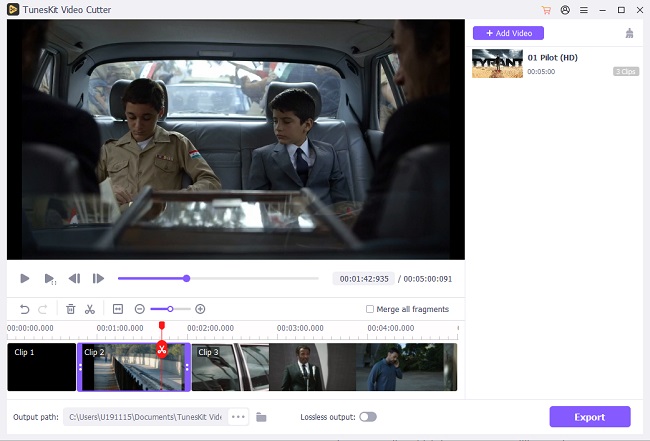
You can review the uploaded H.264 video in the preview window. Using the slider at the bottom of the preview window, you can easily split H.264 video portion you want to remove. If you want more precision while trimming the H.264 video, you can manually set the starting and ending points of the source video.
Step 4 Set The Output Format
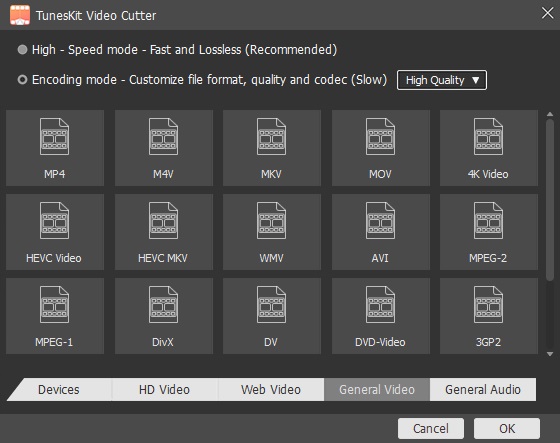
Click on the "Format" button to change the output format of your trimmed H.264 video clip. Select the output format first, then you can also click the setting icon on the format option to customize other parameters, such as adjusting the codec, size, bit rate, and other specifications of your H.264 video without losing the quality. After that, click "OK".
Step 5 Begin The Trimming Process
Now, click on the "Start" option and the video editor will begin the trimming process. TunesKit Video Cutter is a super-fast video converter that trims videos at high speed.

Part 2. Veed. IO- Cutting H.264 Video without Re-Encoding
You can also trim H.264 video using an online video editing tool specially designed for this purpose. Veed. IO is an online MP4 video converter that supports H.264 videos as well. This online tool preserves the quality and frame rate of your trimmed H.264 video and gives you a high-quality output. It allows you to trim, split, and merge H.264 video before you share it on social media platforms. Another benefit of Veed. IO is that you can play the trimmed H.264 video file on multiple devices and operating systems. You'll see how to cut H.264 video without re-encoding below.
How to Use Veed. IO to Cut H.264 Video
Step 1: Go to the official website of Veed. IO.
Step 2: Click on the "Choose File" to drag and drop the H.264 video file into the video editor.
Step 3: Now you can see the H.264 video has been opened on the timeline. Cut the starting and ending points by dragging both the ends of the H.264 video.
Step 4: Now, click on the "Split" icon to create a new video.
Step 5: Press "Export" and the trimmed video will be downloaded to your computer.

Part 3. FAQs about H.264 Video
Q1: Is H.264 good quality?
H.264 delivers a high-quality video transmission with low bandwidth and low latency rate. It has an efficient codec that will not affect the quality of any video file even if the bit rate is reduced.
Q2: What is the difference between H.264 and MPEG-4?
H.264 is 1.5-2 times better efficient as compared to MPEG-4. H.264 has a high compression rate allowing it to store more information on the hard disk. It also provides a high and fluent image quality.
Q3: How do I convert H.264 to MP4?
To convert H.264 video into MP4 format, you can use TunesKit Video Cutter.
Step 1: Open the TunesKit Video Cutter.
Step 2: Upload the H.264 video into the video editor.
Step 3: Edit the H.264 Video according to your preference.
Step 4: You can trim, cut, split, or merge the video as you like.
Step 5: Click the "Edit" button to add effects or filters to the video if you need. Then click "OK".
Step 6: Click on the "Format" option and choose MP4 as your output format. And click "OK".
Step 7: Click on "Start".
Part 4: Conclusion
The above two methods are quite easy and fast for you to trim H.264 video. You can try them both out and get a feel for the features and functions of each. By the way, TunesKit Video Cutter can not only cut the video but also cut the audio file losslessly, which can give you a convenient and wonderful experience.
