[3 Ways] How to Trim a Zoom Recording

Zoom is a video conferencing software that allows businesses to communicate with their clients in real-time. It has an easy-to-use interface, and it also offers a wide range of features, including remote meetings, live chat, and screen sharing. Zoom can be used for business meetings as well as personal ones.
If you already have recorded sessions available in your Zoom account, you can download them to your computer. For instance, if you are using Zoom for official business, you can log in using the credentials and find the recordings of your choice. However, if you want to edit the downloaded Zoom recording, you will need a tool that does the work. Today, you will learn how to trim a downloaded Zoom recording on your computer.
Part 1: How to Trim Zoom Recording with Zoom Built-in Trimmer
Once you have completed a Zoom session and recorded the same, it's time to learn how to trim a Zoom recording. Follow the steps below to use the built-in trimmer from the Zoom application to make edits for a recording:
How to Trim a Zoom Recording
Step 1: Log into your business Zoom account and head to the "Recordings" section.
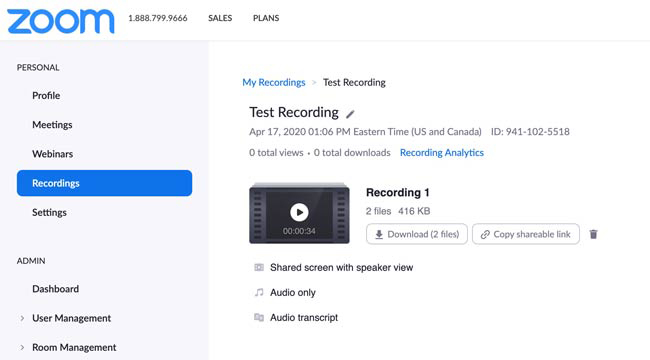
Step 2: Play a recording you'd like to trim. The video will open in the editor.
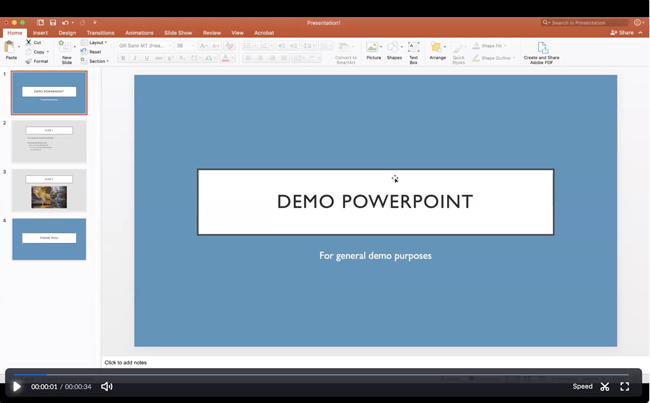
Step 3: You will find the trim option at the bottom of the screen. Click it to use it. Drag the timestamp on the editor and set it to the required start and finish times.
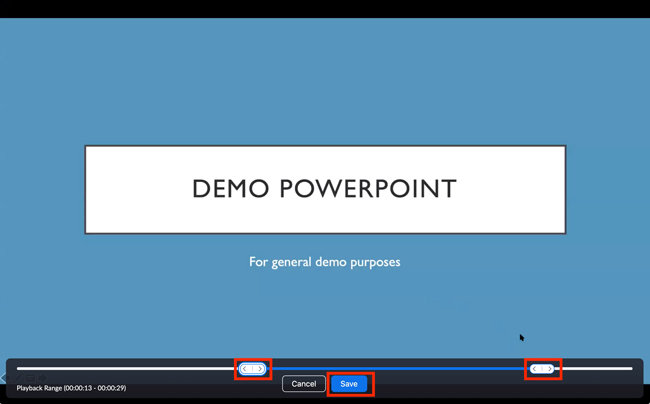
Step 4: Click "Save" to save the trimmed portion of the Zoom video.
Part 2: How to trim a downloaded Zoom recording via TunesKit Video Cutter
You can trim Zoom recording with the help of a third-party tool that specializes in this arena. We will use the tool TunesKit Video Cutter, which gained popularity in less time. It is because of its features and the straightforward operation of trimming videos on Windows 10 and Mac.
TunesKit Video Cutter is a single solution for dissecting Zoom videos or audios into multiple segments and saving them in a different file format. Apart from trimming a video and audio file, the tool also helps merge numerous pieces of different videos to create a new video file. The exciting feature of the software is its ability to retain the original video quality. You can also see the editing in real-time preview, which helps you notice the changes to the Zoom video file undergoing edits.
Key Features of TunesKit Video Cutter
- Edit the audio/video flexibly with customized effects
- Trim a downloaded zoom recording with no quality loss
- Clear interface and easy to operate
- Convert video clips to multiple formats such as MP4, MPEG, AVI and others
How to Use TunesKit Video Cutter to Trim a Zoom Recording
TunesKit Video Cutter is available for Mac and Windows. First, download the software from the official website and complete the installation. Then, choose the free version to test its capability and understand how it functions.
Step 1 Import Zoom Recording Video
Open your Zoom client to look for the local folder where the application saves the recordings. Next, launch the TunesKit Video Cutter tool and click the "Open" button to browse to the Zoom recordings folder and select the file for trimming. Alternatively, you can drag and drop the file.
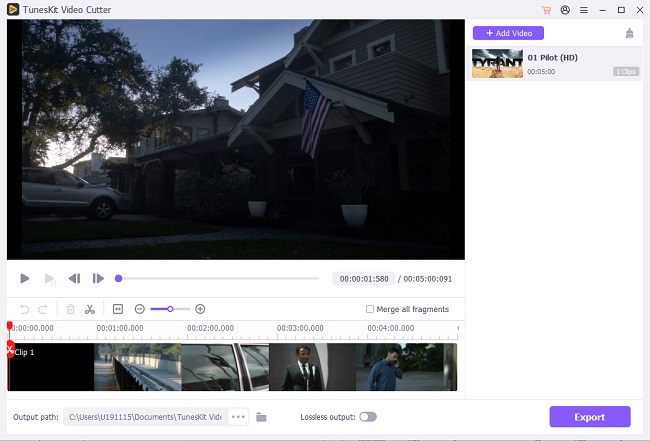
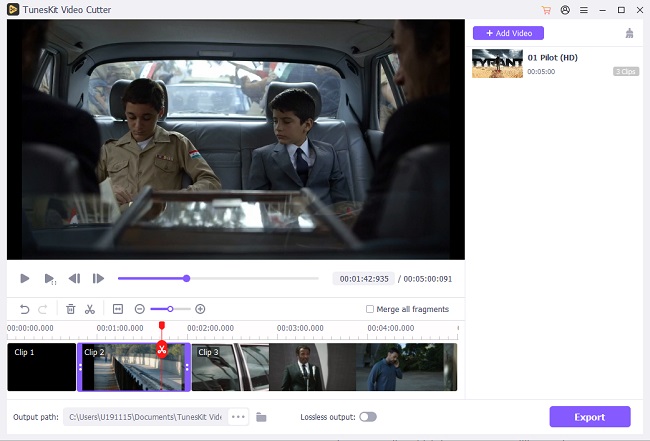
Step 2 Selection of the Zoom Segment
Upon importing the Zoom video, TunesKit will automatically play it, which you can see in the preview window. In addition, you can choose the slider bar and set the trim area for quick results. Likewise, you can enter the start and end times manually.
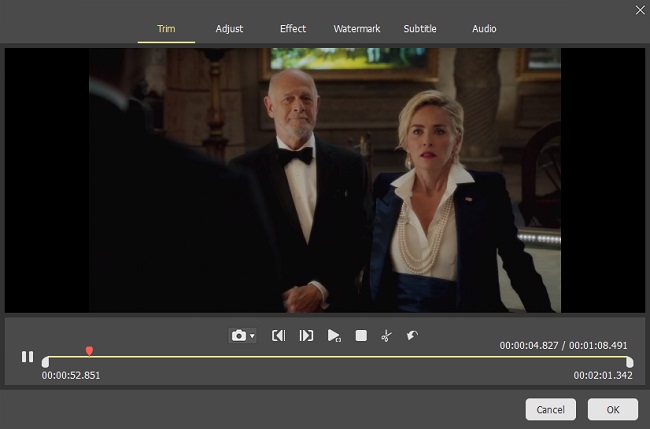
Step 3 Edit the Zoom Recording
You can use the built-in video editor to customize the trimmed clipping. For example, you can change the aspect ratio, add a watermark, adjust brightness, add subtitles, etc.
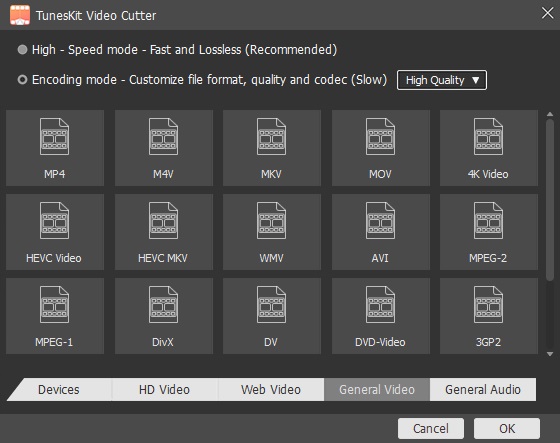
Step 4 Output Format to Zoom Recording
Press the "Format" button to choose the output format for the trimmed Zoom video. TunesKit Video Cutter supports all the video and audio formats. You can also adjust file size, codec, bit rate, etc.
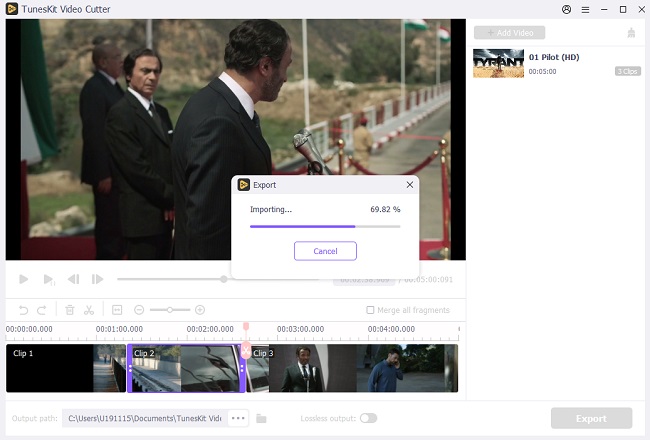
Step 5 Export Trimmed Zoom File
Click the "Start" button to begin trimming the selected section from the Zoom video clip and save it in the format chosen in the previous step.
Part 3: How to trim Zoom recording Online
If you are in a hurry and like to trim a Zoom recording, you can choose the online process. To trim Zoom recording online, you need access to your Zoom recording, a choice of your web browser, a stable Internet connection, and Flixier.
Flixier is an online tool that assists you in trimming Zoom recordings within a few minutes. The tool also helps you add subtitles, motion text, transitions, and overlays for better results. The steps to use Flixier to trim Zoom recording online are as follows:
How to use Trim Zoom Recording Online with Flixier
Step 1: You can add the required Zoom recording from the local drive to the Zoom video editor online or use the cloud feature of Zoom. For the cloud, log in with your credentials and select the required file.
Step 2: Double click the Zoom file to add it to the timeline for edits. Now, utilize the trim tool available to cut segments of the recording. Likewise, you can crop and add motion text, graphics, transitions, and overlays as per the need.
Step 3: After completing the edits, you can click the "Export" button. Flixier will create the download link within three minutes or less, depending on the file size. Alternatively, you can choose to publish the Zoom video to YouTube, cloud storage services, and Facebook instantly.

Part 4: Conclusion
How to trim Zoom recording on PC is the most asked question among Zoom users. The reasons could be professional or personal. Nonetheless, understanding how one can trim Zoom recording provides a straightforward solution for the requirements.
The above-discussed ways to trim Zoom video recording help anyone trim their Zoom recordings as needed. One can use TunesKit Video Cutter for better results or the online mode for fulfilling quick requirements.
