How to Cut a Part of a Video on MacBook with Ease
The necessity for trimming an unwanted part from a video arises for anyone. However, not everyone has the tool or understanding of how to cut a part of a video on MacBook. For any professional or a home user, capturing moments through their smartphones or camera has become a simple task. That said, editing is the most critical part, bringing fruitful results.
Making a video simple and effective is crucial to attracting audiences. In any case, finding out the trimming process is essential because several tools are available for use. However, if you are an amateur, it will be tough to pick the appropriate trimming software that does the work and retains the original video quality. Today, we will look at three different solutions you can use to cut a part of a video on your MacBook.
Part 1: How to cut a part of a video on MacBook via TunesKit Video Cutter
MacBook users often requested answers on how to cut video on MacBook and the best tool for use. In the first solution, we will talk about TunesKit Video Cutter for Mac.
TunesKit Video Cutter is a simplistic solution for all your video editing, especially video trimming, cropping, and merging requirements. This software helps you trim both audio and video files and allow you to save the file in all popular formats such as MP4, AVI, MPG, M4A, AAC, etc. In addition, the preset profiles make it simple to cut and save the video file on your MacBook in the desired format without losing the original quality.
It also helps merge two different clips sourced from various video clippings. As you perform trims of a video into multiple segments, you can use these segments to create a new video altogether. The same applies to any audio file. Moreover, the 60x processing speed reduces the overall time, which is beneficial when you have multiple video files to attend to. Now you can see the guide to use TunesKit Video Cutter on MacBook to cut a Video.
Why Choose TunesKit Video Cutter?
- Trim videos on Mac and Windows easily
- Trim video on Mac and Windows with zero quality loss
- Support lots of output formats and devices
- Friendly interface and easy to use
- Cut 4K Video without quality loss
How to Use TunesKit Video Cutter to Cut a Part of a Video on MacBook
Before beginning with the steps outlined below, ensure to download the free copy of the software from the official site.
Step 1 Add media to TunesKit Video Cutter
Cut video MacBook requires the media file added to the TunesKit Video Cutter. You can do this by launching the software and dragging and dropping the media file onto the interface. Alternatively, you can use the "Open" button to browse the file location and add it to the interface.

Step 2 Setting the part that needs to be cut
Upon completing the media upload to the program, TunesKit Video Cutter will begin playing the file that is visible in the preview window. You can choose the slider bar to set the segment for trimming or use the start and end time for precise cuts.

Step 3 Editing and customizing
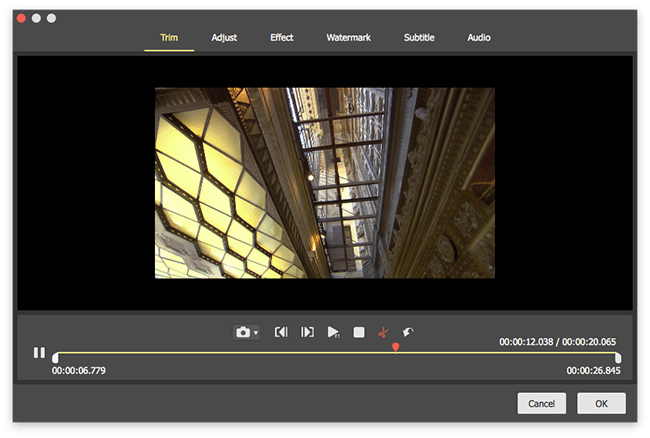
TunesKit Video Cutter has a built-in video editor. You can use it to enhance your video before saving it. For instance, you can click the "Edit" icon to open the available options such as trim, crop, rotate, brightness adjustment, adding subtitles, adding watermarks, and transitions.
Step 4 Merging audio or video clips
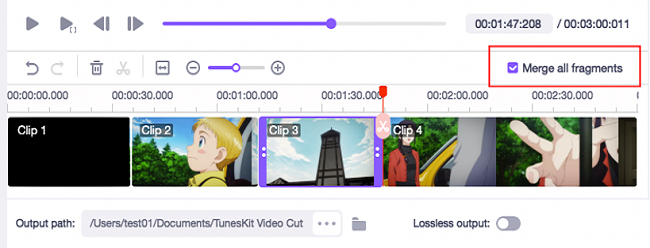
You can cut your video into multiple segments and use these segments to create a whole new video, and use the "Merge Segments" feature to attain this, which is an optional step in this case.
Step 5 Set format and folder
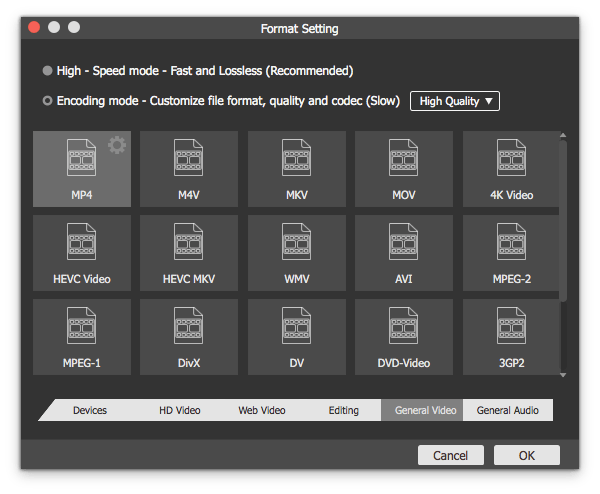
Clicking the "Format" button will open a window where you can choose the output format along with the destination folder. For example, you can select M4V, MP4, AVI, MPEG, 3GP, MKV, WMV, AAC, OGG, etc. The program also allows you to change the bit rate, codec, file size, and sample rate parameters.
Step 6 Start cutting a part of a video
Click "Start" to begin the trimming process of the selected section from the video into small clips. After completing, browse to the destination folder to check the file.

Part 2: How to Cut a Part of a Video on MacBook via AceMovi Video Editor
The other tool that you can put into use is AceMovi Video Editor. With its help, you can learn how to cut video on MacBook in a few simple steps. AceMovi is a powerful video editing tool with all the features that individual hopes to find. You can use the basic tools such as crop, zoom, rotate, flip, speed control, etc. or opt for advanced editing features such as transitions, overlays, reverse videos, filters, keyframing, split-screen, PIP, green screen editing, and mirror effects.
It also has screen recording, webcam recording, and slideshow-making features. In addition, the ready availability of templates makes it easy to edit videos according to the requirements. Please check the guide to Use AceMovi Video Editor to Cut Video on MacBook below.
How to Cut Video on MacBook with AceMovi
Before beginning, ensure to install the trial copy of the software from the official website.
Step 1 Add Video Media
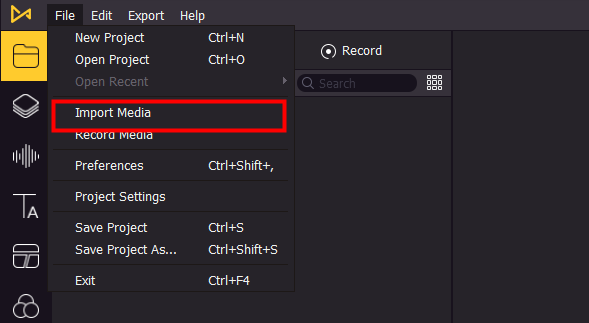
How to cut video on MacBook using AceMovi? Initially, you must first import media to the tool. You can drag and drop the video file or use the "Import" button from the menu bar under the "File" option.
Step 2 Trim the Video
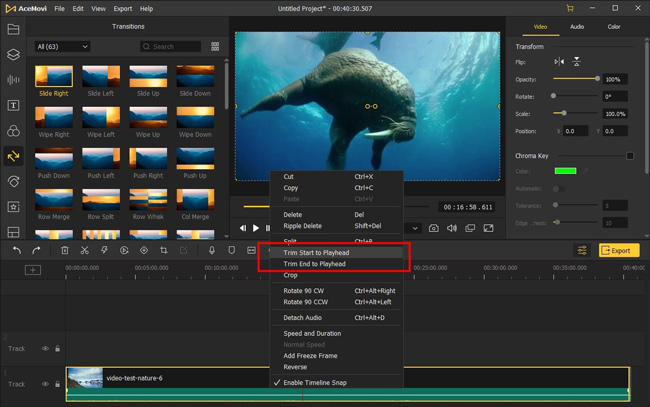
Drop the media file into the timeline. You can hover the mouse on the video clip at the start or the ending to notice a change in the icon. Now, drag the edge to the front or back to remove the unwanted section.
Alternatively, you can trim by right-clicking on the video clip and selecting "Trim start to the Playhead" or "Trim end to the Playhead" option.
If you want to trim an unwanted portion or segment from anywhere, move the mouse to the required position and click the "Scissors" symbol. It will split the video. Once again, repeat the process at the end of the unwanted section. Finally, select the trimmed portion and click the delete icon to remove it.
Step 3 Save the Video
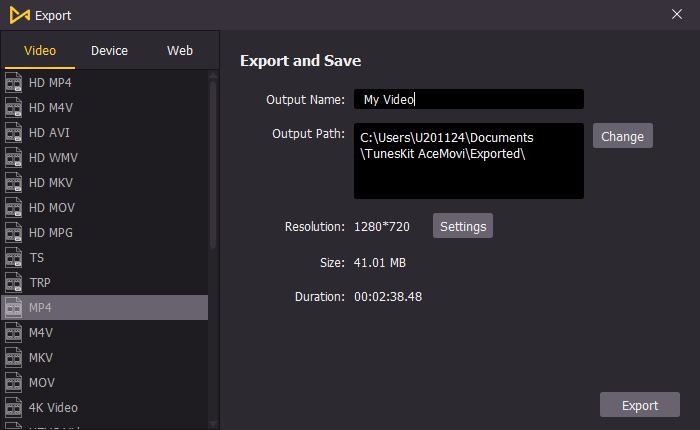
AceMovi allows you to save the altered video in any format. You can save it to your computer, export the file based on a device, or save it per the social media website requirements. Clicking the "Export" button will open up all these options.
Part 3: How to Cut a Part of Video on iMovie on MacBook
Learning how to cut a video on iMovie on MacBook is beneficial for anyone who likes to make minor edits or use the built-in trim feature. The steps to cut a segment of the video on MacBook using iMovie are as follows:
How to Cut a Video on iMovie on MacBook
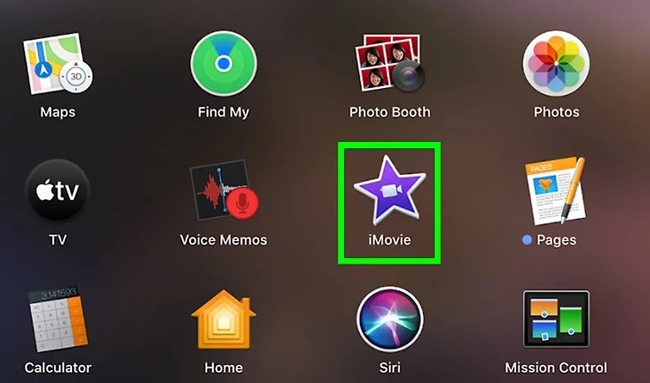
Step 1: First, launch iMovie and load the video file you want to edit.
Step 2: Then, scroll through the video's timeline to identify the exact moment for trim.
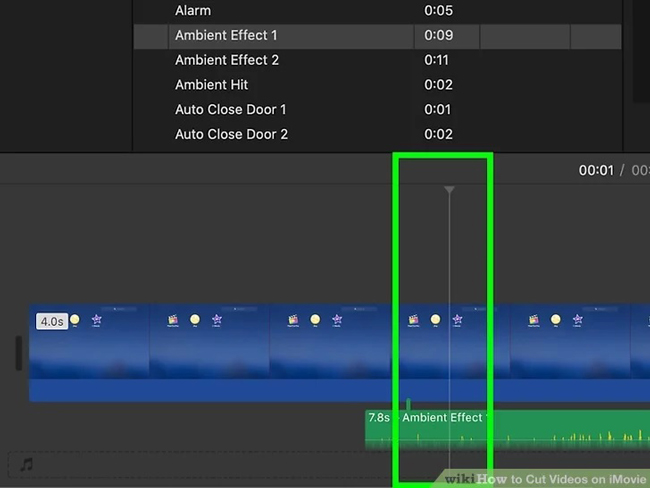
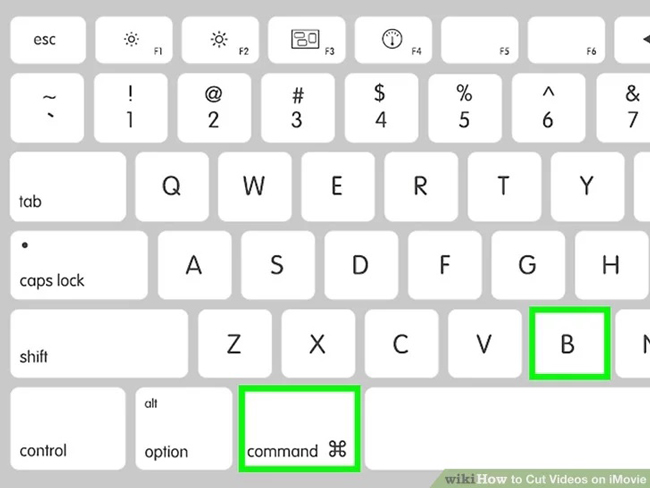
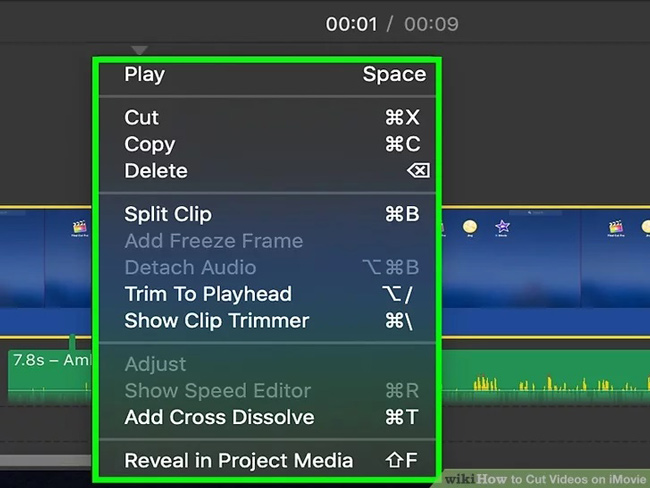
Step 3: Use "Command + B" to split the clip. Alternatively, you can right-click on the exact moment and choose the "Split Clip" option.
Step 4: You can repeat the process to cut the video into multiple segments and remove these portions by deleting them.
Part 4: Conclusion
Learning how to cut a video on MacBook is suitable for everyone who owns a Mac. However, because of the limitations, it becomes difficult to proceed further. If you need more advanced solutions, consider using any of the solutions discussed here like TunesKit Video Cutter, AceMovi, or iMovie to cut a video and edit it as per your requirement. It will result in a high-quality video in the format you want the file to be!
Download TunesKit Video Cutter:
Download TunesKit AceMovi:
