Easy Guide to Cut Parts of a Video in iMovie
Suppose you have watched a wonderful film and want to share it with friends. When you start to transfer it online, you find it's so slow to do that since the film is super large. What will you do? Well, you can use a video cutting tool to cut the most impressive parts of the film and send it to your friends.
For Mac users, iMovie is an accessible and pre-installed video editing software. Do you know how to cut a video in iMovie? In this guide, I will present you with step-by-step instruction to do it, along with an extra tip to cut videos on Mac.
Part 1. How to Cut Video in iMovie
As the official video editing suite from Apple, iMovie is a free tool for Mac users to split video clips. It's available for Mac, iOS and padOS, and the following is the quick steps on how to split a video clip in iMovie.
Step 1 Open iMovie on Mac
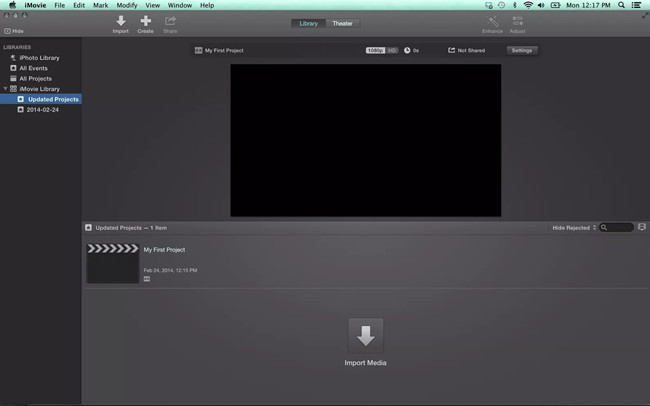
Go to the Dock or your Application folder to find the iMovie application and open it on your Mac.
Step 2 Import the video clips you want to cut

Click the "Project" tab at the top of the interface and then select the "Create New" > "Movie" from the pop-up window. You can also rename the project. Choose the "File" > "Import Media" to add a video file you want to cut. Click on the video clip and drag it to the timeline.
Step 3 Start to cut video in iMovie

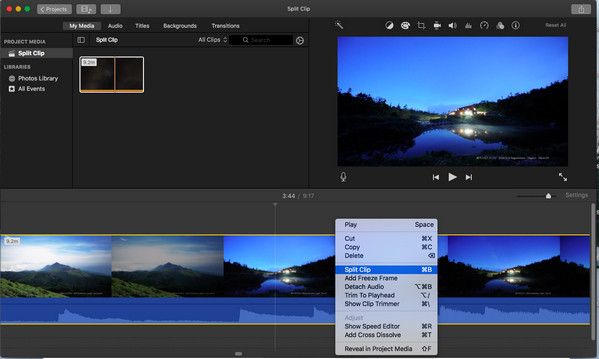
Move the playhead of your mouse to the position you want to split and then click on it Right click the clip and chose the "Split Clip" option to cut the video clip into two parts. You can also use the shortcut key – Command + B to split the clip quickly. Next, click on one segment you don't want, right click and select the "Delete" option to remove the unwanted parts.
Part 2. Alternative Way to Cut a Video on Mac
To cut videos on Mac with lossless quality, you can try iMovie alternative - TunesKit Video Cutter for Mac. This is an easy-to-use video cutting tool specially designed to cut any video/audio files into small pieces, remove the unnecessary segments, extract audio from MP4 files, join video clips together, etc. The most outstanding features of this software is that you can use it to cut videos without re-encoding, which means that there is quality loss at all in your splitted video file.
In addition, TunesKit Video Cutter supports numerous media file formats such as MP4, MOV, VOB, WMV, MKV, AVI, FLV, 3GP, MPEG; MP3, AAC, WAV, FLAC, MKA, APE, AC3, M4A, OGG, AIFF, AU, WMA, M4R, etc. Besides, you can also customize the preset for various portable devices like Apple iPhones, iPad, Samsung Galaxy series, smart TVs, PS4, Xbox, etc. The cutting process is clear and easy to operate. You can download the trial version and start cutting videos for free now.
Key Features of TunesKit Video Cutter:
- Cut videos on Mac or PC easily
- Trim videos and audios without quality loss
- Cut and convert videos in any formats and devices
- Friendly interface and simple to use
Step 1 Launch TunesKit and Add Video

Once you've downloaded and installed the TunesKit Mac Video Cutter, simply open it on your Mac. Click the 'Open' button to import the video file that you want split. Or you can put your target file to TunesKit by dragging and dropping.
Note: TunesKit Video Cutter can only cut one video or audio file at a time.
Step 2 Set the cutting segment

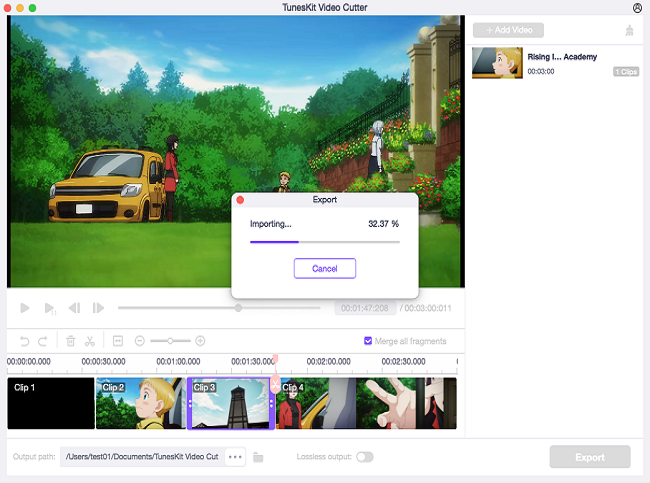
Once the video is added into the program, it will play automatically. You can drag the yellow slider to determine the start time and end time. Alternatively, you can manually set the temporal interval.
Step 3Select an output format

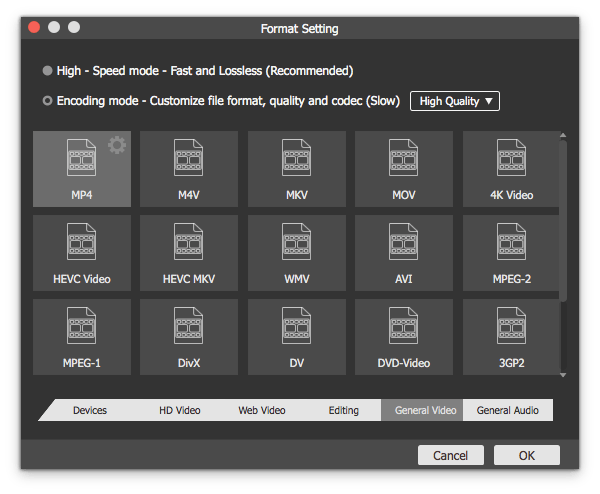
Now press the 'Format' panel, and choose an output mode from the two options: High-speed Mode and Encoding Mode. If you don't want any quality loss, we recommend you choosing the first mode. If you want to change the output format or parameters like codecs, bit rate, sample rate, etc., you can choose the second mode and customize it according to your needs.
Step 4Start the cutting

After all settings are done, you can click the 'Start' button and TunesKit will start cutting the video clips as you want. Wait for a few seconds, and you will get the new video on the destination folder of your computer.
