Best Ways to Cut and Trim Audio Online and Offline

The most frequently asked question on the internet by media professionals is how to capture and cut audio as quickly as possible. Whether journalists or interns who record meeting minutes, many people record audio regularly.
To make the process smoother, no one sends the whole records. Mostly, we only need a small part of the audio for editing or transcription. Then, is there a way to record and trim audio files simultaneously? Two birds with one stone? Yes, that is correct.
Many unique applications have appeared on the market to assist you with this. This guide shows you how to record and cut an audio file on Windows, Mac, and online.
Part 1. How to Cut Audio File via TunesKit Video Cutter
The number of audio editing software has grown considerably in response to the rise of media sharing sites. However, many of these programs can be highly complicated and difficult to cut audio. While TunesKit Video Cutter, a friendly audio cutter, has various features that make it an excellent choice for audio cutting.
Key Features of TunesKit Video Cutter:
- Cut an audio file with ease.
- Support cutting audio from YouTube videos.
- Variety of output media formats
- Save audio cuttings to MP3, AAC, WAV, etc
Even though it is called a video cutter, its powerful features allow it to cut an audio file with ease. Using this program is entirely intuitive due to its basic design. A simple design with a few icons promotes efficiency and removes potential ambiguity. Furthermore, it is not web-based and you need to download the application to your Windows or macOS computer. Learn how to use TunesKit Video Cutter to trim audio files by following these simple steps.
How to Cut an Audio File
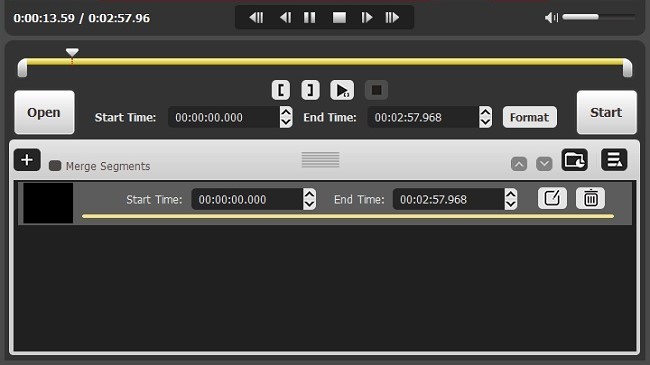
Step 1Import audio files in the TunesKit Audio Cutter
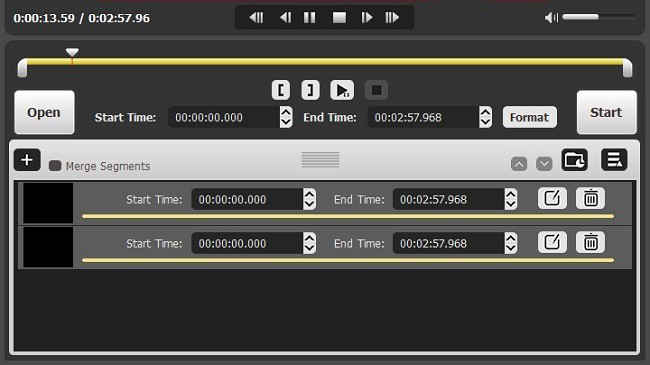
When the TunesKit Audio Cutter is launched, click "Open" or drag the media file into the cutter. It can only upload one audio file at a time.
Step 2 Choose the segment to be trimmed
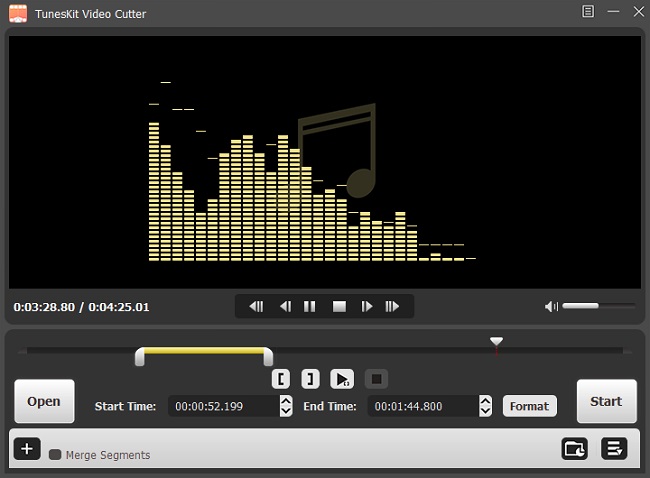
As soon as the audio file is imported, it begins to play in the preview. Then you have two options for determining the length of the segment you want to separate. The simplest method is to choose the part using the slider bar. The other, more exact option is to manually set the start and end times.
Step 3 Enhance the audio
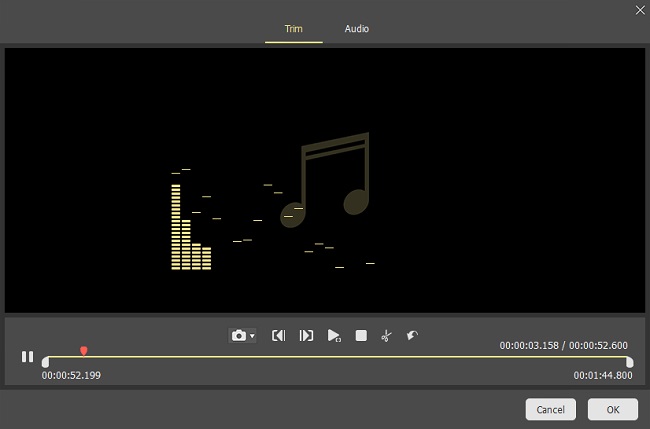
TunesKit Video Cutter includes an audio editor that allows you to edit HD audio clips before saving them. Click the "Edit" symbol and turn to the Audio option. Such as changing volume, adding sound effects and more. Then click OK.
Step 4 Select an Output Format
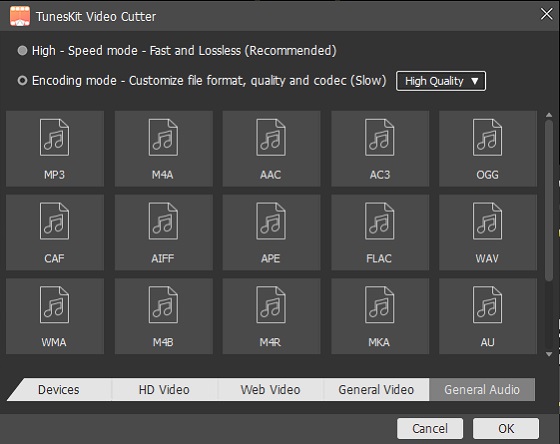
By selecting "Format", you can choose the output format and device. It currently supports hundreds of output types and mobile devices. You can also change the media parameters like codec, size, and bit rate.
Step 5 Begin to trim audio file
Finally, press the "Start" button, and the TunesKit Video Cutter will begin cutting and editing your audio into short segments 60 times faster. Wait till the dividing is complete. Then, to access the final cut audio, click the history folder icon.
Part 2: How to Cut Audio Files with Audacity
Audacity is one of the top applications for trimming audio file, splitting them into tracks, merging them, and many other tasks. You can locate the exact area where you wish to make a change and begin editing using the timeline quick-play or scrub and seeking tool.
And you can modify as much audio as you want as many times as you wish, with limitless consecutive undo and redos. It also allows you to keep tracks and labels in sync by selected sync-lock tracks features and its trim audio file feature.
Follow the steps below to cut audio file with Audacity:
How to Cut Audio files with Audacity
Step 1 Using Audacity to import audio
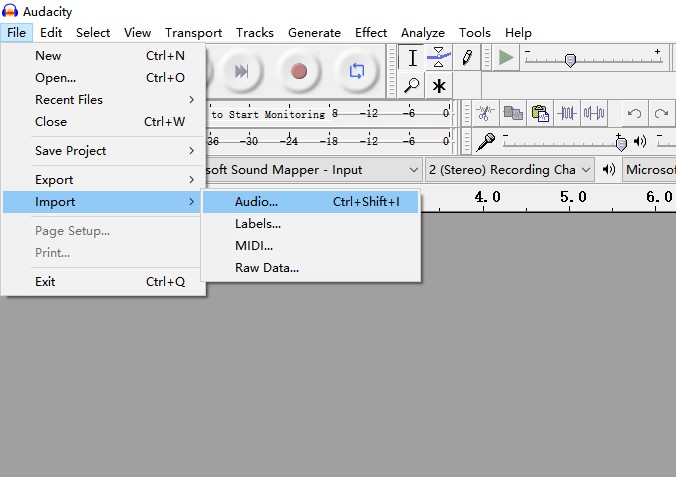
To import audio into Audacity, you can follow: Select File> Import> Audio. Audacity will automatically import a single or many audio files into the existing project according to what you choose.
Step 2 Using Audacity to cut audio
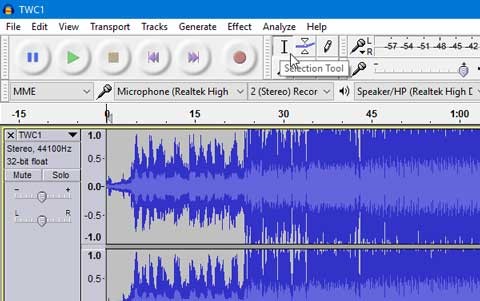
First, use the Selection tool to choose the audio section you wish to cut in Audacity. This section of the audio will now darken. Use the included finger tool, which allows you to drag in or drag out for greater precision. Once you've determined which piece is correct, play it back to double-check. Then, press Delete on your keyboard or select Edit > Delete from the top menu.
Step 3 Audio exporting
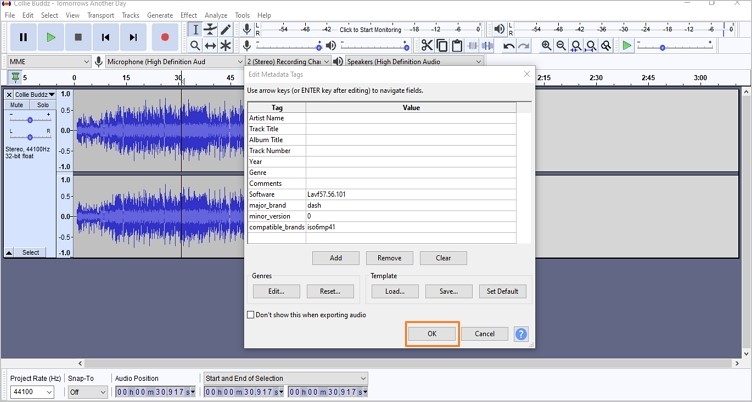
Begin by clicking on File> Export> Export as MP3 to update and save your audio track. After that, enter the name of your file and click Save.Then you can edit the ID3 tags. Then click OK.
Part 3. How to Cut Audio Online
Audio Trimmer can trim and cut audio files online without downloading and installing complicated software on your device, which is entirely free and straightforward to use! It is effortless to edit audio with the primary interface and is designed to work on most current devices, including computers, tablets, and smartphones so that you can edit and trim audio files.
You can also cut songs, music, and audio recordings right from the browser on your mobile device. There is no need to install any third-party apps or programs. Just follow these 4 simple steps to get started.
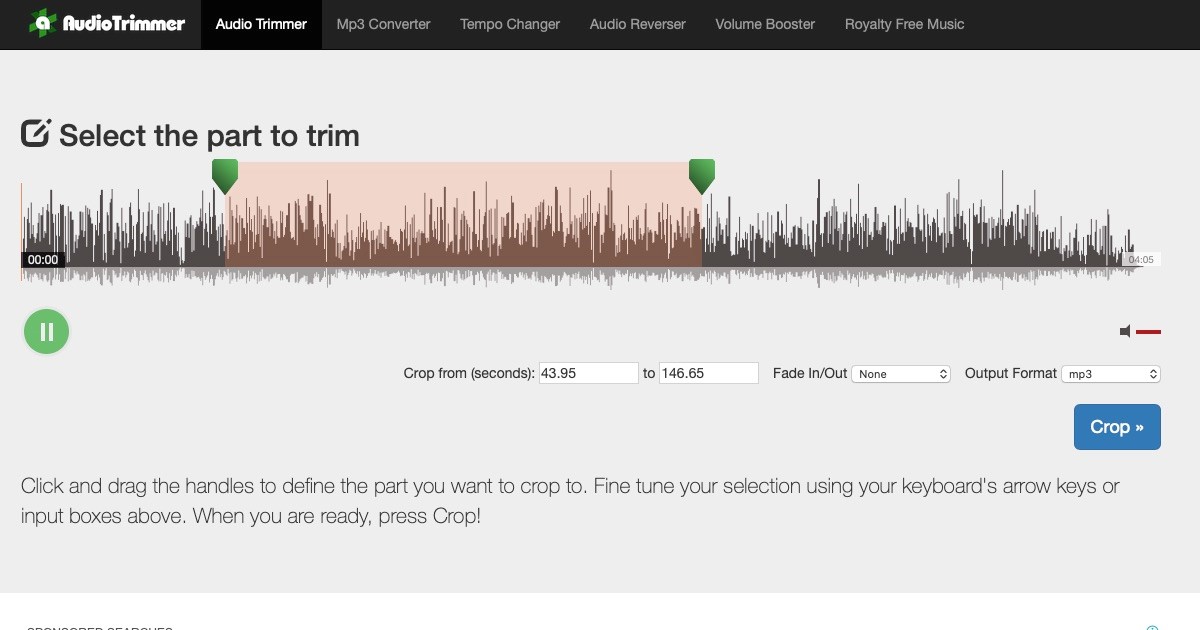
How to Cut Audio Online
● Step 1: Select an mp3 or other audio file from your hard drive.
● Step 2: If your browser supports audio, it will begin playing instantly. Otherwise, press the Upload button.
● Step 3: Drag the handles to pick the part you want to trim, then click Crop.
● Step 4: That's it! You can now download your edited audio file.
Final Words
Whew! With these online audio trimmers, you should now be able to trim an audio file. Trimming audio makes creating engaging content more accessible than ever. These three methods are very easy and convenient for you to cut audio. What's more, TunesKit Video Cutter can also cut the video easily. So when you want to cut audio or video, we hope it can be your first choice.
