How to Cut Videos on Windows 10: 2 Best Ways
For basic video editing, a comprehensive video editor such as Adobe Premiere Pro, or Final Cut Pro would not always be the best choice. Most of the time, what we actually need is simply a dedicated video cutter that can help us trimming off unnecessary footage from the video clips. Luckily, there are many tools could do the job fast and efficiently.
Take Windows 10 for example, it's perfectly set up with free video cutting feature so that we can trim the videos directly with the Microsoft built-in program called Photos. Or you can use third-party video cutters to cut video on Windows 10 if you like. Here we'll show you how to cut videos on Win 10 either with Windows 10 Photos or 3rd-party Win 10 video trimmer.
Part 1. Trim Videos with Windows 10 Photos
This could be the perfect solution for you who don't want to install any extra software on your PC while cutting the video files. But if you are in search of a more professional and stable video cutting tool with additional editing, you are suggested to try the other way instead.
Step 1 Open video file with Photos
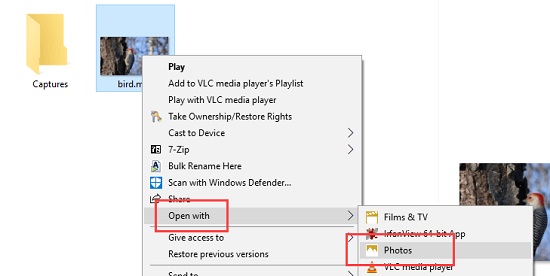
First of all, find the video file you wish to trim. Then right-click on the specific file and select Open With > Photos option. You can also open the Photos app firstly and then load the video within the program.
Step 2 Set cutting section
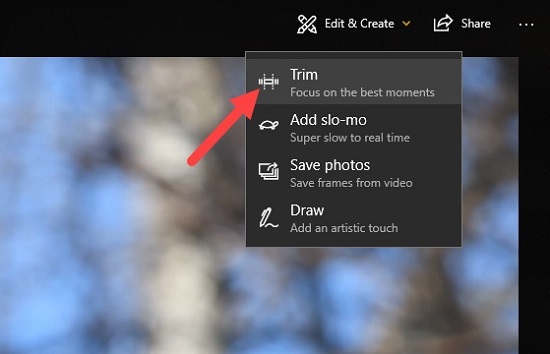
Once the video is open in Photos, click on the video and you should be able to see a menu bar. Then click Edit & Create > Trim. Now you should see three circles on a slider. Simply move the smaller two (starting and ending sliders) to select the video segment you want to trim. At the same time, move the larger circle around to confirm that you have correctly trimmed where you want without missing out anything. By clicking on the Play icon, you can preview how the video looks after trimming.
Step 3Cut the video

After that, click on the Save a Copy button at the top menu bar and it will take some time to create a copy of the trimmed video for you automatically.
Step 4Define the name of the trimmed clip
Once trimmed, go back to the same folder where you've stored the original video, and you will find the new video cuts with "Trim" at the end of the file name. You can then rename the file if you like.
Part 2. Cut Videos on Windows 10 with 3rd-party Video Cutter
As mentioned above, the Photos app of Windows 10 is a single purpose video cutting solution only. If you need a fully functioning video cutter and editor, you are suggested to try TunesKit Video Cutter for Windows, an alternative to Photos to cut all your videos (and audios) on Win 10 with no quality loss.
Being the most complete media splitter for PC, this software is able to trim any video file into small segments losslessly while allowing you to edit the video clip with customized effects, such as trimming, cropping, rotating, and more. Besides, it can cut and merge multiple parts from a video/audio and save the video cuts to popular formats, including HD MP4, WMV, FLV, MOV, AVI, etc. as well as portable devices like Apple iPhone, Android, Windows Phone, game consoles, smart TVs, etc.
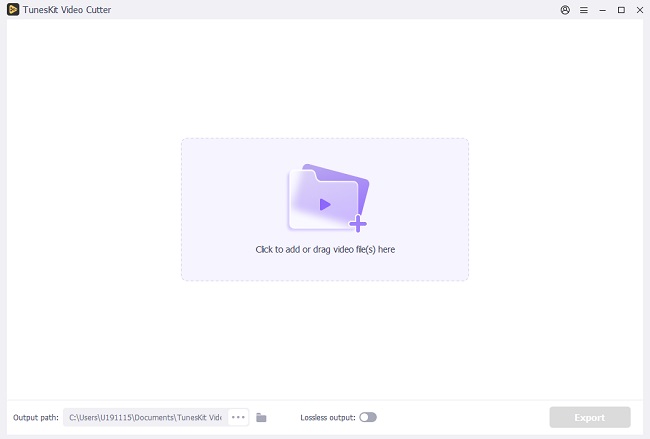
Now simply follow the guide here to learn how to use TunesKit Video Cutter to trim the videos on Windows 10 easily and quickly.
Step 1 Add video to TunesKit
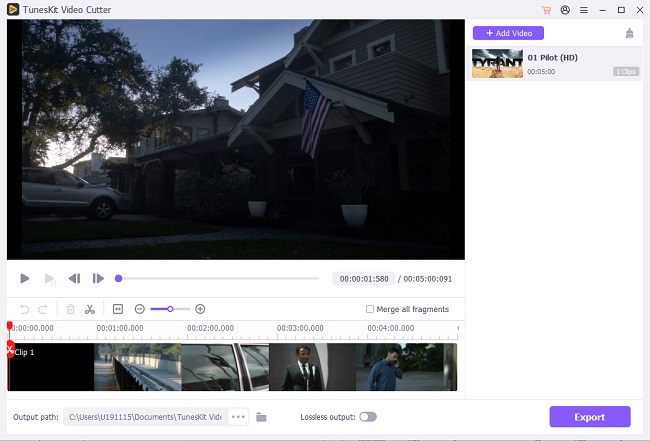
Firstly, open TunesKit Video Cutter on Windows 10. Then add the video file either via "Open" button or drag-and-drop.
Step 2Set trimming duration
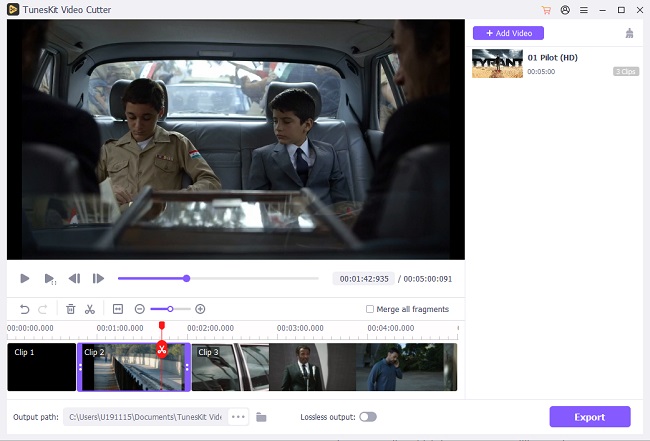
After loading the video into the cutter, you can set the duration of the segment you want to cut from the video by either moving the slider bar or setting the start and end times manually. If you want to cut multiple sections from a single video, simply click the "+" icon and it will create a new segment for you.
Step 3Edit the video as you want
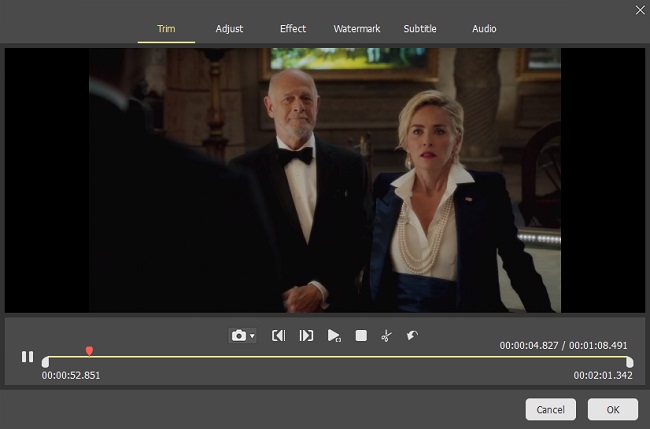
If you want to edit the video clip before cutting, simply click the "edit" icon of each segment and you'll be directed to the video editor interface where you can trim, adjust, add watermark, subtitles, etc. to the clips according to your own needs.
Step 4Choose output format
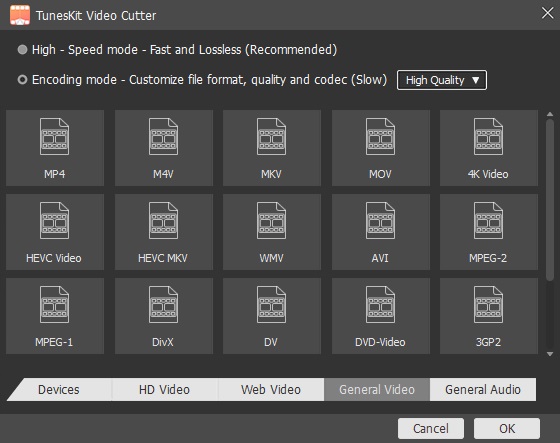
Now click the "Format" button to set the output format or device for the video cuts. You can also customize the parameters like codec, size, bit rate, etc. if you want.
Step 5Start to cut the video losslessly on Win 10

It's time to cut the video. Just click the "Start" button and it will begin cutting the video file at up to 60X faster speed. If you've cut out multiple segments from the source videos, you can choose to merge all the parts into a new file by checking the option of "Merge Segments" before starting the cutting process.
