- Utility
- Multimedia
- Freeware
- Support
- Download Center
- Shop
Before getting started to cut, merge, and edit videos or music with TunesKit Video Cutter, you should first download and install the free version of this smart toolkit on your computer.
TunesKit Video Cutter is one of the most brilliant and up to date products released by Tuneskit. No need to worry about the format or size of the video footage or audio file that is going to be uploaded, even on the demo version.
Step 1: Import Video/Audio File into TunesKit Video Cutter
After launching TunesKit Video Cutter, you should click the "Open" button or add the MP4 or MP3 files into the UI by drag-n-drop. It supports adding one video or audio file each time.
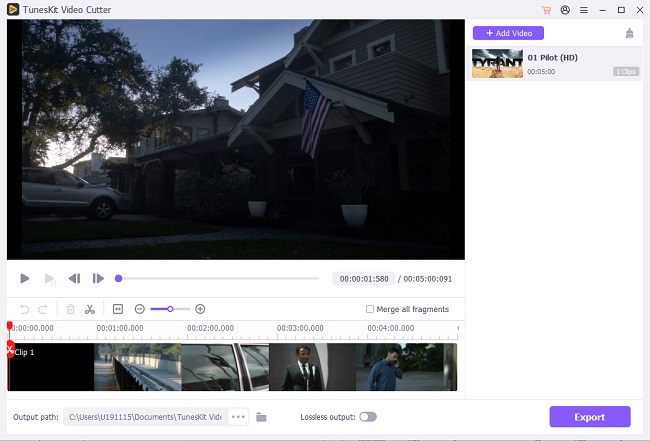
Step 2: Select Segment to Be Trimmed
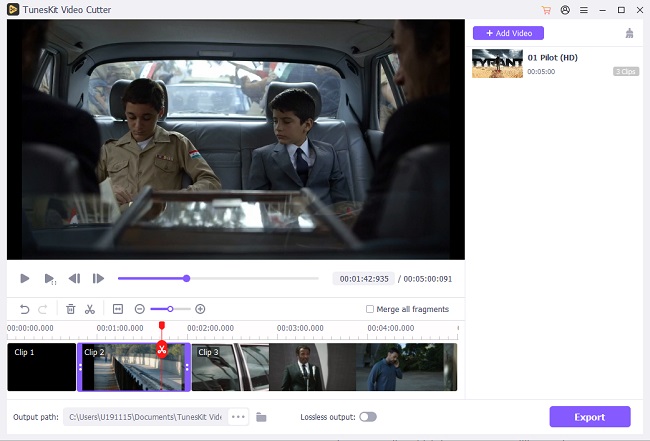
Once you have your files imported, the video/audio would begin to play automatically in the pre-view performance monitor. There are two options to set the duration of the segment that you want to split from the raw clip.
The easier one is to select the segment by sliding the slider bar. The other yet more precise one is to set the start and end time manually, which is accurate to millisecond.
Step 3: Edit & Enhance the Media before Cutting
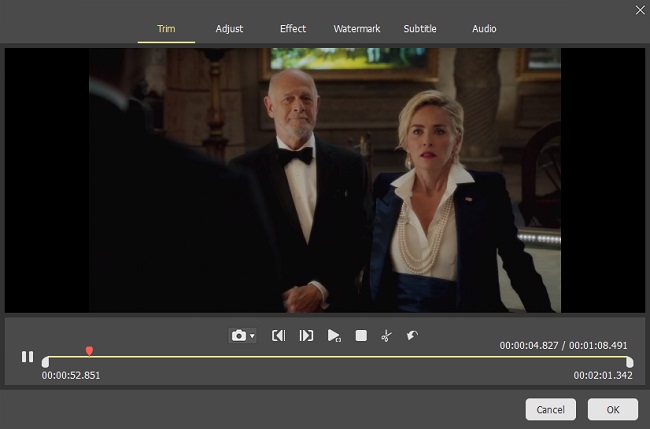
Thanks to the built-in video editing functions of TunesKit Video Cutter for Mac and Windows, you can customize the video or audio clips with multiple effects before starting to cut the media.
To edit the videos, simply click the "edit" icon displayed in each segment such as "Trim", "Adjust", "Effect", or "Watermark". There you can personalize your video by trimming, changing the aspect ratio, adjusting brightness, adding watermarks, subtitles, and other effects according to your own needs.
Step 4: Merge Video/Audio Segments (Optional)
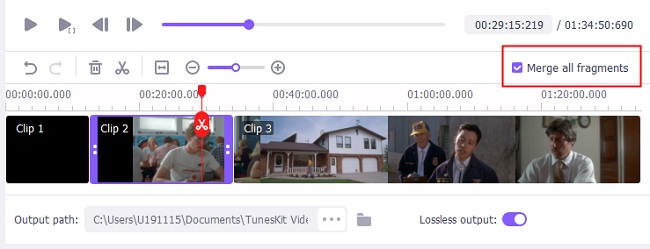
Surprising that TunesKit Video Cutter provides the option for you to combine or join multiple segments from the same original file.
Simply click "+" button and it will create a new footage for you. If you want to merge those different media segments being cut from the same source file into one, you can simply check the option of "Merge Segments".
Step 5: Set Output Format and Related Parameter Variables
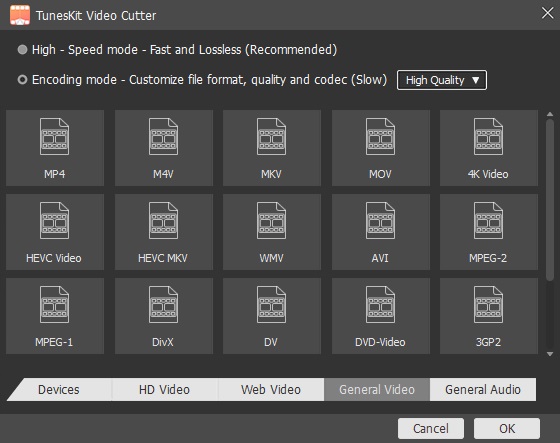
Clicking the "Format" button, you'll be directed to the window where you can select the output format and device. Currently, TunesKit Video Cutter offers hundreds of output formats and mobile devices for you. You can also customize the media parameter like codec, size, bit rate, etc. if you like.
Note: To keep the lossless quality of the original video while cutting, you are suggested to select the High-Speed Mode.
Step 6: Cut Your Video/Audio File when You're Ready
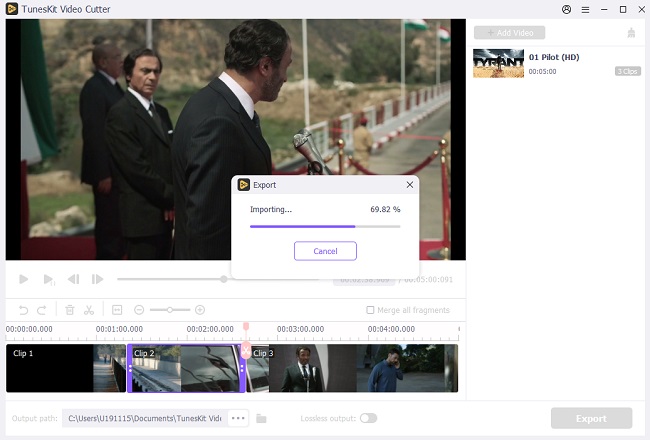
In the end, click the "Start" button and TunesKit Video Cutter will begin trimming the videos/audios to small clips at up to 60X faster speed. Wait until the splitting process completes. Then you'll get the desired segments by clicking the history folder icon.