How to Rip a DVD and Upload it to YouTube Site?

As we all know, YouTube is one of the most well-known video-sharing platforms. If you are a YouTuber, you may need to upload and share sections of your favorite videos on DVDs to your audiences. Or you may need to make some clips on a DVD film, edit, and then upload it to YouTube. Now you may have the question, how do I rip a DVD and upload it to my YouTube channel?
Part 1. What's the restriction on YouTube when uploading a DVD file?
Before introducing how to rip DVDs to YouTube, there are some restrictions on YouTube you should know.
(1) Intellectual property: Not matter what kind of forms of commercial videos, they can't be your commercial use. So you can't upload a commercial DVD completely without permission to YouTube for it's illegal to do.
(2) YouTube supported formats: MPEG4, MPEG-PS, MP4, AVI, MOV, WMV, FLV, DNxHR, WebM, 3GPP, CineForm, ProRes, HEVC (h265). As a result, you can convert your DVD file into these 13 types of video formats and then upload it to your channels.
Part 2. How to rip and upload a DVD to YouTube channel?
What you need most is a professional DVD Ripper that can rip your DVDs into the formats that can be supported by YouTube.
If you are not familiar with the various video formats and don't know which one to choose, TunesKit Video Converter can solve your problem. It provides you the option that can automatically convert your video to the YouTube format, thus you don't need to set all the parameters like size and length suitable for YouTube by yourself, which is very convenient and easy to operate.
Regarded as one of the best video converter in 2020, TunesKit supports more than 250 output formats like MP4, MKV, MOV, AVI, and 68+ output devices like iPhone, iPad , Apple TV. Meanwhile, it is more than a DVD to YouTube converter. TunesKit also lets you edit your video files like trimming, cutting, add special effect and watermark to make your videos more wonderful.
Key Features of TunesKit DVD Ripper:
- Rip a DVD to in any format supported by YouTube
- Convert DVD or videos without quality loss
- Edit DVDs with built-in video editor
- Convert over 250+ videos and audios
- Support more than 68 output devices
- Easy of use with clear navigations
The following section is the step-by-step guide for converting and uploading DVD to YouTube.
Step 1 Open TunesKit and Add Your Target DVD files
You should connect your DVD with a computer via a DVD driver. Then after your DVD files have been detected, add your target files by clicking the first button in the red frame or dragging the files into the interface.

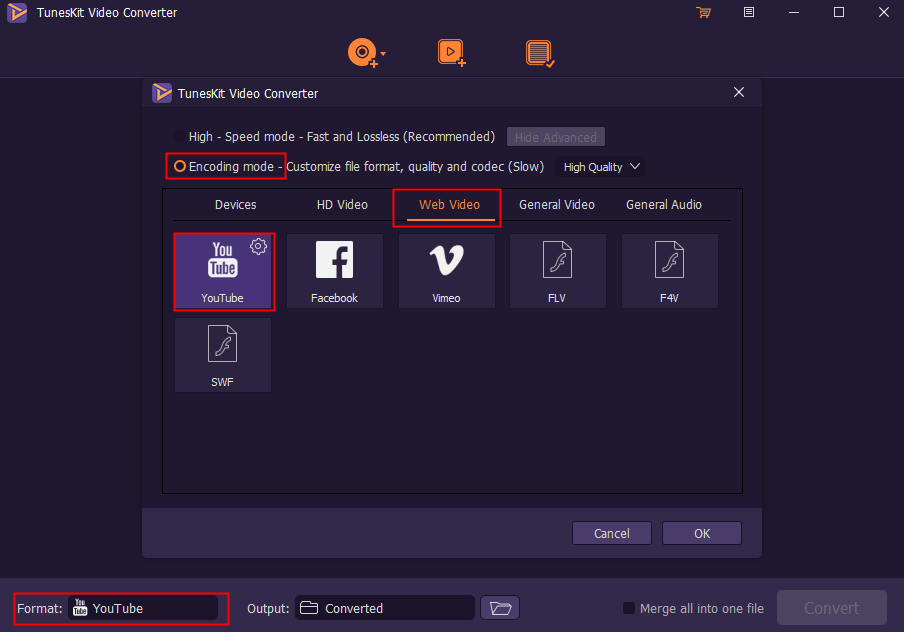
Step 2 Customize Output Settings and Choose the format
Click 'Format'> 'Encoding mode'> 'Web video'> 'YouTube'

Note: High-Speed mode can convert videos to any format fast and lossless. Encoding mode gives you a chance to select any format you want like YouTube, Facebook, Vimeo, etc.
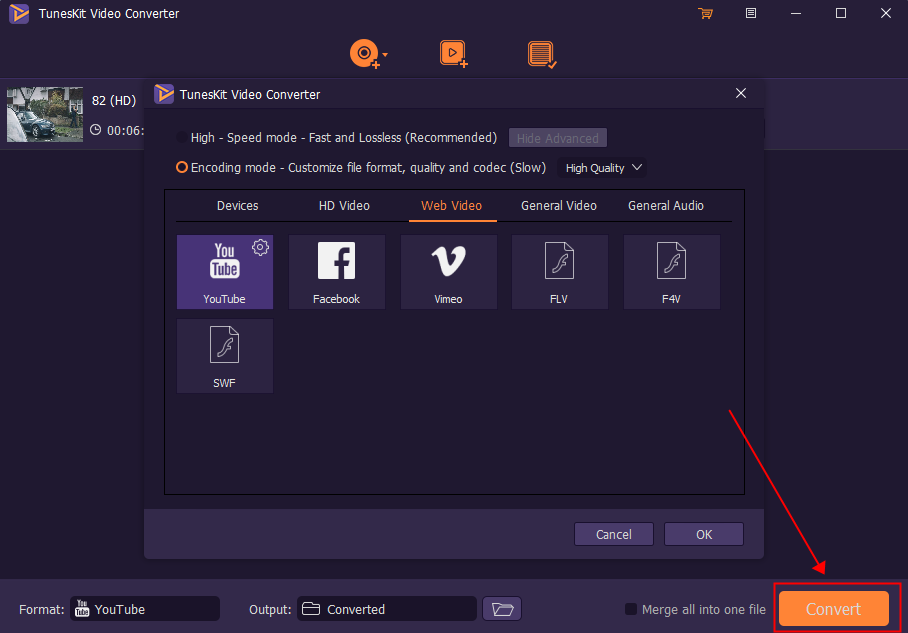
Step 3 Start to Convert or Rip DVDs
Press the 'Convert' button to rip your DVDs files to the format you set.

And you can find all your converted video by clicking the third button on the top of the interface. So you can have a check after finishing converting.

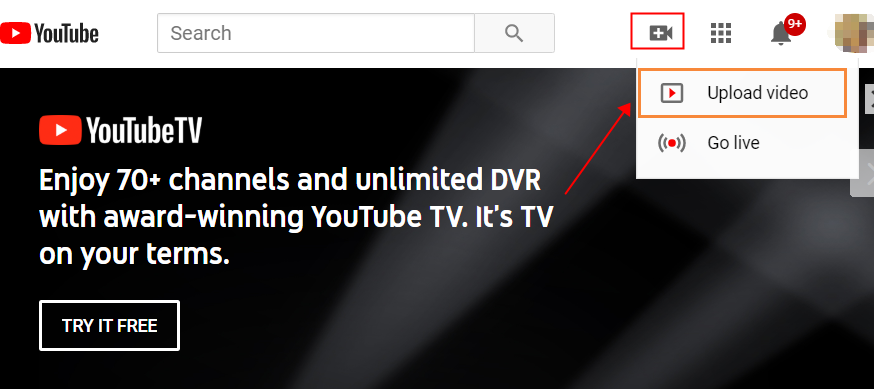
Step 4 Upload DVD Video to YouTube
Then your last job is to upload the converted videos into YouTube sites and let people enjoy them.
1. Upload your YouTube
2. Define your video is 'Public' or 'Private'
3. Click on the arrow to upload your DVD video and wait for it to finish

Video Demo: How to convert a DVD to YouTube format?
You can also watch the following short video to learn how to convert a DVD to YouTube with the assistance of TunesKit Video Converter.
Part 3. Conclusion
Have you made sense of how to upload a DVD to YouTube by using a DVD ripper? If you want to be an excellent YouTuber, it is wise to have a powerful video converter of you own. Why not download TunesKit Video Converter and have a try?
