How to Switch Apple ID on iPhone - 2023 Full Guide Here
"Hello, can anyone help me? I have an old iPhone but I can't remember the passcode of the Apple ID on it. Does anyone know how to switch Apple ID on iPhone without entering passcode or verifying the phone number? All the suggestions are greatly appreciated."
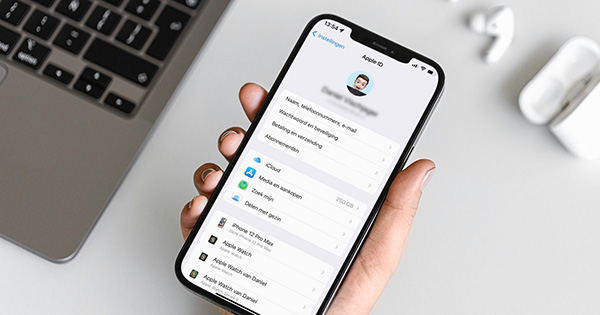
An expired Apple ID will cause trouble while using your iPhone or iPad. When you need to download apps, check iCloud files, or use Apple Music, you will be required to enter the correct passcode for further steps. Therefore, knowing how to switch Apple ID on iPhone or iPad is necessary for iOS users, especially for those who have multiple Apple IDs. In this post, you will learn how to switch to other Apple IDs on your iOS devices without or without the correct passcode. Read it on!
Part 1. What Happens When Switch Apple ID on iPhone
Before signing out of the current Apple ID, your device will ask you if you need to delete or keep data. You can keep what data you want to keep on your phone and delete unwanted files. Then, you will need to enter the Apple ID passcode while updating apps in Apple ID if you have changed the Apple ID. And you will need to log into Apple Music again. When you log into a new Apple ID and iCloud account, your iPhone will download iCloud files to your iPhone automatically and merge files.
Part 2. How to Switch Apple ID on iPhone
Sign Out of Apple ID
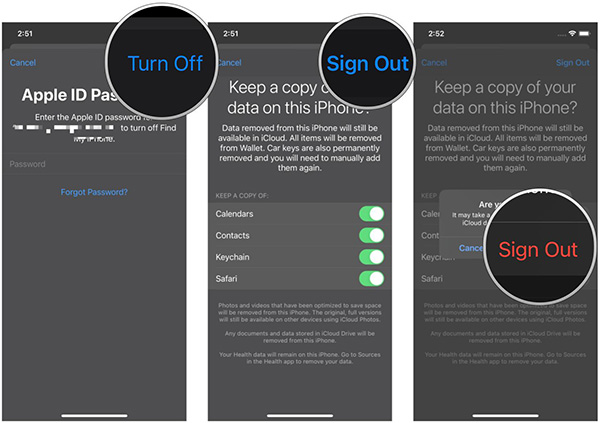
To switch Apple ID on iPhone, you will need to sign out of the Apple ID first. To sign out of Apple ID on your iPhone devices, you can follow the below steps.
Step 1. Open Settings on iPhone.
Step 2. Click on your Apple ID profile.
Step 3. Scroll down to the Sign Out button and click on it.
Step 4. Click on the Turn Off button to disable the Find My iPhone feature.
Step 5. Toggle on the switch if you want to keep the copy on your iPhone.
Step 6. Hit on the Sign Out button to sign out of the Apple ID on your iPhone.
Sign into a New Apple ID
After signing out of Apple ID on your iPhone, click on the Apple ID option and log into the other Apple ID. Follow the below steps to log into a different Apple ID.
Step 1. Open the Settings app on your iPhone.
Step 2. Hit on the Sign in to your iPhone option to log in to the Apple ID and iCloud account.
Step 3. Enter the Apple ID and the correct passcode.
Step 4. In this phase, you can choose to merge or don't merge files. If you select the Merge option, your iPhone will merge the data on your iPhone and iCloud, and the iPhone data will be uploaded to iCloud automatically. If you don't want to update your iPhone data to iCloud, please select the Don't Merge option.
Part 3. How to Switch Apple ID on iPhone Without Passcode
In case of forgetting Apple ID passcode, using a professional iOS unlocking like TunesKit iPhone Unlocker can be a feasible and easy solution on how to switch Apple ID on iPhone without passcode. TunesKit iPhone Unlocker is a powerful and dedicated iOS unlocking tool that can help users remove Apple ID, unlock iOS lock screen, remove MDM restrictions, and bypass Screen Time passcode with simple clicks. In different situations like forgot Apple ID passcode, Apple ID passcode not working, or can't verify Apple ID, TunesKit iPhone Unlocker can always help you remove Apple ID without entering any passcode.
Key Features of TunesKit iPhone Unlocker
- Available on the latest iOS version including iOS 16
- Switch Apple ID on iPhone without passcode
- Enable to factory reset iDevices without passwords
- Unlock iPhone/iPad/iPod Touch with ease
- Help to remove Face ID and fingerprint recognition at ease
Now, let's see how to use TunesKit iPhone Unlocker to switch Apple ID on iPhone.
Step 1Connect your iPhone to the PC
Download and install TunesKit iPhone Unlocker on your computer, and then connect your iPhone to the computer. Select the Unlock Apple ID option and click on the Start button.

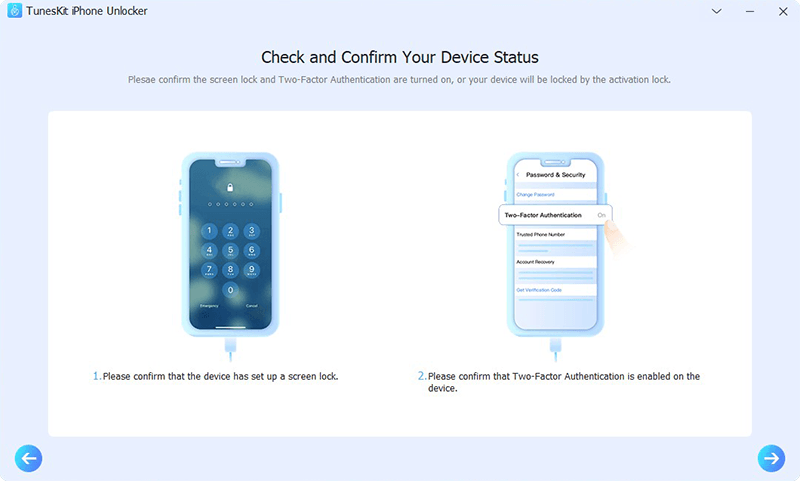
Step 2Check and Confirm Device Status
Before removing the Apple ID from your iPhone, please check whether the Find My iPhone feature is disabled on your iPhone. If Find My iPhone is disabled, TunesKit iPhone Unlocker will start to remove the Apple ID from your iPhone directly. Otherwise, please ensure that your iPhone has enabled the screen lock and two-factor authentication. Then, click on the Next button.
Step 3Download Firmware Package
In this phase, TunesKit iPhone Unlocker will start to download the firmware package to remove the Apple ID from your iPhone. Before downloading, check the onscreen information and correct the wrong information manually. Then, click on the Download button to download the firmware package.

Step 4Switch Apple ID on iPhone
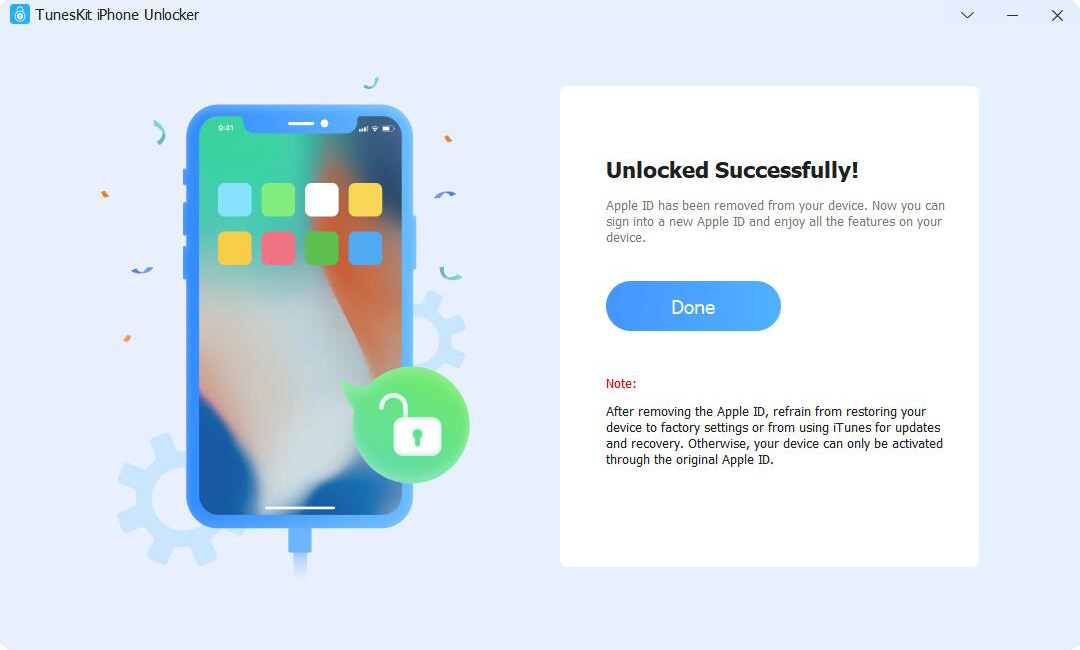
Then, TunesKit iPhone Unlocker will start to remove the Apple ID on your iPhone. After removing the old Apple ID on your iPhone, you can log into a different Apple ID on your iPhone.
Part 4. How to Add a Second Apple ID on iPhone
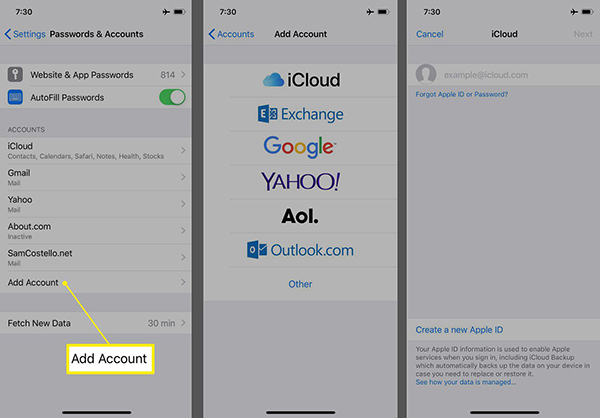
Apple supports users to use multiple Apple IDs on one iOS device. You can follow the below steps to add a second Apple ID on your iOS device.
Step 1. Open Settings on iPhone.
Step 2. Hit on the Mail, Contacts, Calendar, Notes, or Reminder option.
Step 3. Click on the Accounts option.
Step 4. Hit on Add Account and select iCloud.
Step 5. Enter the Apple ID account and passcode to add the second Apple ID on iPhone.
Conclusion
Hope that you can learn how to switch Apple ID on iPhone by using the above effective solutions. You can easily switch Apple IDs if you know the correct passcode. If you can't remember the passcode of your Apple ID, try using TunesKit iPhone Unlocker to remove the Apple ID on your iPhone without entering any passcode.
