How to Set Up Parental Controls on iPhone
In today's digital age, children are exposed to various online environments that may not always be safe or appropriate. Parental Controls is an essential tool that help parents manage and supervise their children's online activities on iOS device, ensuring a safer digital experience. By setting up Parental Controls on iPhone, parents can restrict access to explicit content, manage screen time, ensure privacy and security, monitor usage, and prevent unauthorized purchases. These controls empower parents to create a safer and more controlled digital environment, fostering positive and responsible technology use for their children. If you use iPhone for the first time, how to set up Parental Controls on iPhone will be a question. And today, we will go in-depth into the question how to set up Parental Controls on iPhone.
How to Set Up Parental Controls on iPhone
If you are going to set up the Parental Controls feature on your child's phone, you can follow the below instructions to make it.
1. Set Up Screen Time
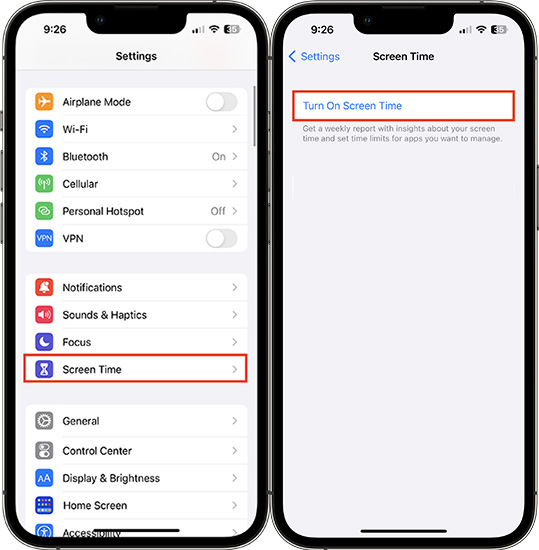
Step 1. Unlock your iPhone and go to the Home screen. Then, open the Settings app.
Step 2. Scroll down your screen and select the Screen Time feature.
Step 3. Tap Turn on Screen Time option to turn the feature on.
Step 4. Choose This is My Child's iPhone if you are going to turn on the Parental Control feature on your child's phone.
After setting up Screen Time feature on your child's phone as a parent, you will need to set up a passcode later. Just click on the Use Screen Time Passcode option to confirm a Screen Time passcode. This way, your child will not bypass the screen time limit via the Ignore Limit option.
2. Set Up Downtime
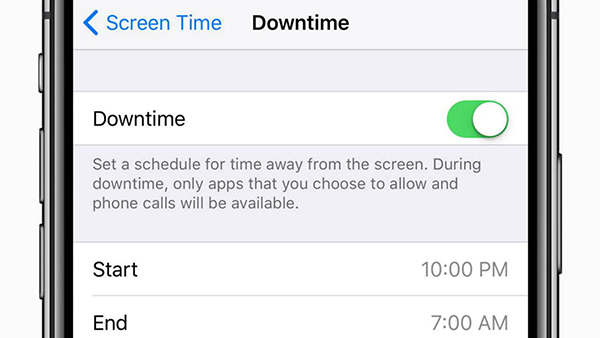
Later, you can set the Downtime feature to restrict the use and phone calls on iPhone. The Downtime feature on the iPhone is part of Apple's Screen Time settings, designed to help users manage their screen time and promote healthier digital habits. When the Downtime feature is enabled, only certain apps and phone calls that you allow will be accessible. You can set up the Downtime feature by clicking the Downtime option and toggle on the Downtime feature. Then, set a start and end time for Downtime, during which only allowed apps and phone calls will be available.
3. Set Content & Privacy Restrictions
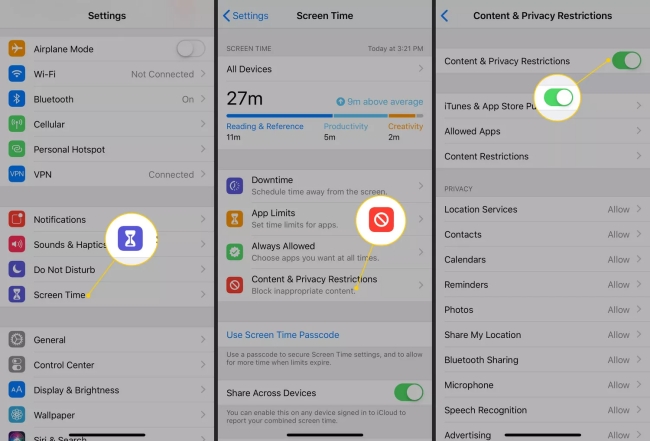
Content & Privacy Restrictions allow you to control access to apps, content, and privacy settings. You can block explicit content, set age ratings for media, limit adult websites, and restrict Siri searches. Additionally, you can manage app installation and deletion, prevent in-app purchases, and require a password for purchases. You can also control privacy settings like location services and access to contacts, photos, and the microphone. These features help ensure child safety, protect privacy, and prevent unauthorized purchases, creating a safer digital environment while using iOS device. You can set up Content & Privacy Restrictions by following below steps.
Step 1. Tap "Content & Privacy Restrictions" and toggle the switch to enable the feature.
Step 2. You can turn on features here including iTunes & App Store Purchases, Allowed Apps, Content Restrictions, and Privacy Settings.
4. Set Up Family Sharing
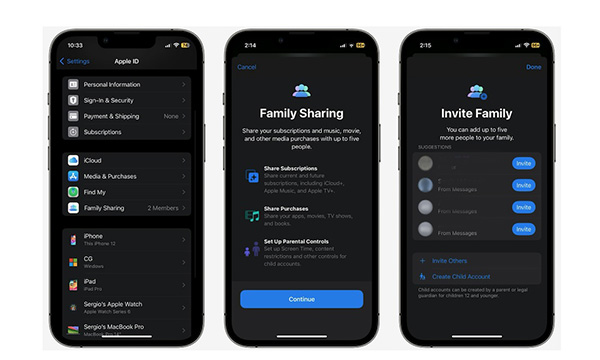
Family Sharing on iPhone allows up to six family members to share Apple services and purchases, including apps, music, TV shows, iCloud storage, and Apple subscriptions like Apple Music and Apple TV+. Parents can use the "Ask to Buy" feature to approve children's purchases and manage Screen Time settings. Family Sharing provides a convenient and cost-effective way to stay connected and organized, enhancing the overall family experience through Apple devices. Here is the how-to.
Step 1. Go to the Settings app on your phone, select your Apple ID profile and tap Family Sharing.
Step 2. Add family members and set up Ask to Buy for children's accounts.
How to Turn Off Parental Controls if Passcode Forgotten
If you forgot the parental controls on your iPhone that cannot turn off the feature on your iPhone, here I will recommend TunesKit iPhone Unlocker to you. TunesKit iPhone Unlocker is a multifunctional iOS unlocking with 4 useful features for iPhone, iPad, and iPod touch users to remove screen lock, remove Apple ID, unlock Screen Time, and bypass MDM restrictions. When you encounter problems like forgot Parental Controls passcode, forgot Screen Time passcode, etc., TunesKit iPhone Unlocker can help you solve your problems in several simple clicks. What's more, the user-friendly and intuitive interface allows users to unlock iOS devices without taking assistance from any others.
Key Features of TunesKit iPhone Unlocker
- Turn off Parental Controls when forgot passcode
- Help to remove Face ID and fingerprint recognition at ease
- Unlock Apple ID, Screen Time and MDM without passcode
- Available on the latest iOS version including 17
- Fully compatible with most iOS device models
Now, let's see how to turn off Parental Controls if you forgot the correct passcode on your iPhone by using TunesKit iPhone Unlocker.
Step 1Connect iPhone to Computer
Download and install TunesKit iPhone Unlocker on your computer first. Connect your iPhone to the computer and launch the program. When your iPhone is connected, select the Unlock Screen Time feature and tap Start.

Step 2Turn Off Parental Controls Without Passcode
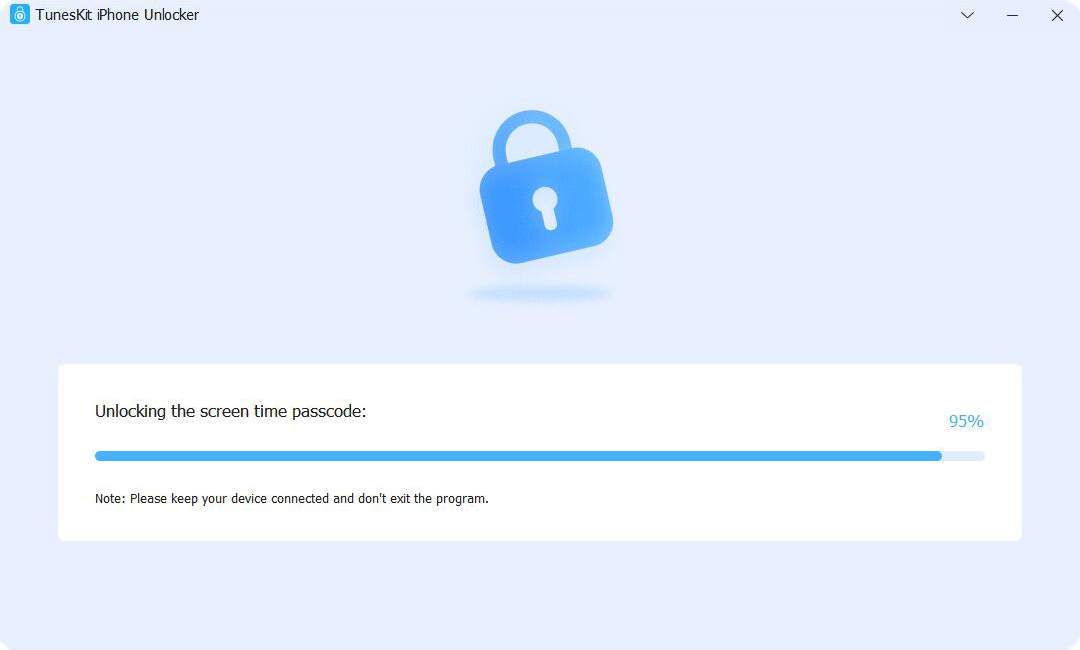
Then, TunesKit iPhone Unlocker will start to turn off the Parental Controls and Screen Time feature on your iPhone. Before unlocking, please ensure that the Find My feature is disabled. If not, you can turn it off from Settings.
Step 3Set Up iPhone Again
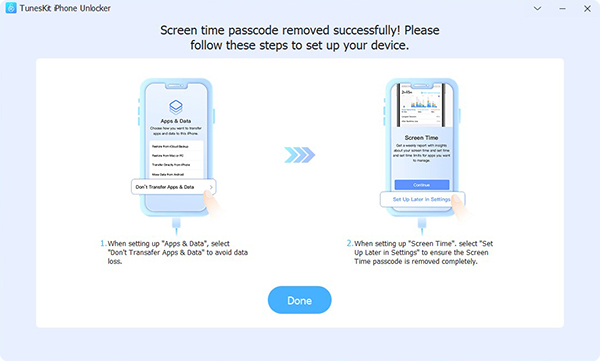
When the Parental Controls is turned off, you will need to set up your iPhone to finish the process. Please select Set Up Later and Don't Transfer Apps & Data while setting up your device. All your iPhone data will be safe.
Conclusion
That's it. You can learn how to set up Parental Controls on iPhone and how to turn off Parental Controls without knowing the passcode after reading this post. If you can't remember the correct Screen Time passcode on your iPhone, you can download and try using TunesKit iPhone Unlocker. This is a powerful iOS unlocking tool that can meet all your needs in unlocking iOS devices. If you have other questions, please feel free to leave us a comment below.
