iPhone Erase Data After 10 Attempts: Must Know Security Tips
It's no secret that Apple has always been good at security. It keeps optimization in various security mechanisms applied to iOS devices for data protection, such as biometric authentication (Face ID, Touch ID), Find My, two-factor authentication, Apple ID, iCloud keychain, etc.
Besides these, there is another option called "Erase Data", which automatically resets your iPhone if the wrong passcode is entered 10 times in a row. If you've never heard of this feature or aren't sure how it works, you're in the right place! This guide will walk you through everything about Erase Data after 10 failed passcode attempts. Let's dive in!
- Part 1. What Is Erase Data After 10 Failed Passcode Attempts?
- Part 2. How to Turn on iPhone Erase Data After 10 Failed Attempts?
- Part 3. What Happens to iPhone After 10 Failed Attempts?
- Part 4. What to Do If iPhone Erase All Data After Failed Passcode Attempts?
- Part 5. Solutions to Unlock iPhone After 10 Failed Passcode Attempts
- Part 6. Conclusion
Part 1. What Is Erase Data After 10 Failed Passcode Attempts?
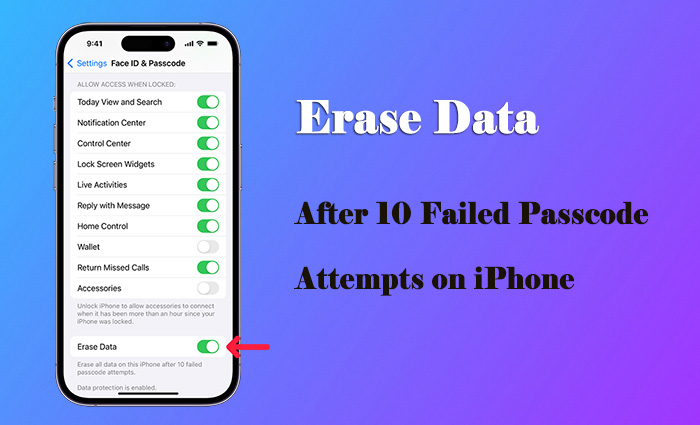
The "Erase Data" option on iPhones is designed to protect your personal information from unauthorized access. If someone repeatedly enters the wrong passcode in an attempt to break into your device and obtain sensitive information, this security feature will automatically erase all data from your iPhone.
That is to say, when the maximum number of passcode attempts allowed, which is 10, is reached, the iOS device will erase all information and resets to factory settings by removing the encryption key to the data. This operation can undoubtedly prevent others from breaking into your device and can be completely futureproof against data theft.
Part 2. How to Turn on Erase Data on iPhone After 10 Attempts
To automatically erase all data and avoid leakage on iPhone after 10 consecutive incorrect passcode attempts, you can easily enable this feature in your settings. However, before doing this, remember to back up your latest data from iPhone to iCloud or iTunes, preventing permanent data loss.
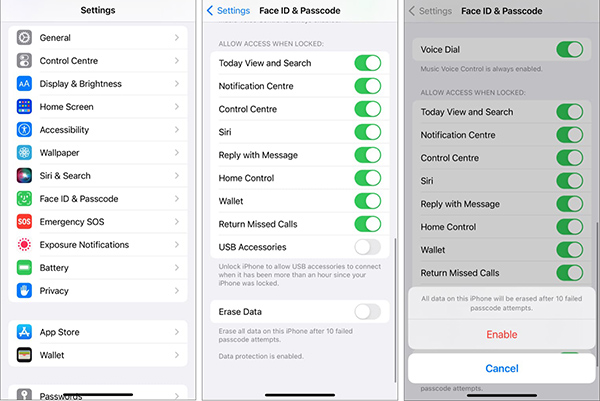
Step 1: Open Settings on iPhone and scroll down to tap Face ID & Passcode (on an iPhone with Face ID) or Touch ID & Passcode (on an iPhone with a Home button).
Step 2: As instructs, enter your screen passcode.
Step 3: Swipe to the bottom of the screen and switch on Erase Data.
Step 4: A message will pop up, showing "All data on this iPhone will be erased after 10 failed passcode attempts". Confirm this by clicking on the "Enable" button.
With "Erase Data" option enabled, your iPhone will be restored to factory settings immediately. However, it doesn't erase data in iCloud or in existing backups. Besides, "Find My iPhone" will remain active, meaning you will still need your Apple ID and password to set up your iPhone again after the reset.
Part 3. What Happens to iPhone After 10 Failed Attempts?
You might worry about that someone would intentionally enter consecutive wrong passcodes to erase all data on your iPhone and set it as a new device. Rest assured, Apple has built-in safeguards to prevent accidental data loss. This security mechanism will gradually increase the time you must wait between incorrect passcode attempts.
For example, after entering the wrong passcode 5 times, your iPhone will be disabled for 1 minute; after 6 failed passcode attempts, it will be disabled for 5 minutes. The more wrong attempts you make, the longer the device will be disabled.
When you have accumulated 10 failures, the activated "Erase Data" feature will put into effect and automatically reset iPhone to factory settings.
Part 4. What to Do If iPhone Erase All Data After Failed Passcode Attempts?
What can you do if your iPhone has cleared all data and settings after 10 passcode verification failures? If you have no idea about it, follow us here.
Step 1. Restore iPhone from a Backup
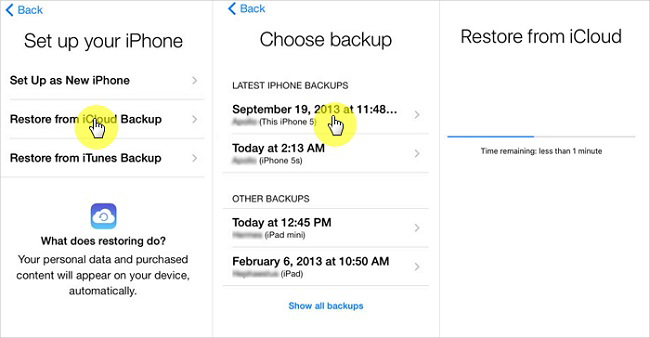
If you had backed up your iPhone before the reset, you can restore your data using iCloud or iTunes/Finder. However, if you don't have any backup, you can only set up iPhone as a new device without any previous data.
- For iCloud backup: on iPhone setup screen, click on "Restore from iCloud backup" and choose the latest backup to recover data from.
- For iTunes backup: connect erased iPhone to computer and open iTunes. Once the device is detected, click the device icon in iTunes. Under Summary, hit "Restore Backup" and select a recent backup to retrieve data from.
Step 2. Set a New Screen Passcode
If you failed to unlock iPhone screen many times becasue you forgot iPhone passcode, you should create a new easy-to-remember passcode to safeguard the device. Also, write it down on another place so that you can review it later.
Step 3. Disable "Erase Data" Option If Needed
Sometimes your naughty kids might mess up with your phone, causing 10 failed passcode entries and automatically leading to erase all data on iPhone. If you don't want this to happen, simply turn off "Erase Data" option in Settings.Check Part 2 for detailed steps if needed.
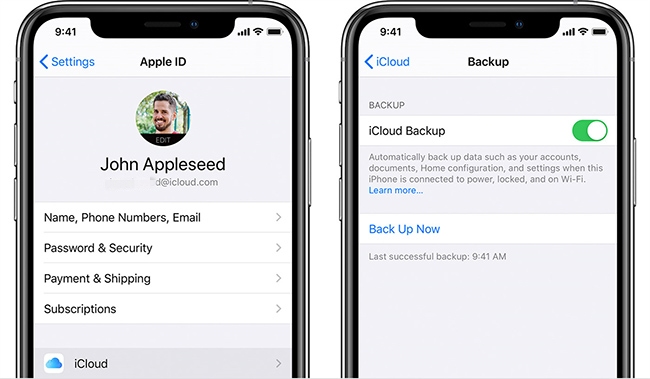
Step 4. Turn on "iCloud Backup"
To avoid losing important data in the future, you'd better enable iCloud Backup: Go to Settings → [Your Name] → iCloud → iCloud Backup. By doing this, your apps and data will be automatically backed up to iCloud as long as your device is connected to power, locked and on WLAN. Certainly, this helps make a regular back to avoid sudden data loss.
Part 5. Top 4 Solutions to Unlock iPhone After 10 Failed Passcode Attempts
What if you don't enable "Erase Data" on iPhone? Then the device won't automatically restore itself to factory settings. However, once you type the wrong passcode 10 times in a row, your device will be disabled, unavailable or comes with security lockout forever. In this case, you can try the following solutions to remove screen lock and unlock iPhone.
Solution 1: Erase iPhone/iPhone Reset Directly on Locked Screen
Luckily, Apple officially provides a straightforward workaround to erase device on iPhone itself. But some conditions should be met: iPhone is running iOS 15.2 and later, iPhone is connected to Wi-Fi or cellular; you remember Apple ID and password. If it is the situation that you're in, check out steps below.
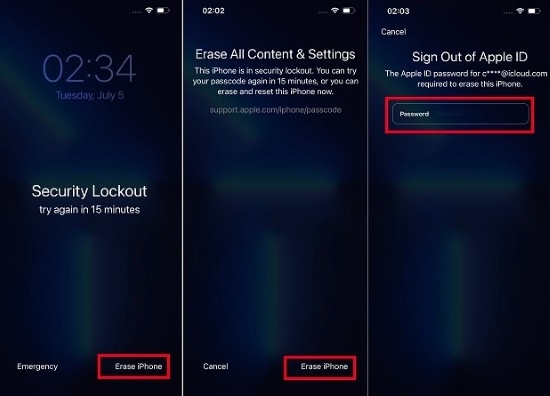
For iOS 15.2 ~ iOS 16: Use "Erase iPhone"
Step 1: Tap on "Erase iPhone" in the lower right corner of the lock screen.
Step 2: In the "Erase All Content & Settings" screen, confirm your operation by hitting "Erase iPhone" again.
Step 3: Now enter your Apple ID password to sign out of Apple ID.
Step 4: Tap on "Erase iPhone" to start clearing all data and settings from your iPhone, accompanying with the screen passcode removal.
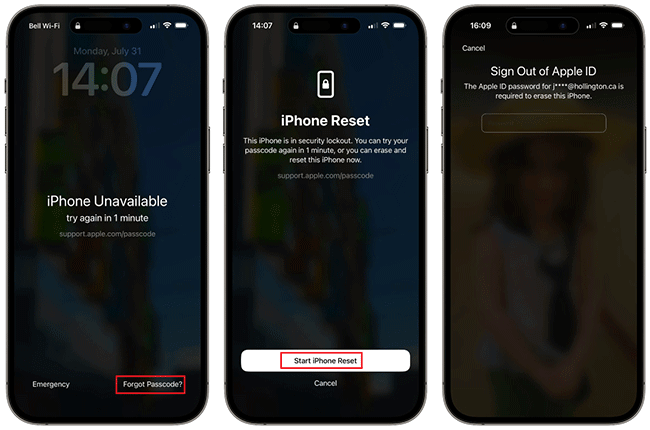
For iOS 17: Use "iPhone Reset"
Step 1: Tap on "Forgot Passcode?" at the right bottom of iPhone lock screen.
Step 2: Continue to click "iPhone Reset" → "Start iPhone Reset".
Step 3: Type in Apple ID password to successfully sign out of Apple ID.
Step 4: Click on "Erase iPhone" to delete all content and settings from iPhone, including the screen passcode.
Solution 2: Unlock iPhone with Professional TunesKit iPhone Unlocker
Sometimes, your iPhone becomes unavailable with no "Erase" option. In this case, you can only resort to other tools rather than the iOS device itself. Here TunesKit iPhone Unlocker is a mighty alternative that can ideally remove all types of cryptographic barriers from iOS screen.
It supports numeric passcode, alphanumeric passcode, Face ID and Touch ID. No matter what model your device is and what lockup circumstance you're in, this software can come to rescue. In addition to screen lock, it can well support Apple ID, MDM, and Screen Time passcode removal.
Key Features of TunesKit iPhone Unlocker
- Unlock iPhone without password effectively
- Rescue iPhone, iPad, iPod from various lockup cases
- Support series of iOS device models as well as iOS versions
- Offer lossless solutions to unlock Apple ID, Screen Time, MDM
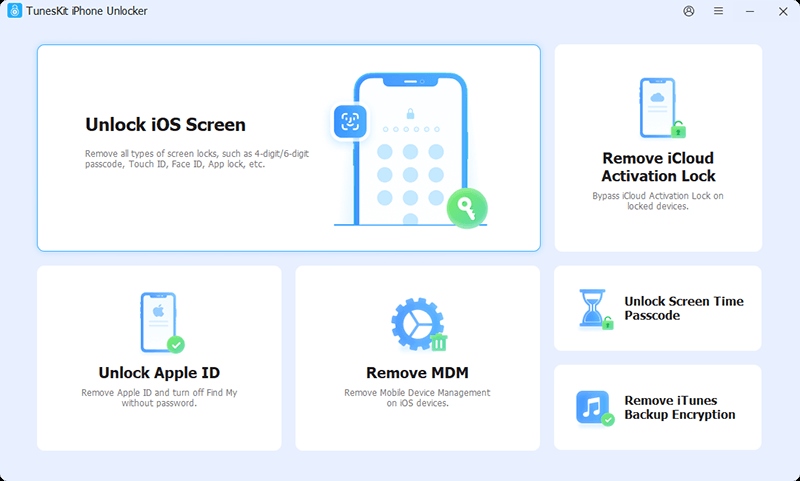
Step 1 Connect Locked iPhone to Computer
Connect locked iPhone to a computer. Afterward, open the newest version of TunesKit iPhone Unlocker and choose "Unlock iOS Screen" in the main interface. Then, click on "Start" button.
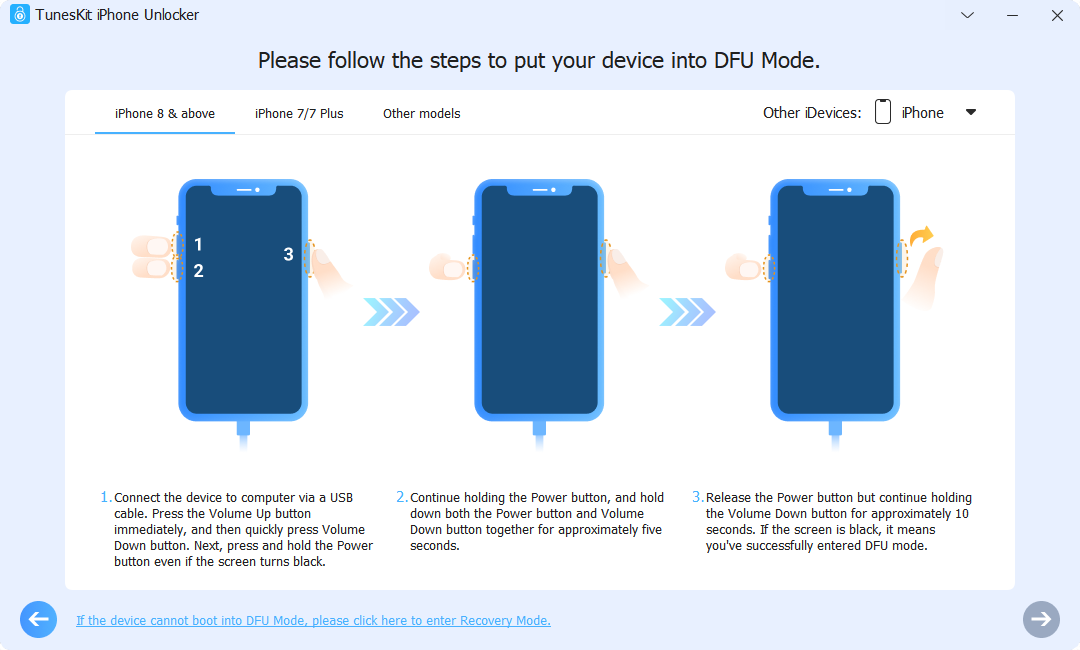
Step 2 Boot iPhone into DFU/Recovery Mode
There are onscreen instructions for your iPhone to enter either DFU or recovery mode. Simply check and follow them until the right arrow located at the right bottom turns blue.
Step 3 Download a Compatible Firmware Package
The device information of your connected locked iPhone will be shown in the interface. Check and confirm it. If there is no problem, click on the "Download" button to get a matchable firmware package and finish verification process.

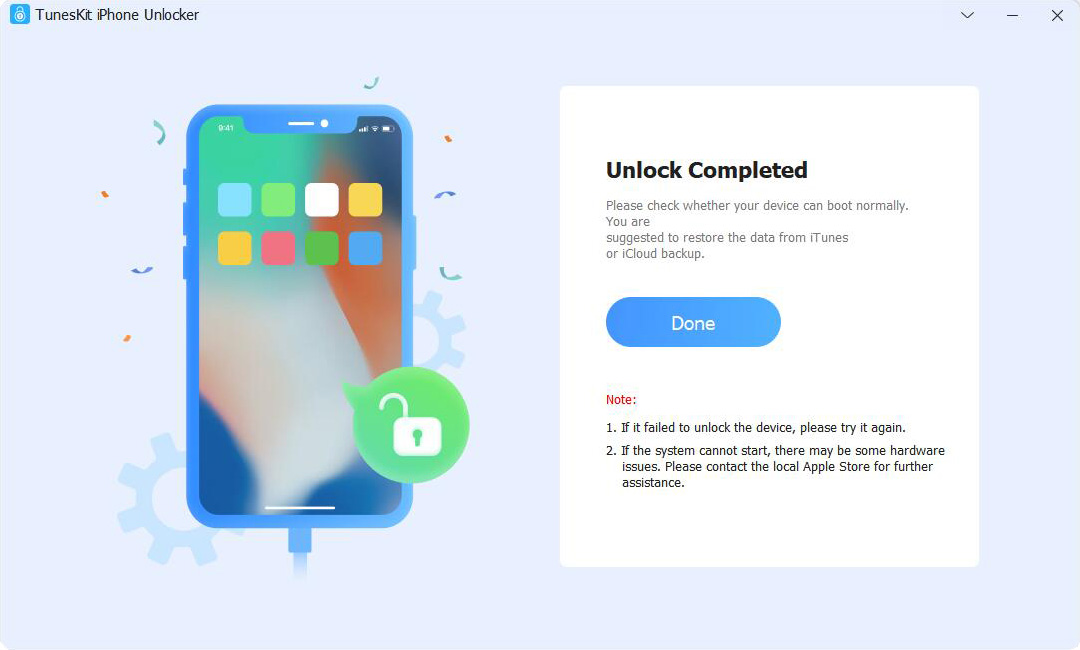
Step 4 Remove Passcode from iPhone Locked Screen
Once you click on the "Unlock" button, TunesKit iPhone Unlocker will carry out a process to unlock iPhone, during which the screen passcode will be removed. Just keep the device connected until it restarts for you to access.
Solution 3: Erase Device with iCloud
Cannot erase all data on iPhone after 10 failed passcode attempts because the "Erase Data" option is inactivated? Don't worry. You can erase your iPhone using iCloud as long as you have enabled Find My feature and know iCloud account. Here's what you can do.
Step 1: Visit https://www.icloud.com/find/ on any browser you have and hit Sign In to complete iCloud account login.
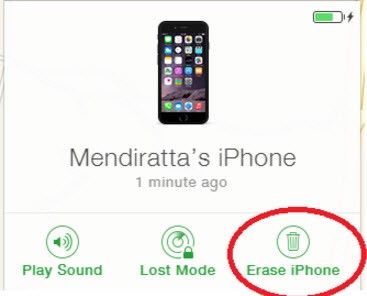
Step 2: Find your disabled iPhone under the list of "All Devices".
Step 3: Choose "Erase This Device" among all options out there. Your iPhone will be erased without screen passcode.
Solution 4: Restore iPhone with iTunes/Finder
iTunes/Finder can assist you with device reset and data cleanup. It makes iPhone a new device as well. You just need to ensure that the Find My feature has been turned off. Here are detailed steps for you to follow.
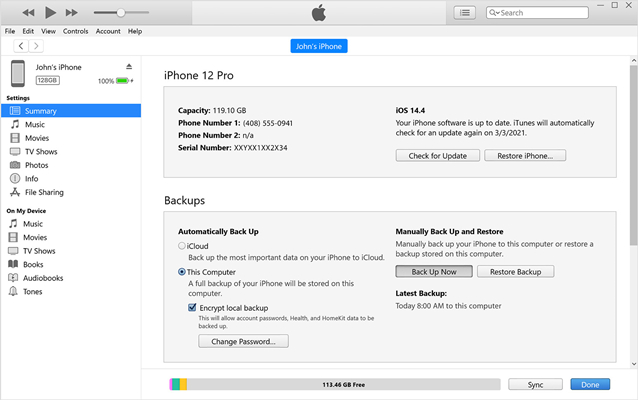
Step 1: Run iTunes (or Finder on Mac) and connect your disabled iPhone to a trusted computer.
Step 2: iTunes/Finder can detect and recognize your connected iPhone, showing a device icon for you to click. If not, put iPhone into recovery mode first.
Step 3: Under Summary section, you can hit "Restore iPhone…" to confirm a device factory reset operation. If iPhone is in recovery mode, click Restore in pop-up window.
After a few minutes, the device can restart itself without a screen passcode.
Part 6. Conclusion
The "Erase Data after 10 failed passcode attempts" feature is a helpful option to avoid personal data being stolen or leaked by others. In this post, you have clearly known what it is, how to enable it, what happens when it works, and what to do after automatic device reset.
While this feature enhances security, it may not be ideal for everyone - especially if kids frequently use your phone and may enter the wrong passcode multiple times. If you ever get locked out without the Erase Data option on iPhone, TunesKit iPhone Unlocker is a reliable solution to bypass the screen lock and regain access quickly.