4 Solutions to Enable a Disabled iPhone in iOS 17
"After updating my iPhone to the latest iOS 17 version, my iPhone ask me to enter the passcode when I try to unlock it. However, I can't remember the correct passcode and my iPhone got disabled after some wrong passcode attempts. Does anyone know how can I enabled a disabled iPhone on iOS 17?"
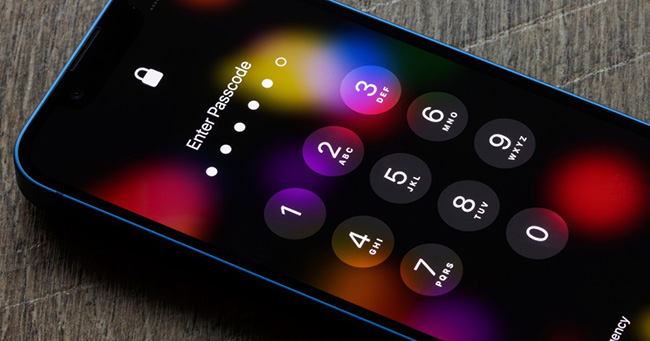
It is not an impossible job for iPhone users to unlock a disabled iPhone in iOS 17. In most cases, iPhone users can easily unlock their phones by entering the correct passcode. Because of the iOS security system, users will need to enter the screen lock passcode again after update iOS version or restart the iPhone. However, if users forgot the correct passcode at this time, things will get knotty. But don't be worried. In this post, you will learn some effective solutions on how to enabled a disabled iPhone in iOS 17.
Part 1: How to Enabled a Disabled iPhone in iOS 17 - 4 Solutions
Solution 1. Unlock iPhone via iOS Feature
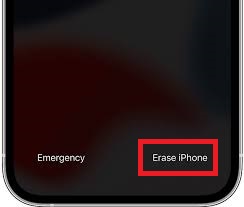
When your iPhone is using iOS 15.2 or a later iOS version, the iPhone owner can erase the iPhone from the disabled screen directly. TO use this method, you should know the correct Apple ID on the disabled iPhone and the correct passcode. You can follow the below steps to enable your disabled iPhone on iOS 17.
Step 1. Keep entering the passcode until your iPhone is disabled.
Step 2. Here you will see an Erase iPhone option on your iPhone screen. Click on it.
Step 3. Enter your Apple ID account and the correct passcode to enabled your disabled iPhone in iOS 17
Solution 2. Use TunesKit iPhone Unlocker
If you can't remember the Apple ID and the passcode on your iPad, the first method in this post will not be recommended to you. Here, TunesKit iPhone Unlocker is the optimal move. TunesKit iPhone Unlocker is an iOS unlocking tool that can help iPhone/iPad/iPod touch unlock screen lock, bypass MDM restrictions, unlock Screen Time, and unlock Apple ID. While using TunesKit iPhone Unlocker, users will not encounter any problem because of the concise and intuitive user interface. Besides enable disabled iPhone on iOS 17, TunesKit iPhone Unlocker also allows users to unlock disabled iPhone, fix iPhone passcode expired, and unlock iPhone when forgot passcode.
Main Features of TunesKit iPhone Unlocker
- Fully compatible with most iOS device models
- Access security lockout iPhone with simple steps
- Unlock iPhone/iPad/iPod touch with ease
- Supports the latest iOS version including iOS 16
Now, let's see how to enable disabled iPhone on iOS 17 by using TunesKit iPhone Unlocker.
Step 1Connect iPhone to Computer
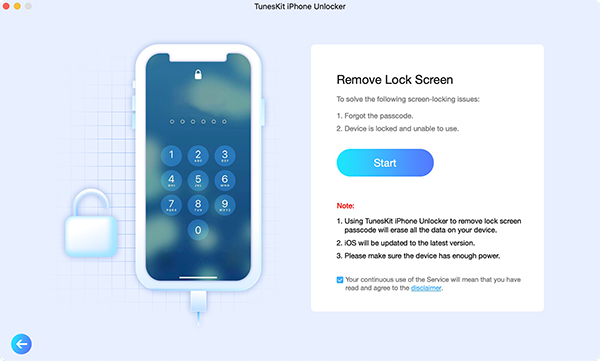
To begin with, download and install TunesKit iPhone Unlocker on your computer. You will see some unlocking options to unlock your iOS device on the main interface of TunesKit iPhone Unlocker. Select the Unlock iOS Screen feature and hit on the Start button.
Step 2Put iPhone into Recovery Mode
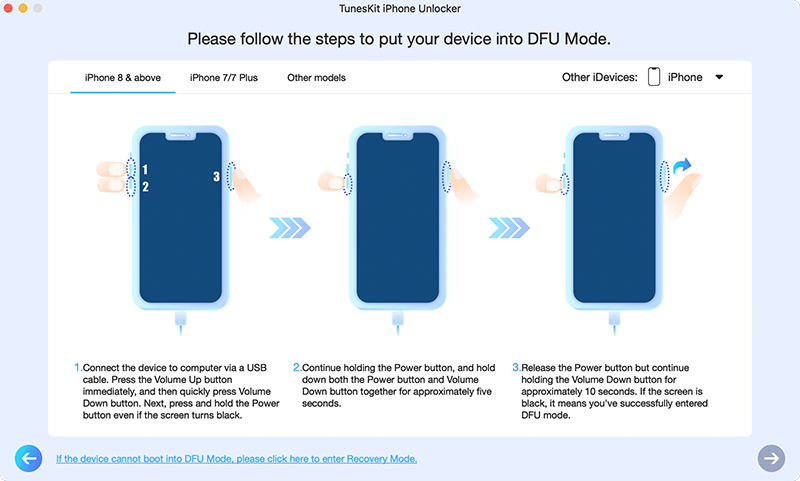
Then, you will need to put your iPhone into Recovery mode. If you don't know how to make it, you can follow the onscreen instruction to make it. When you put your iPhone into Recovery mode successfully, hit on the Next button.
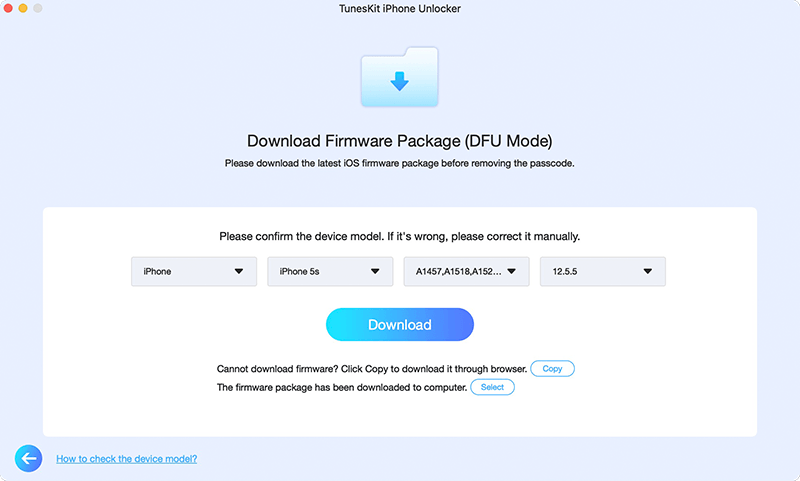
Step 3Download Firmware Package
TunesKit iPhone Unlocker will start to download the firmware package to enable the disabled iPhone on iOS 17. You should check the onscreen information and correct it if there is anything wrong. Click on the Download button to start downloading.
Step 4Enable Disabled iPhone in iOS 17
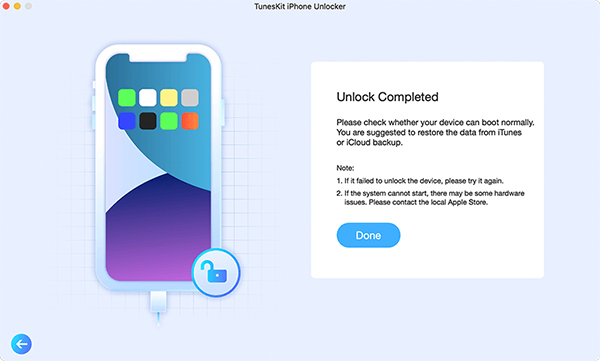
Then, TunesKit iPhone Unlocker will start to enable your disabled iPhone on iOS 17. This process will not take a long time and you can get into your iPhone again after unlocking.
Solution 3. Restore iPhone via iTunes
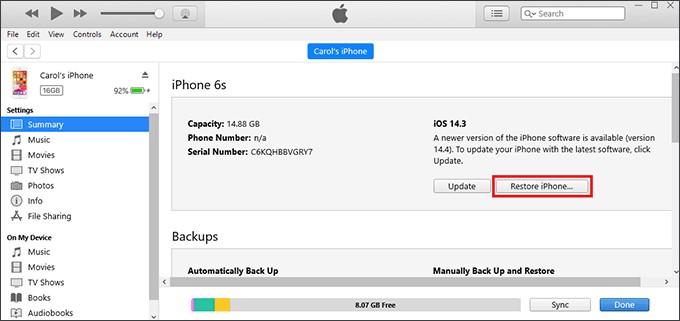
Users can also use iTunes to restore an iPhone. Using iTunes to restore an iPhone will erase all the data and content from the device. Therefore, you can make a backup first if you are going to use iTunes to enable a disabled iPhone on iOS 17. Besides, your iPhone should be synced with iTunes before, or you will need to put your iPhone into Recovery mode first. You can follow the steps below to restore your iPhone via iTunes.
Step 1. Download and install iTunes on your computer. Then, connect your iPhone to the computer. Launch iTunes on your computer.
Step 2. Hit on the little device icon on the top toolbar when you can see it.
Step 3. Select the Summary option on the Sidebar.
Step 4. Hit on the Restore iPhone option to restore your iPhone.
Solution 4. Erase iPhone via iCloud
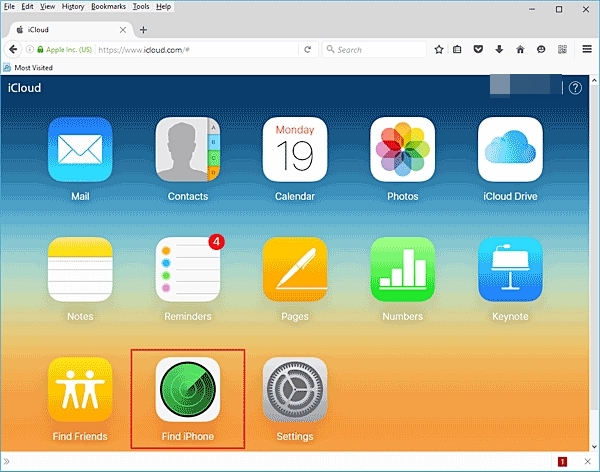
If you don't have a computer to use the above solutions, you can try this method. It is worth noting that the Find My iPhone feature should be enabled on your disabled iPhone, or you will not be able to use it. Now, let's see how to enable a disabled iPhone on iOS 17 by using Find My iPhone.
Step 1. Open a browser on your computer or another mobile phone. Then, go to the iCloud.com website and log into your Apple ID account.
Step 2. Select the Find My iPhone feature.
Step 3. Click on the All Devices option and select your disabled iOS 17 phone.
Step 4. Hit on the Erase iPhone option to enable the disabled iPhone in iOS 17.
Part 2: Conclusion
That's it. In this post, you can learn how to enable a disabled iPhone in iOS 17 version. When your iPhone gets disabled, you can always trust TunesKit iPhone Unlocker as it can help you unlock any iOS device without entering any passcode. If you are still having other questions, please feel free to leave us a comment below.
