[Guide] How to Use DNS to Bypass iCloud Lock
Activation Lock is a protective mechanism set up by Apple to keep your device from being accessed by someone else if your device is lost or stolen. But it's also a frustrating feature for anyone who's ever bought a second-hand iPhone or iPad with Activation Lock or forgotten the passcode. At the same time, solutions to bypass the iCloud Activation Lock have emerged.
Using DNS to bypass iCloud lock is one of those solutions. Is it working? How does it work? What are the pros and cons of this method? In this guide, let's find out these things about iCloud DNS Bypass, and what if it is not working.
Part 1: What Is iCloud DNS Bypass?
iCloud DNS Bypass refers to changing the DNS to bypass the Activation Lock. Domain Name Server (DNS) is used to translate your domains into IP address. And it's also set up to improve the quality and security of your network. With an IP address, you can locate a device and access its information.
In general, once you try to activate your iPhone or iPad, your device will go to DNS to get the IP address and send it to Apple Server. And you will be asked to enter the Apple ID and passcode to unlock your device. So, to prevent Apple Server from knowing that we are activating our device, we can change our DNS to a third-party DNS so that your device does not recognize the correct IP address.
Part 2: How to Bypass Activation Lock using DNS?
Here are the steps that tell you how to bypass iCloud lock via DNS.
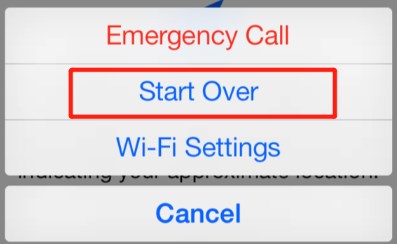
Step 1: If you're already on the Activation Lock interface, you need to press the home button and tap Start Over and set up your language and country, and go ahead to WiFi network.
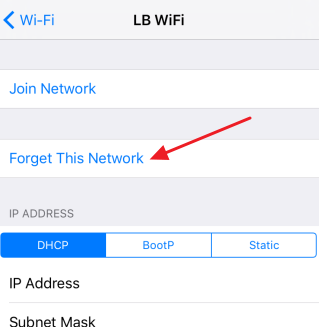
Step 2: You need to disconnect your WiFi if you have already connected one. Tap on i icon on the right and tap Forget This Network.
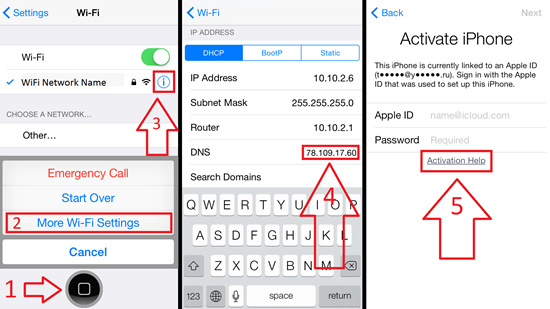
Step 3: Go to tap i icon on the right of your WiFi name, and select Configure DNS. Tap Manual, and go ahead to Add Server, enter one of the DNS below, and tap on Save.
- North America: 104.154.51.7
- South America: 35.199.88.219
- Europe: 104.155.28.90
- Asia: 104.155.220.58
- Australia and Oceania: 35.189.47.23
- Other continents: 78.100.17.60
Step 4: Tap Back. Enter the passcode and connect to your WiFi. The Activation Lock will appear and ask you to go to the Next Page.
Step 5: Please go ahead to tap Back. Select Activation help. Then, DNS bypass Activation Lock is finished.
More steps to use iCloud DNS bypass crash:
Follow these steps to remove iCloud after using DNS bypass if certain features are unavailable on your iPhone.
Step 1: After completing the previous DNS bypass method, tap on Menu, then navigate to Applications.
Step 2: Scroll down and select the Crash option to restart your device.
Step 3: Once the device restarts, go to Language and Country settings. Select your Wi-Fi network, then click Home. Go to More Wi-Fi Settings, select Configure Proxy, and choose Manual.
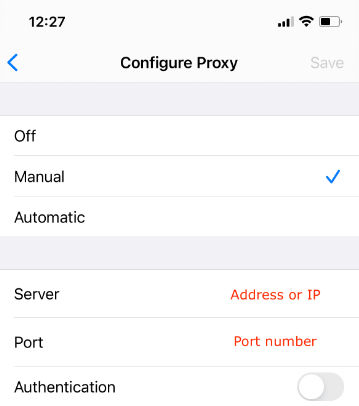
Step 4: In the Server section, remove the current HTTP address. Replace it by entering 30 different emojis. In the Port section, type 8888, then tap Save at the top.
Step 5: Tap Back, then Next to return to the Unlock screen. Press the Home button to proceed.
Step 6: When the Home screen appears, select the Language option to finalize the process.
Part 3: Pros & Cons of Using DNS to Bypass iCloud Lock
There is no 100% working and no error Activation Unlocker in the world. You can learn its pros and cons and make your own decision.
- It's completely free to apply DNS server for iCloud bypass on iPhone or iPad.
- No computer needed.
- No jailbreaking required.
- Temporary access to the device.
- If it works, your device can be restored as a normal one.
- The success rate cannot be estimated.
- The steps are too complicated.
- No permanent unlock.
- Requires Wi-Fi connection.
- Not all the iOS versions and models are supported.
Part 4: Bypass iCloud Lock Without DNS: TunesKit Activation Unlocker
When the iCloud DNS bypass doesn't work, there is another reliable tool to bypass the Activation Lock, which is a professional Activation Lock removal tool. All you need to know about all the Activation Unlocker on the market is that there's no a tool that comes with 100% success rate. And I'd like to introduce a tool that has a much higher success rate among those tools-- TunesKit Activation Unlocker.
TunesKit Activation Unlocker specializes bypassing an iCloud lock, removing the Apple ID and turn of Find My on iPhone, iPad and iPod. Cannot access and use your device due to the iCloud lock and Apple ID? TunesKit Activation Unlocker is the perfect option for you fixing any issues related to Activation Lock and Apple ID, such as buying a second-hand iPhone or iPad with iCloud lock, iPad is locked to owner, cannot turn off Find My without passcode, unable to activate iPhone, etc. The operation is easy, with no complex interface or words to figure out. Mac users and Windows users are all able to use it.
Features of TunesKit Activation Unlocker:
- Remove iCloud activation lock in a few clicks.
- Easy to use & High success rate.
- Turn off Find My without password.
- Override Lost Mode without password.
- Turn off camera sound on iPhone & iPad
If you've tried and failed in iCloud DNS bypass, it's suggested to use the following steps to bypass it.
Step 1: Connect your Device
Go to the TunesKit website and download and launch the TunesKit Activation Unlocker. Connect your device with a USB cable and begin the process. Select the Remove iCloud Activation Lock option. A tip will pop up to ask you to read the term carefully and click Agree. Then click the Start button to continue the process.

Step 2: Jailbreak Your System
Next, start to jailbreak your system. For the difference of the computer system, you need to select the appropriate jailbreak solution to bypass the Activation Lock. When you jailbreak your system successfully, restart your computer and launch the tool again.
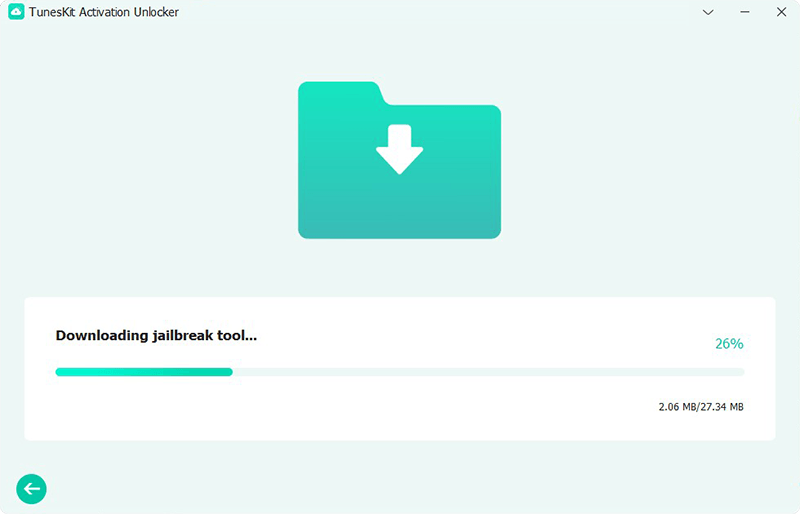
Step 3: Start to bypass activation lock
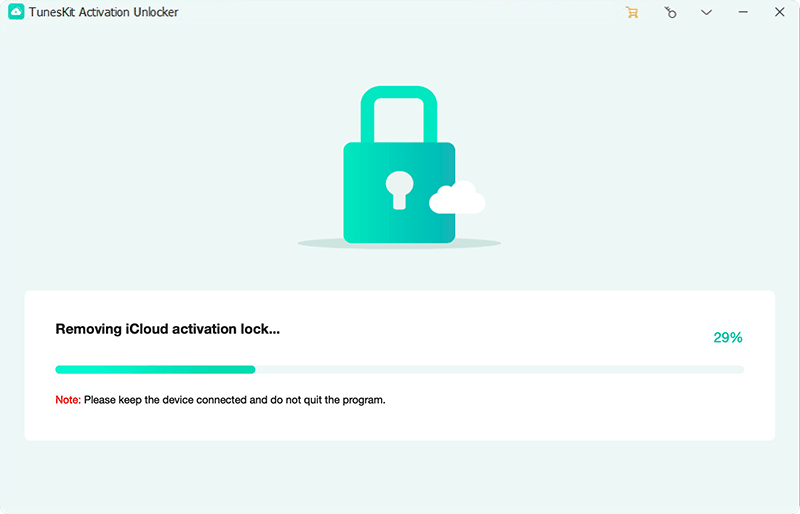
Please seriously check your device's info shown on the interface, go ahead if there's nothing wrong. Click Start to Remove to bypass the Activation Lock. Once done, you can regain access to your iCloud lock iPhone without restrictions.
Part 5: FAQs about iCloud DNS Bypass
-
1. Can jailbreaking remove the iCloud lock?
No. Though jailbreaking is crucial for removing Activation Lock, it cannot remove the iCloud lock directly. Additional steps are required to finish it.
-
2. Can I use iCloud DNS Bypass on Apple Watch?
No. This method only works on iPhones and iPads running on iOS 8 to iOS 10.
-
3. Can I permanently remove the iCloud lock using DNS?
The DNS method is only a temporary solution. If you restart the device, it will be stuck on the Activation Lock screen again.
-
4. How does iCloud DNS Bypass work?
The process involves changing the device's DNS server settings to redirect it to a bypass server, which gives access to certain functions of the device, such as the home screen, without entering the Apple ID credentials. However, this does not remove the activation lock; it just provides limited access.
Conclusion
The iCloud DNS bypass method is a practical solution to bypass iCloud lock. But, it comes with uncertain success rate. If it does not work, you can use the alternative tool TunesKit Activation Unlocker to bypass the Activation Lock on your device. Feel free to contact us when you have difficulties using this tool to bypass the iCloud-locked iOS Devices.
