How to Screen Record on Windows 10 with Audio
Nowadays, whether it is for leisure and entertainment, or telecommuting, online teaching or learning, professional video makers, especially people who use Windows computers, will watch some videos. And when you come across some useful videos, some video sites support downloading their videos, and some sites don't. So at this time, have you ever wanted to record screen and audio on Windows 10? Fortunately, we have listed several ways to achieve a record screen with audio on Windows. Now let's take a look.
Part 1: How to Screen Record on Windows 10 with Audio with TunesKit Screen Recorder
There is plenty of software on the market that can record screen and audio on Windows 10, but what we recommend today is TunesKit Screen Recorder. TunesKit Screen Recorder is a powerful and outstanding recording software on Windows computers.
TunesKit Screen Recorder has a concise interface and simple operations for beginners to use. It can record screen and audio simultaneously or separately on Windows 10. When you record screen with audio, you can capture video from screen, webcam, system audio, and microphone with just a simple operation. At the same time, it supports a variety of input formats, as well as a variety of output formats for you to choose from. And what makes it stand out is its high-quality recorded videos.
TunesKit Screen Recorder
- Reocrd screen and audio on Windows 10 losslessly
- Record screen video and audio separately or simultaneously
- Supports plenty of output formats
- Add your unique watermark to your recordings
Pros:
• Clear interface
• Can record screen and audio separately
• Can set recording schedule
Cons:
• The trial version adds a watermark and can not be removed. And it only can record the audio for 1 minute.
Now please read the tutorials about how to screen record with audio on Windows with TunesKit Screen Recorder.
Step 1: Download and launch TunesKit Screen Recorder, then you will see a simple interface.

Step 2: Before you start, you can preset the recordings. Click the OPTION button firstly, then you will open the setting platform. You can adjust the output format of your recording, set the target folder, and customize the cursor.

Step 3: After your setting, you can record the screen and audio on Windows 10 now. Click “Screen Recording” model, then click "+" to select the recording area, and click REC. Then the recording begins. In the process, you can screenshot, or cut the recording segment. And click STOP to end the recording.

Step 4: The recording with the screen and audio will be saved in the history file to let you review. You can watch the recordings on this platform, rename the recordings, trim it, and delete it. If you want to trim the video, click the EDIT button, then you can trim it in the editing scene.

Step 5: When you finish, click OK and the new recording will be saved in the setting file.
Part 2: How to Screen Record on Windows with Audio for Free
The above approach is suitable for most people. And there may be some people who feel that it is inconvenient to buy to use all the functions, so now here are the free methods to record screen and audio on Windows 10 as follows:
1. Built-in Program to Record Screen on Windows with Audio
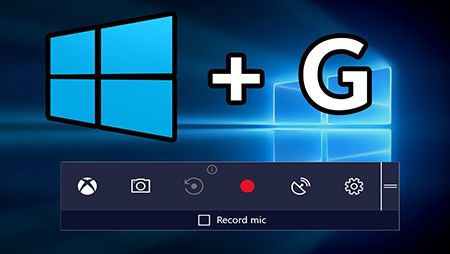
Windows 10 has a screen recording function called the Xbox Game Bar. You can use it to screenshot, record your screen and audio simultaneously, or only to record your screen without audio.
Pros:
• Easy to use
• Do not have to download any extra recording software
Cons:
• Can not capture the desktop
• Have to disable the game bar to record
• Without edit function
Now please read the tutorials as below:
Step 1: Open your Windows 10 computer, press the keyboard "Win" + "G" to open the Xbox Game Bar.
Step 2: The Xbox Game Bar will appear, click SETTINGS to adjust.
Step 3: Before you start recording, you have to open the target screen, then you can select whether to turn on the microphone while recording, and click CAPTURE.
Step 4: In the recording interface, you can see the recording duration displayed in the toolbar. When you finish, click the STOP button to stop recording.
Step 5: Click the POHOT window to open the file to check your recording.
2. OBS Studio to Screen Record on Windows 10 with Audio
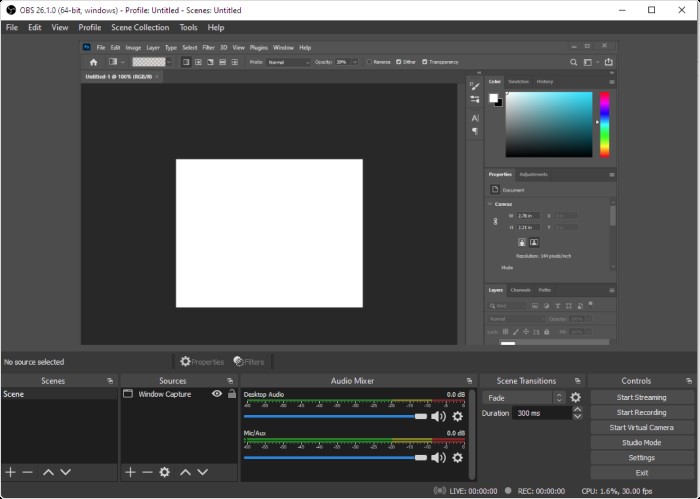
OBS Studio is a free recording software to record screen and audio on Windows 10. It has a lot of functions that can be utilized to make some decorations on your screen and audio recordings. It has plug-ins that bring more possibilities to the editing of recordings.
Pros:
• Has a studio mode to be able to watch the recording while recording
• Have more functions to your recording
Cons:
• Complex interface
• Hard for novice
• Can not appear the setting file while finishing the recording
Now please read the guidance:
Step 1: Download and launch OBS Studio.
Step 2: Select the scene and source. You can adjust the area of the recording in this interface. In this review bar, you can directly see the area and screen.
Step 3: Click SETTING to preset the recording condition.
Step 4: Click STRAT. And you can play the video or audio now, the software is capturing the screen now.
Step 5: Add the audio effects, screen effects, and transitions if needed.
Step 6: Press STOP.
Step 7: The recording will be automatically saved in the setting file. So you can check your recording.
Part 3: How to Record Screen and Audio on Windows 10 Online
Now we are going to introduce a simple and fast way to screen record on Windows 10 with audio. That is record screen and audio online on Windows 10. And we will recommend two online recording tools as follows:
1. Apowersoft Free Online Screen Recorder
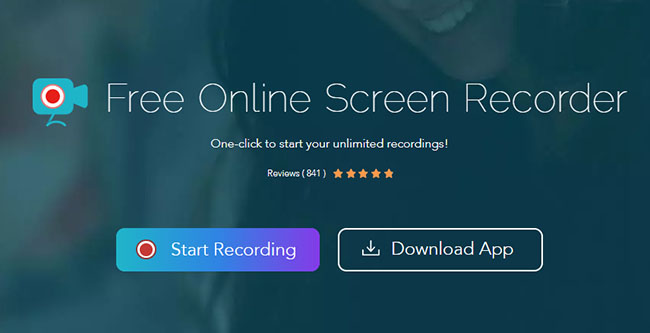
This screen recorder can record your screen and audio with no limitation. Its clear interface and recording function attract lots of people to utilize it. If you are using it for the first time, you need to install a launcher.
Pros:
• Save the recording as GIF
• Unlimited recording time
Cons:
• Without trim and edit function
• Can not review the recording
Now you can follow the steps:
Step 1: Open the target screen and wait for the recording.
Step 2: Click "Start Recording" to open the online recording area. If you are using it for the first time, a message will appear asking you to download the launcher.
Step 3: Customize the recording mode and region, then start recording.
Step 4: When you finish, save the screen and audio recording to your folder.
2. iTop Online Screen Recorder
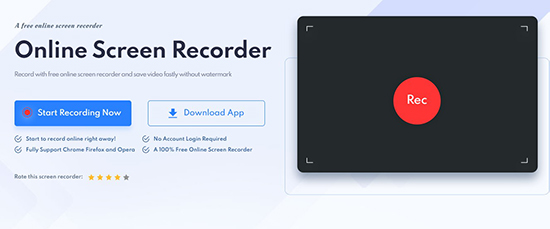
iTop Online Screen Recorder is a free online screen and audio recorder. It can accurately record the screen and audio you want on your Windows 10 computer. You can choose to record only the screen or record the screen with audio. After the recording, you can preview the video, and you can also set the playback speed of the recording. It has the “picture in picture” function that allows you to display and preview the video on another screen.
Pros:
• Can stop sharing the screen and only capture the audio while recording
• "Picture in picture" allows you to review the recording in other scenes
Cons:
• Online screen recording has a 5-minute-timelimit
• Can not trim or edit the screen recording
• Without output format to choose
Now please read the instructions:
Step 1: Open the iTop Online Screen Recorder and your target screen.
Step 2: Click START RECORDING NOW. You can select Microphone Audio, Browser Audio, or no audio. Then turn to choose the record mode. There has Entire Screen mode, Window mode, and Chrome Tab mode. Then click SHARE and click REC.
Step 3: When you finish, click STOP. Then you can check the recording on this scene. If you want to save the video, then click DOWNLOAD.
Part 4: FAQs about How to Screen Record on Windows 10 with Audio
Q1: Could Windows 10 computer record screen and audio?
Yes. Windows 10 computers can do this. You can download the recording software on your computer. And most of this software can be used in Windows 10.
Q2: What is the difference between screen recording software and online screen recorder?
Screen recording software has more functions than online tools. If you want to make a good quality screen recording, you can download a screen recorder.
Q3: How do I record my computer and my sound on Windows 10?
If you just want to record it and don’t need to trim or edit, you can use the built-in program on Windows 10 called Xbox Game Bar. If you want to edit your recording, you can choose TunesKit Screen Recorder. Please refer to the Part 1 to read more detailed instructions.
Part 5: Conclusion
The above methods are all about screen recording on Windows 10 with audio. Each method is capable of recording screen and audio, but each has its characteristics and limitations. After reading, do you have the best choice in your mind? We still recommend TunesKit Screen Recorder to you. We believe it has functions and features to meet your needs, such as easy operation, lossless recording, high-quality output, and more. If you have any questions, please leave a comment.
