How to Screen Record iTunes Movies
Sometimes you are watching an iTunes movie in your free time, but unfortunately, the network is poor that the iTunes movie can't play successfully. Or maybe you want to capture a part of the video clips while watching an iTunes movie. In these cases, using a video recorder would be a better solution. Screen recording iTunes movies can help you easily extract scenes from the iTunes movies, and you don't even need to do the cutting job.
But how to screen record iTunes movies? Don't be worried, we will tell you 2 effective tools to screen record iTunes movies, including a built-in program, and third-party screen recorder. Now let's have a look.
Part 1. How to Screen Record iTunes Movies on Mac Using TunesKit Screen Recorder
When comes to screen recorders, people always appreciate their quickness and convenience. Here we highly recommend TunesKit Screen Recorder for further editing of the recorded iTunes movie. It enables you to screen record iTunes movies, streaming videos, and computer screens on either a full or a trial version, and allows you to capture iTunes movies and audios simultaneously and separately. Besides, with it help, you can capture and edit iTunes movies clips like cutting and trimming, and export the recorded iTunes movie to MP4, MKV, MOV, and other different video formats.
TunesKit Screen Recorder
- Record YouTube videos, video calls, gameplays and other scenes on your desktop
- Screen record iTunes movie and audio separately or simultaneously
- Work well as a screenshot tool, output high resolution recordings
- Convert recorded iTunes movies to any format without watermark
How to Screen Record iTunes Movies with TunesKit Screen Recorer
Step 1: Prepare the iTunes movie
Launch iTunes and open the iTunes movie you want to record. Play the movie and adjust the size of the window. If you only need to record a few clips, locate the slide bar to where you want to record.
Step 2: Change recording settings
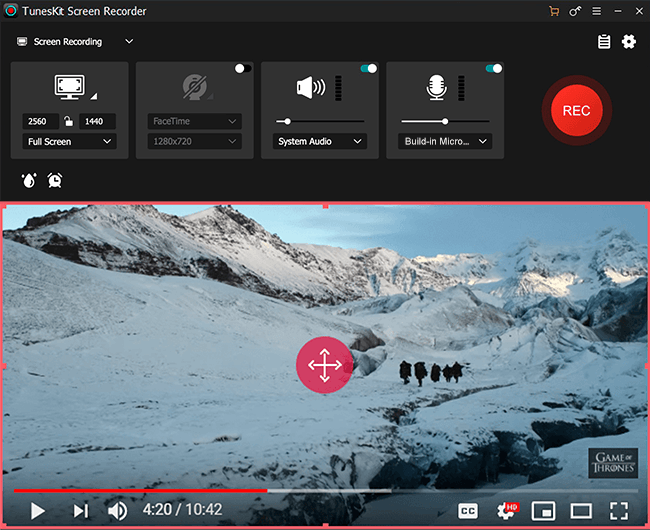
Launch TunesKit Screen Recorder, click the "Options" button to open the setting. For the basic record options, you can change the output folder and output format as you want. To capture lossless iTunes movie, choose the format under "HD Video". In the record time options, you can use the time scheduler to set a time to begin and end the recording. This feature is very convenient and you can leave the recorder to finish everything automatically. In the cursor options setting, we suggest you uncheck all the boxes to hide the mouse if you don't want it to show in the recording.

Step 3: Customize size and area to record iTunes movies
Now, click the "+" button. You can select the recording area using these two options. There are many fixed sizes for you to choose or you can customize the area by yourself.
Step 4: Start screen recording iTunes movies
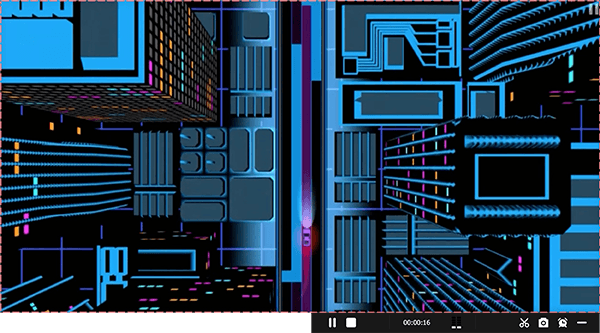
When all the settings are done, hit on the "REC" button to start recording iTunes movies. Click the "Stop" button when you finish the recording. If you set the hotkey to start/stop capture, you can press the hotkey on your keyboard to finish the whole process.
Step 5: Edit the recorded iTunes movie
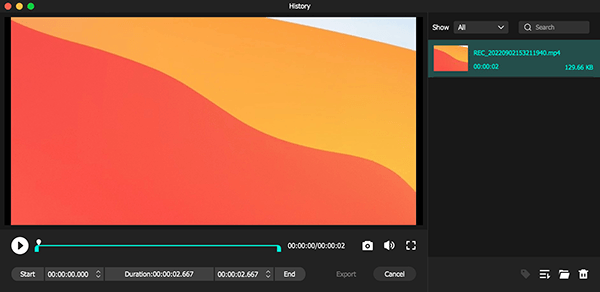
After that, the iTunes movie recording will be saved into History list and destination folder. You can cut out the unwanted parts with the built-in video cutter by clicking the "Edit" button.
Part 2. How to Screen Record iTunes Movies via Built-in Program
The second method we are going to talk is using QuickTime Player to record iTunes Movies. It is well known that QuickTime Player is the default multimedia player on macOS, allowing users to play video, images, and audio. On top of that, it also has a recording feature that records screen and audio on a Mac.
With the recording function, you can record screen iTunes movies and make a short edinting on it. You can refer to the steps below.
How to Screen RecordiTunes Moives with QuickTime Player
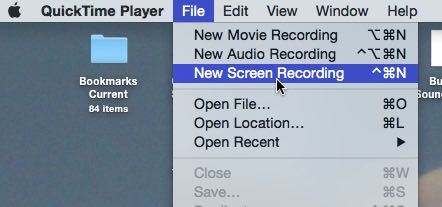
Step 1: Prepare the iTunes movie that you want to record. Launch QuickTime Player and click on the top menu File> New Screen Recording.
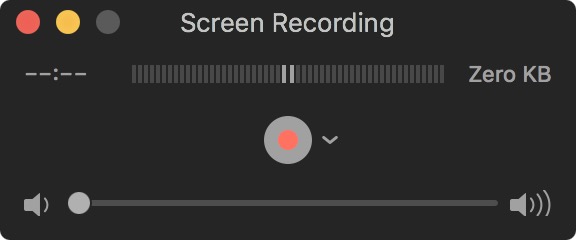
Step 2: Tap on the REC button, and you can click to record the whole screen or drag it to generate a recording window over the iTunes movie. After that, click on Start Recording. Now you can play the iTunes movie.
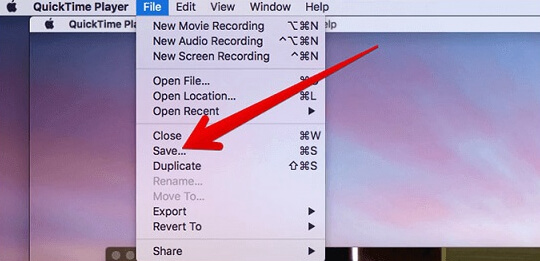
Step 3: When the recording is completed, click the Stop button on the top. You can check the iTunes movie recording, and save it by clicking File> Save.
Part 3. FAQs about Recording iTunes Movies
Q1: How can I remove DRM from iTunes movies?
iTunes movie encrypts its movies in DRM, to remove DRM, you can choose TunesKit Screen Recorder. It supports HD screen recording iTunes movies and can export them to many video formats.
Q2: Can I convert iTunes movies to MP4?
If you want to convert iTunes movies, I would suggest you use the M4V Video Converter directly. It is designed to convert iTunes movies to common formats so that you can enjoy the playback anytime and anywhere you want. Try TunesKit M4V Converter because it is among the best.
Q3: How do I download a movie from iTunes to a USB?
To download a movie from iTunes to a USB, you can use TunesKit Screen Recorder to record the iTunes first, and transfer the recording file to your USB stick.
Part 4. Conclusion
So now you have got 2 easy ways to screen record iTunes movies. TunesKit Screen Recorder can help you record iTunes movies and export them to different formats, while the built-in screen recording from QuickTime is able to record iTunes movies simply and quickly. Besides iTunes movies, TunesKit Screen Recorder can also work as an audio recorder and it is able to capture streaming audio, too. We have both Mac and Windows versions for you, Just try it!
