How to Record Switch Gameplay wih/without Capture Card
Nintendo Switch is one of the most popular video game consoles all over the world. As a game enthusiast, we believe you have already appreciated the fun of it. It is quite enjoyable to play Nintendo Switch games in your spare time, especially when you pass the game or have an amazing experience. In such exciting moments, what do you usually do? We're sure most people will choose to record them.
So now comes to the question, do you know how to record Switch gameplay? If not, then you can refer to this post, in which we will introduce effective methods to record gameplay on Switch with/without a capture card. Now let's commence.
Part 1. How to Record Switch Gameplay without Capture Card
Want to record Switch Gameplay without a capture card? Just only use the Switch console and you can record gameplay on it with its capture button. Even though it only takes screenshots and video gameplay clips of 30 seconds in 720p, it is still a decent option if you are on a budget. And when you finish, you can check the gameplay clips and share them on your PC.
How to Record Gameplay on Switch
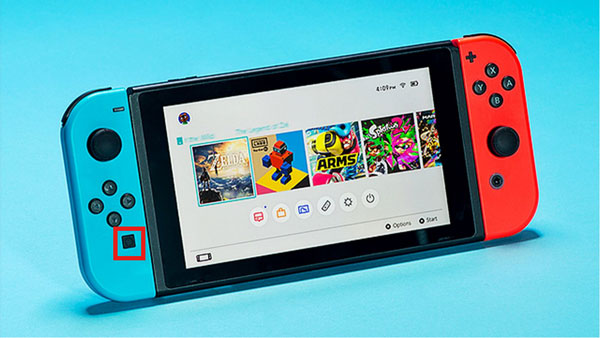
Step 1: Play a game you want to record on Switch, and long- press the Capture button on the bottom left for seconds. It will start recording the gameplay for up to 30 seconds.
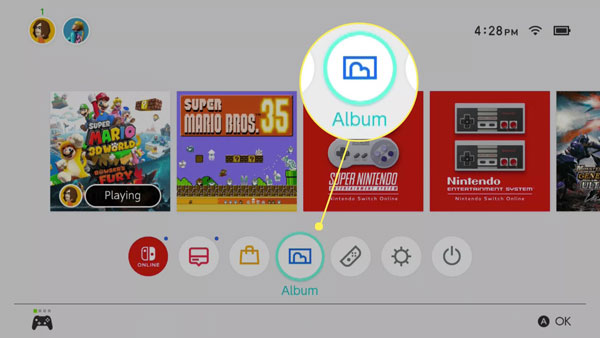
Step 2: When it finishes, you can see a "Successfully saved" prompt in the top right corner. And you can check the recorded Switch gameplay by clicking the Album button in the System Home.
Part 2. How to Record Ninetendo Switch Gameplay on PC with Capture Card
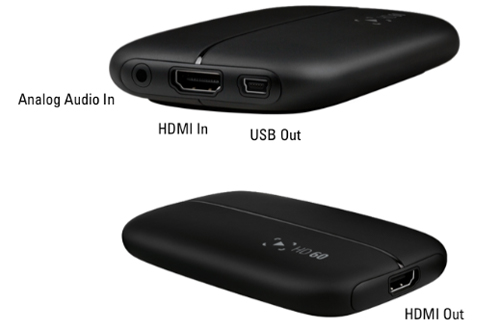
Not all the time you will be satisfied with a 30 seconds Switch gameplay in 720p. What if you'd like to record the entire game with high resolution? In this case, you'll be in need of a capture card. All you need to do is to connect Nintendo Switch to a capture card to acquire the Switch game footage on your computer. There are all kinds of capture cards you can find on the net, and here we choose Elgato HD60, you can also pick other kinds of capture cards as you like.
And of course, you'll also need a reliable recording program that is capable of recording Switch gameplay on your PC. And here we will take TunesKit Screen Recorder as an example to teach you how to record Nintendo Switch gameplay with ease. This software is available to record Switch gameplay in a high-quality resolution that is up to 4K at 30 fps, and export the recorded gameplay to the most popular video formats, such as MP4, M4V, MKV, MOV, etc. Now please read the tutorial on how to record gameplay on Switch with a capture card.
Key Features of TunesKit Screen Recorder
- Record Switch gameplay with high quality
- Save your Switch video in other formats like MP4, MOV, AVI, MKV, etc
- Flexible options for settings adjustments
- Record Switch gameplay and audio simultaneously and separately
How to Record Switch Gameplay on PC with Capture Card
Step 1: First, use an HDMI cable to connect "HDMI OUT" of the Nintendo Switch'dork, and connect it to "HDMI IN" of the Elgato. Next, use a mini USB cord to connect "USB Out" of the Elgato to your computer. Last, use another HDMI cable to connect "HDMI OUT" of the Elgato to your monitor.
Step 2: After that, you should download the Elgato Game Capture HD software on the Elgato official website. Pick the right version such as 4K Capture Utility and install it. Launch it and then you will see the Nintendo Switch game screen on the interface. You can play the game first and check the game footage on this screen. If all is well, you can start recording now.
Step 3: Launch TuneKit Screen Recorder, before you start recording Switch gameplay, you can customize the recording parameters. Click the Options button, first, you can select the output format, such as MP4, 4K video, HD MP4, etc., and you can click the setting icon to adjust the codec, resolution, frame rate, bit rate, and quality. Then you can change the destination folder and watermark.
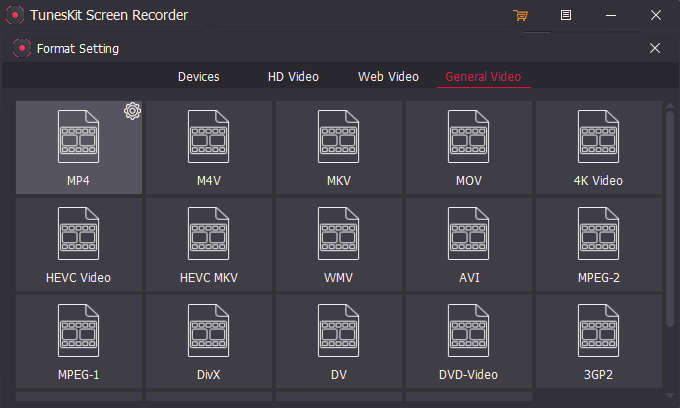
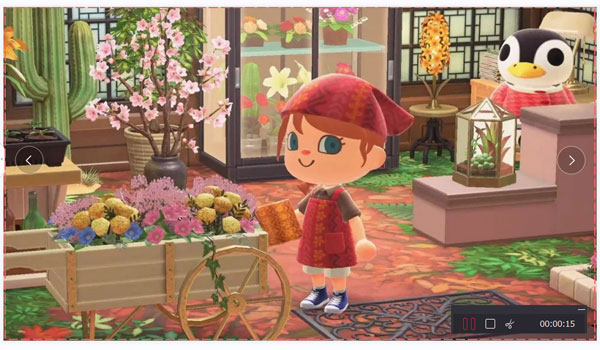
Step 4: Once done, hit the "+" icon to create a recording area, or you can just select the configured size by clicking on the drop-down menu next to the "+" icon. Now, tap the REC button and back to Switch to continue your game.

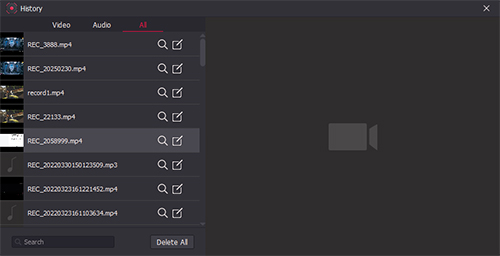
Step 5: TunesKit Screen Recorder is on the recording now, and you'll see a recording toolbar as well. When you finish, click on the Stop button on the recording toolbar, then the recorded Switch gameplay will be displayed on the History list.
Step 7: You can double-click to check the Switch gameplay recording, or hit the Edit button to cut it. After that, you can open the target folder by hitting the Search button.
Part 3. FAQs about How to Record Gameplay on Switch
Q1: How do you record more than 30 seconds on Nintendo Switch?
TunesKit Screen Record can help you record more than 30 seconds of gameplay on Switch. Just follow the guide above for more details.
Q2: Can I plug my Switch into my PC?
If you just want to play the Switch game on a big screen like a monitor, you don't have to connect to your PC. Just use an HDMI cable to connect your Switch dork "HDMI Out" to the monitor HDMI port.
Q3: How do I stream my Switch?
To stream your Switch gameplay on the internet, you can follow Part 2 to connect your Switch to your PC first, then use a streaming program such as OBS to stream your Switch online.
Part 4: The Bottom Line
Now you have got the answers to how to record Switch gameplay. Although Nintendo Switch doesn't offer a powerful recording system, you still have the possibility to record Switch gameplay using TunesKit Screen Recorder with a capture card. In addition, TunesKit Screen Recorder can accomplish many tasks more than just recording gameplay. Anyway, we hope you enjoy the Switch game and record the wonderful moments.
