How to Record Skillshare Videos
It's all over the internet – videos! Whether you are marketing, providing a tutorial, or sharing your ideas on DIY, Skillshare will help you accomplish your mission. This is an online learning community that offers numerous classes for those with great ideas in creativity. You can easily record classes on Skillshare and share your creativity with viewers on various media platforms.
Skillshare was founded way back in 2010 and has risen to a famous digital platform, offering over 35 courses. You get thousands of classes to choose from on this platform as well as a wide community who share your interests and values. More so, the platform is quite intuitive for both mobile and desktop platforms. Check how to record classes on Skillshare with these three powerful tools.
Part 1. How to Record Classes on Skillshare Using TunesKit Screen Recorder
Our mission is to embark on how to record Skillshare videos to share with your viewers. TunesKit Screen Recorder comes in handy to record Skillshare videos. And it is capable of recording both video and audio from any source.
This includes recording from your computer screen, webcam, or microphone. It's also easy to set the preferences such as setting the size of capture or using a full-screen recording. Likewise, get it easy to share your Skillshare recording content on any platform. This app supports the recording of Skillshare classes in severs formats like 3GP, MPEG, WMV, MKV, etc. Follow this step-by-step guide to record classes on Skillshare with TunesKit Screen Recorder.
Key Features of TunesKit Screen Recorder
- Flexibly adjust settings to capture full or half screen
- Save your Skillshare recordings in any format
- It keeps high original quality
- Export Skillshare recording to MP4, MKV, MOV and other video formats
How to Record Skillshare Classes
The app is easy to use and you don't need rocket science to operate it. Check out the simple steps.
Step 1 Launch the app and choose a recording mode
First, download and install TunesKit Screen Recorder on your computer then launch it to begin screen recording. Then go on to choose a video recording mode.

Step 2 Adjust recording parameters
Then go to the "Settings" option to set the recording parameters. Among the settings you can customize include the output format like MP4, MOV, AVI, 4K video, HD format, etc. Likewise, you can set the output folder, add images, and watermarks, among other options.

Step 3 Set recording area
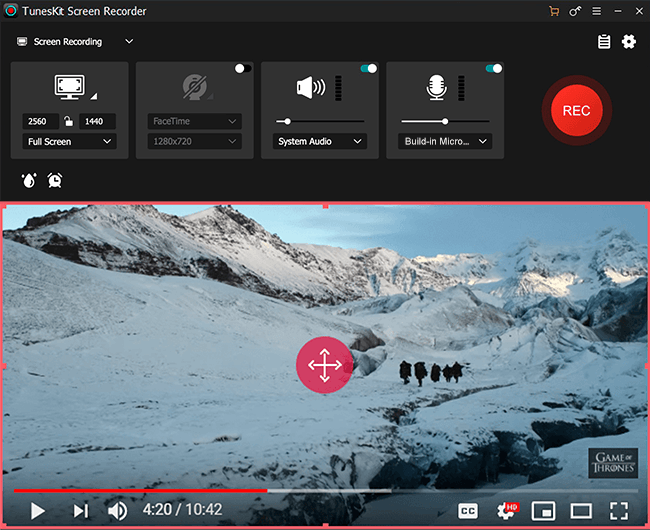
Next, begin to select an area for recording. To do so, click on the "+" button and wait for the recording window to pop up. Then move on to choose a specific recording size from the drop-down menu. You can record your screen with sound as well as capture your voice by enabling the Microphone icon.
Step 4 Record Skillshare video on screen
Now begin to record a Skillshare class. Click on the "REC" button, wait for a 3-seconds countdown and start playing the Skillshare video. You are free to stop the recording temporarily by hitting the "Pause" button or using the "Scissors" icon to cut your recording. Click on the "Stop" button to stop the process.

Step 5 Preview and edit the recorded Skillshare class
You can choose to edit the recorded Skillshare class, although this is optional. Editing options include splitting, merging, or cropping unwanted parts, etc. TunesKit Screen Recorder also lets you view your recorded video before saving it. Just click on the "Search" icon to open the file location.

Part 2. How to Record Skillshare Videos via OBS
The second option to record your Skillshare videos is via OBS Studio. This is a video streaming program that is open source and free to use across platforms for any video recording such as recording Skillshare classes. It is compatible with Windows, Mac, and Linux operating systems. Here is how to make a record Skillshare video with OBS.
How to Record Skillshare Videos
Step 1 Download and install OBS
Download OBS on your computer. Then install and launch it to start recording.
Step 2 Prepaer for Skillshare screen recording
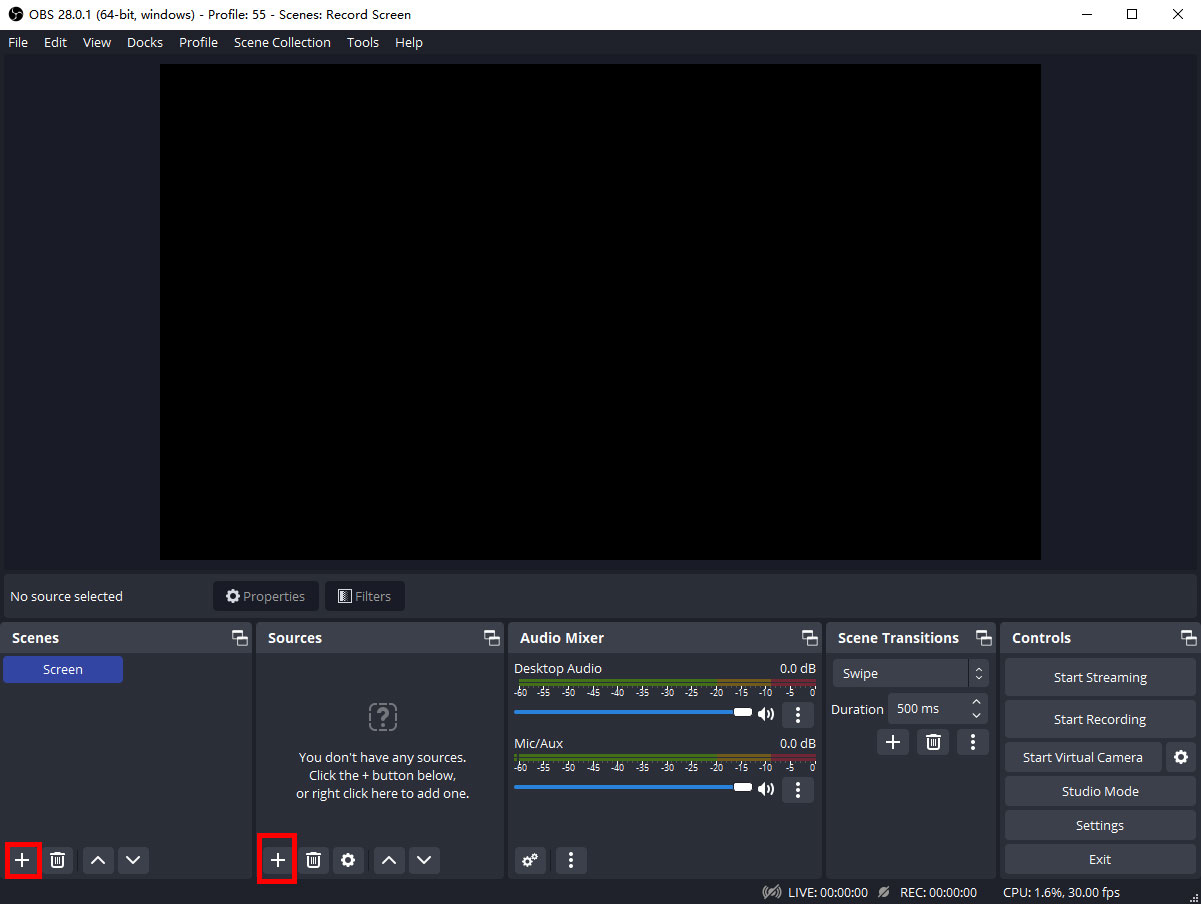
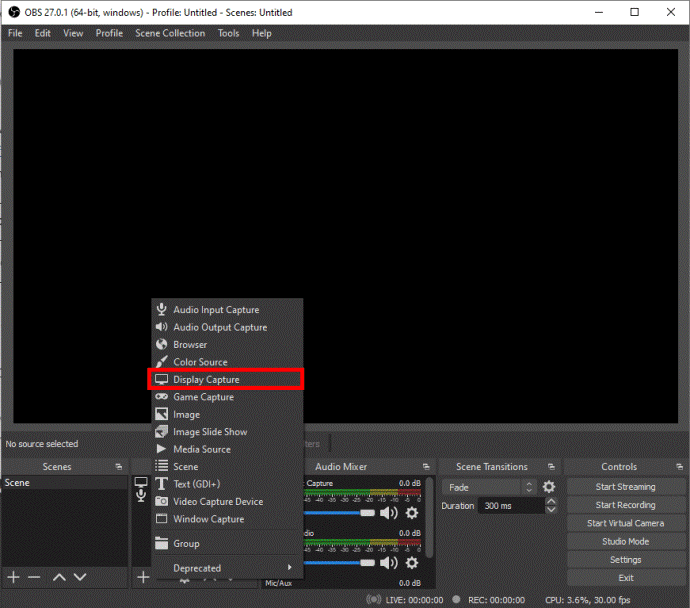
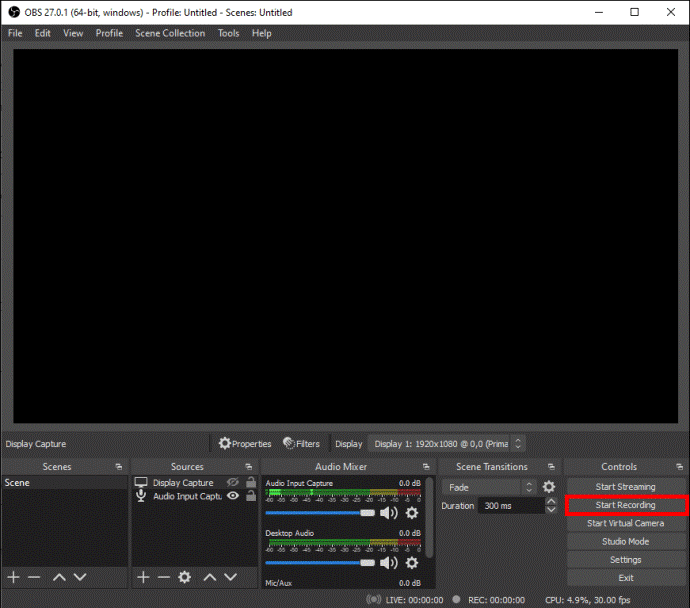
After you launch OBS, you'll be slammed with a scene that's added by default. Next, add a source inside the scene then click on the "+" button. Then click on the "Display Capture" on your Windows or Mac to select the capture. Click on the "OK" tab on the box that pops up. Then go to the "Settings" button located at the bottom of the screen and choose the "Output" tab. Specify the destination location on your computer where the recorded video will be saved.
Step 3 Start Skillshare recording
Click on the "Start Recording" tab to begin recording Skillshare video. Then click the "Stop Recording" icon upon completing the process. Your Skillshare video will be finally written to the specified destination folder in your settings.
Part 3. How to Make a Record on Skillshare Video Online
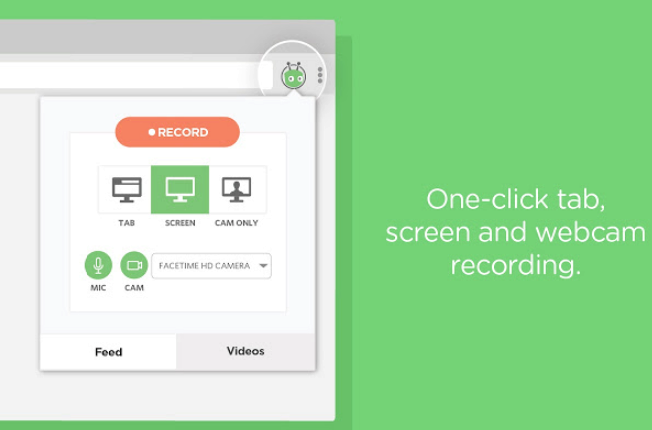
Screen Capture is an awesome tool to help you to record classes on Skillshare in simple steps. You need no app download for this tool. It is free for access and will deliver high-density videos. It also lets you record your screen with sound, including your voice and the computer's system sounds.
Follow these steps to record your computer screen with Screen Capture.
How to Make a Record on Skillshare
Step 1. First, visit the Screen Capture site. Then enable the app to use your webcam and microphone by checking the small boxes against them.
Step 2. Choose settings and then enable the Skillshare you wish to capture.
Step 3. Next, click on the "Start Recording" tab.
Step 4. Then save your Skillshare class recording to your computer. Finally, now share the recorded video on Skillshare and other sites.
Conclusion
These are the three ways how to record Skillshare videos to avail to your viewers. You have the option to record your screen online with Online Screen Recorder, OBS Studio, or TunesKit Screen Recorder. Even though they are all easy-to-use, TunesKit Screen Recorder offers you advanced editing features. It will record any video on your screen, capture audio, and produce high-quality videos.
