How to Record a Game Video for Twitch

Nowadays, playing games is not only between you and your friends. You can share your games with thousands and millions of people online by streaming your gameplay on live broadcast platforms like Twitch. Also, you can choose to record a game video and upload it. Having someone else watching you play games feels good because your audiences have the same game interest as you and they are just like friends watching you play beside you. Even if you are playing the game alone, you won't feel that lonely with audiences engaging in your video.
Compare to a live broadcast, some people prefer to record down the gameplay down since you can cut out some unwanted parts and edit the video to make it more attractive. Or you can just record the most interesting moments.
TunesKit Screen Recorder is one of the best gaming recorders for twitch. It can help you record everything plays on the screen of your PC or Macbook, such as a computer game, a video call, a video tutorial and so on. Moreover, you can use it to do some quick video editing. So today we will talk about how to record gameplay for Twitch channel.
How to Record Gameplay with TunesKit Screen Recorder
Step 1 Launch TunesKit and Select Recording Mode
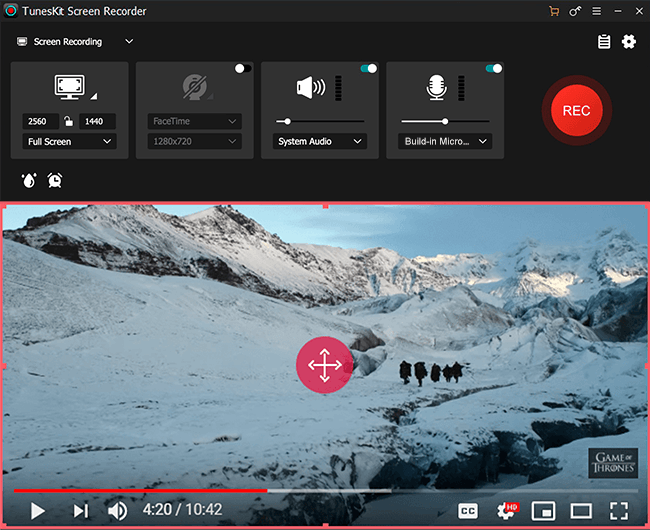
Download and install TunesKit Screen Recorder from the above link. Double-click to launch the recorder and you will see a toolbar as below:

If you want to record video of your screen, you can choose the  Video recording mode (by default); if you'd like to capture audio on screen, please switch it to the
  Audio recording mode. Here we take the video recording mode as an example and the other is almost the same.
Step 2 Set Recording Size and Area

Before you start to capture screen video, you need to select an area for recording. Click the "+" button, a recording window will pop up. Then you can either adjust the recording size manually or click the "down arrow" icon to select a resolution from the drop-down list.
Step 3 Adjust Recording Parameters
Next click the ![]() Settings icon at the lower right corner of the interface, and you'll see a lot of options for you. You can customize the recording settings before start recording based on your requirements. For example, change the output folder, output format or device, personalize keyboard shortcuts, add image watermarks, make a scheduled recording by setting the start and stop capturing time or change the cursor and click effects, etc.
Settings icon at the lower right corner of the interface, and you'll see a lot of options for you. You can customize the recording settings before start recording based on your requirements. For example, change the output folder, output format or device, personalize keyboard shortcuts, add image watermarks, make a scheduled recording by setting the start and stop capturing time or change the cursor and click effects, etc.

As for the output format and device setting, you can click the Format panel and choose a suitable format or device. TunesKit Screen Recorder now supports numerous video formats such as MP4, M4V, MKV, MOV, AVI, 4K Video, HD formats, etc. You can also export the recordings onto various portable devices including iPhone, iPad, Apple TV, Android Generic, Windows Phone, game consoles, smart TVs, etc., or share them on the social platforms like YouTube, Facebook, Vimeo, etc.
Step 4 Start to Record the Game
Now click the red REC button and get ready to start playing your target video after 3-second countdown. You can also stop the process temporarily by clicking the  Pause button or cut the recording and then continue recording by clicking the
  Scissors icon. To stop the recording completely, just click the
  Stop button.
The Bottom Line
You can also record any twitch stream you like with TunesKit Screen Recorder. Also, you can choose to record only video or only audio on your screen. When you finish the recording, use the built-in editor to do some cutting and editting. And after that, you can upload your game video to Twitch with a sensational title.
