How to Record a Zoom Meeting
Zoom has recently turned out to be one of the most important online meeting platforms for students, family members and employees. With hundreds of millions of people studying and working from home, Zoom offers a feature-rich and easy-to-use meeting services including online meetings, chat and video webinars.
However, it comes with some limitations when people want to record meetings of great importance. Today we'll sort it out for you to help you record Zoom meetings without any restrictions.

Record a Zoom Meeting Within Its App
Users are allowed to record Zoom meeting or webinar locally to the computer or to the Zoom cloud if you are a licensed user. But the latter one costs a decent amount of money and comes with a limited storage capacity. So here we'll mainly give you a step-by-step tutorial for local recording.
Step 1 Enable Local Recording Settings

(1) Sign in to your Zoom personal profile page and click Settings.
(2) Enter the Recording tab and make sure the Local recording setting is activated, if not, click the toggle to enable it.
Step 2 Start Local Recording

(1) Start a Zoom meeting as a host
(2) Click the Record button to start recording
(3) After the meeting has ended, there'll be a brief conversion process before the recording files are produced.
How to Record Zoom Meeting without Permission
Q: How to record zoom meeting as a participant with no permission?
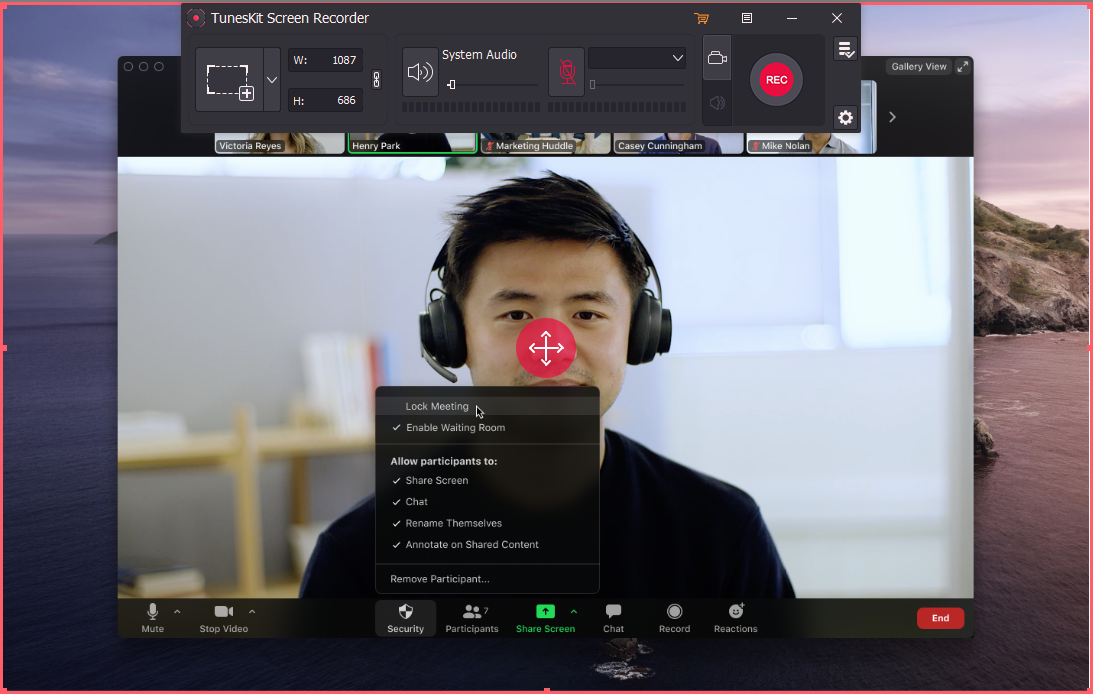
A:Only the host is allowed to record the meeting or the participants who are given the permission can record. If you want to record Zoom meeting as an attendee under no permission, you can only rely on a third-party application such as TunesKit Screen Recorder to finish recording.

TunesKit Screen Recorder is a miscellaneous one-stop tool for recording audio and video separately or simultaneously.
It is compatible with both Windows and Mac system. And it covers various recording scenarios such as video conference, webinar, live broadcast, PC games, video calls and every operation that displays on your computer screen. It also features a wide range of settings customization options that enable you to finish recording and basic editing in one application.
TunesKit Screen Recorder
- Caputure any videos play on your desktop, such as video meetings, webinar and live broadcasting
- Record screen video and audio separately or simultaneously
- Work well as a screenshot tool, output high resolution recordings
- Convert recorded video to any format without watermark
Step 1 Preset Output Settings

(1) Launch TunesKit Screen Recorder, and then click on the "Cog” button at the bottom right.
(2) Adjust output and time options such as output folder, format, starting and stopping time, etc. You can also customize your cursor that appears among recording process.
Step 2 Choosing Recording Area

You can choose recording area by manually framing the area you want to be recorded or selecting preset frame size or even typing in whatever size as you wish.
Step 3 Start Recording Zoom Meeting

You can choose to record either audio/video or both in prior to the recording process. Click the "REC" button and then after a three-second countdown, the recording will start.
During the recording process, you can click the "Pause” button to stop the stop recording or cut the recording and then continue recording by clicking the "Scissors”.
On completion, click the "Stop” button to finish recording and you can edit your output videos using the built-in editor.
