How to Record in VRChat in 3 Ways
VRChat is a free VR game, or you could say it is more like an online chat room where you get to interact with others as 3D character models. It can access on VR headsets and Steam. In VRChat, you can talk to people from all around the world. That's why we can see those interesting VRChat videos on YouTube.
After watching those interesting videos, have you got the idea to record a VRChat game but don't know how to do it? Don't worry. This article will show you how to record in VRChat in three ways.
Part 1. How to Record in VRChat on PC
Recording VRChat is something worth doing because you don't know what will the funny incident happen. With the TunesKit Screen Recorder, you can record any interesting scenes while playing VRChat.
This powerful screen recorder is stable and can output high-quality resolutions up to 4K, and can also export the recorded VRChat videos in more than 20 output formats such as MP4, MKV, MOV, and more for viewing on different devices and platforms. It provides a game recording mode that you can record VRChat games without latency. You can also add your own unique watermark before you start recording the VRChat game and trim it in the built-in video cutter.
TunesKit Screen Recorder
- Record VRChat games in high quality on Windows and Mac
- Provide several recording modes like Game Recording, Screen Recorder, Audio Recording, Webcam Recording, etc.
- Work well as a screenshot tool, output high resolution recordings up to 4K and 60 fps
- Has built-in time scheduler and video cutter
How to Easily Record VRChat with TunesKit Screen Recorder
Step 1 Launch and Select Game Recording
Download and install TunesKit Screen Recorder from the above link. Launch it, and you can see the main interface. Select the recording mode to Game Recording, and choose VRChat as the target source(make sure VRChat has open).

Step 2 Adjust Recording Settings for VRChat
Next, you can set up the recording preferences by clicking on the Options button. You can change the output folder, output format, cursor, hotkeys, webcam, etc., as you want. And we strongly suggest you use the hotkey feature to control the screen recorder, which can give you great convenience. In the cursor options, uncheck all the boxes to hide the mouse you don't want to appear in the recording process.

Step 3 Start VRChat Recording
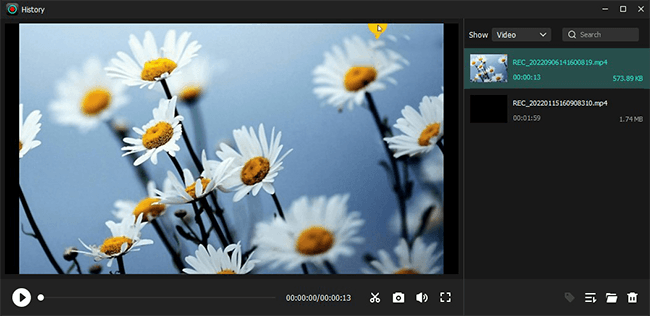
Before you start, you can enable the webcam and audio options if you want to record yourself. Then tap the REC button to start recording the VRChat game. When you finish, press the hotkeys to stop the recording. And you can see the recorded VRChat video in the History list.
Step 4 Edit VRChat GamePlay
Here you can double-click to check the VRChat recording or tap the Edit icon to trim it to the desired length. And hit the Folder button to locate the destination folder.

Part 2. How to Record VRChat with OBS
Suppose you are a gamer and streamer on a social media platform, and you might want to live stream and record VRChat games for your viewers. Then you should try OBS. OBS is a free open-source streaming and recording software for all beginners and advanced users. You can live stream and record VRChat gameplay directly on this program without additional installation and payment. You can also add a webcam to see yourself while streaming VRChat, as well as add picture-in-picture such as an image, insert a window, and more. Let's see how to start the VRChat recording.
How to Stream and Record VRChat on OBS
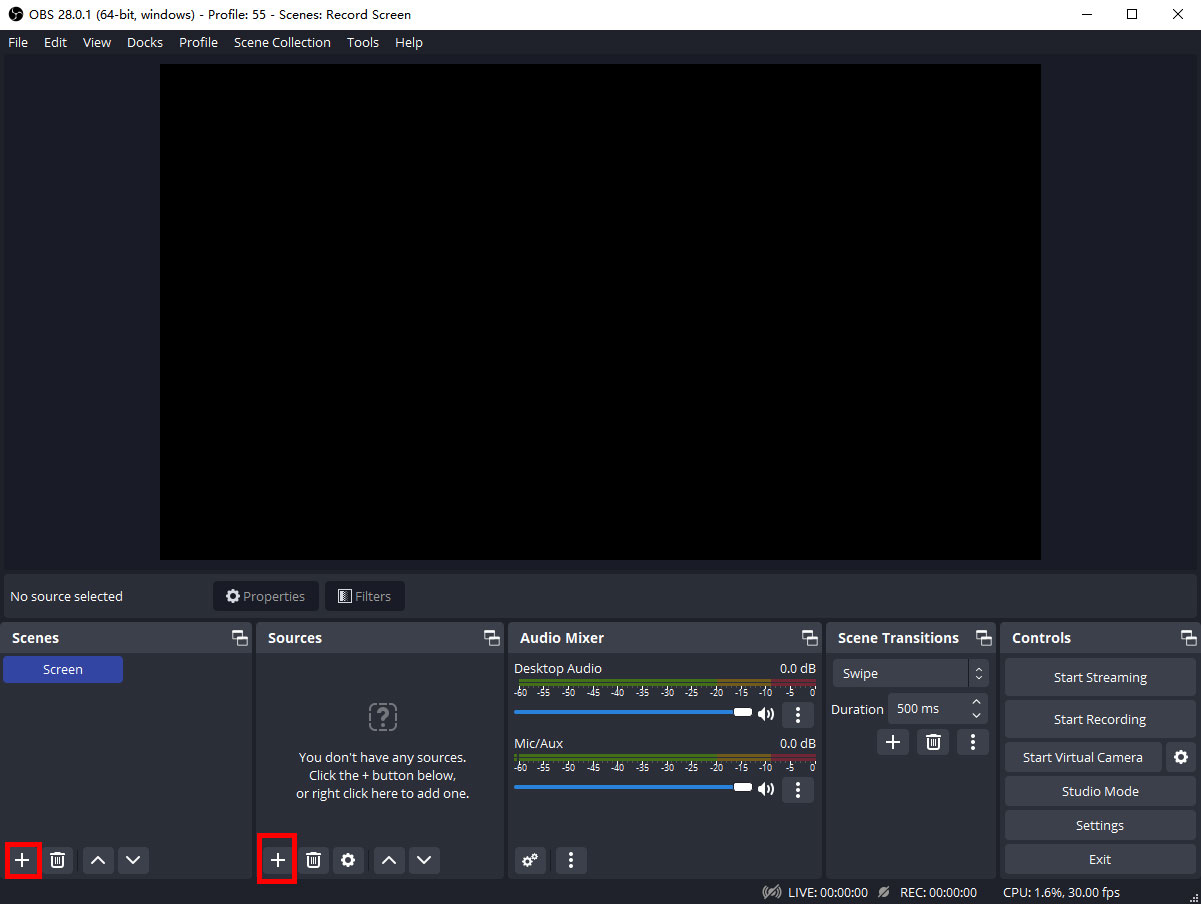
Step 1. Launch VRChat and get ready to record. Open OBS and create a scene in Scenes at the bottom left corner.
Step 2. Turn to Sources and click on the + button to add Game Capture. Select Capture specific window and choose VRChat in Window.
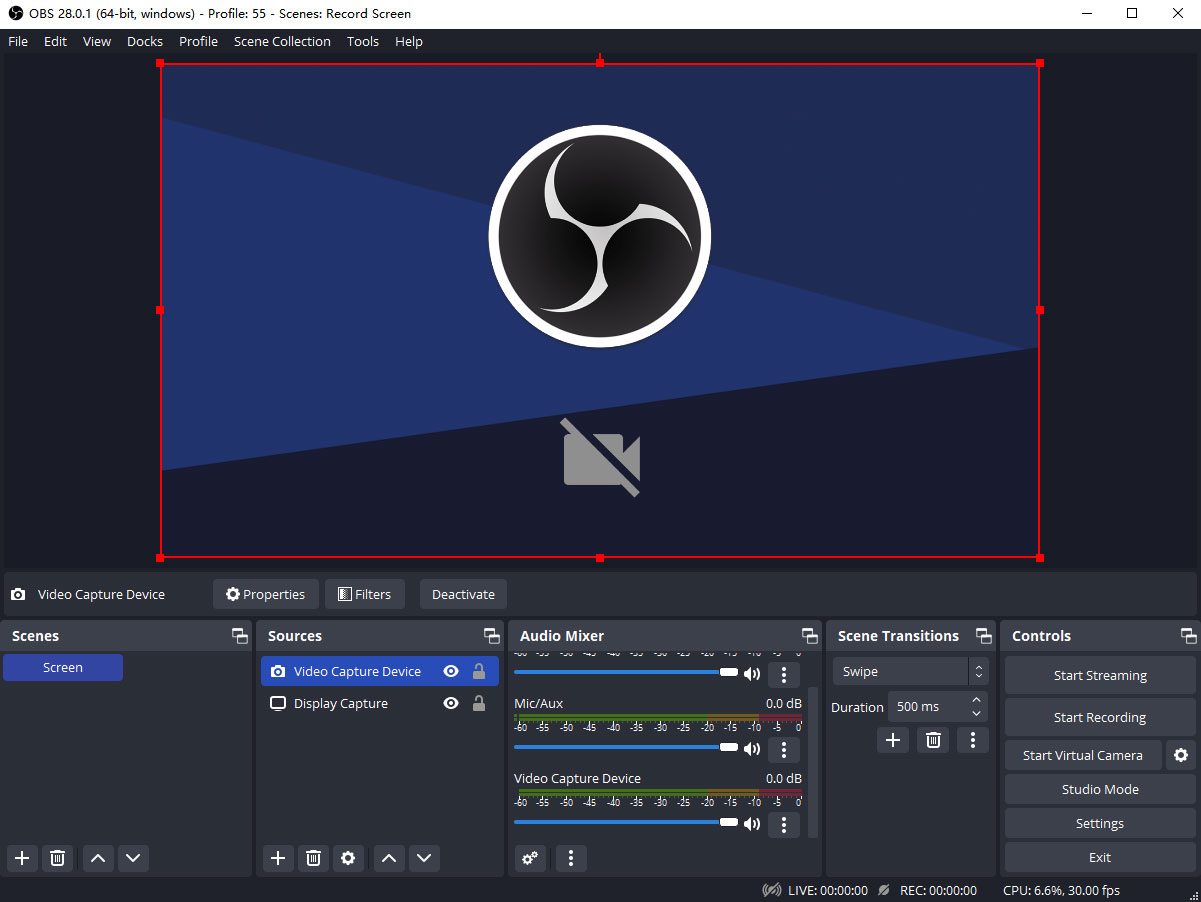
Step 3. If you want to add a webcam and record and your voice, please remember to add Video Capture Device, Audio Input Device, and Audio Output Device in Sources. Then select the corresponding devices.
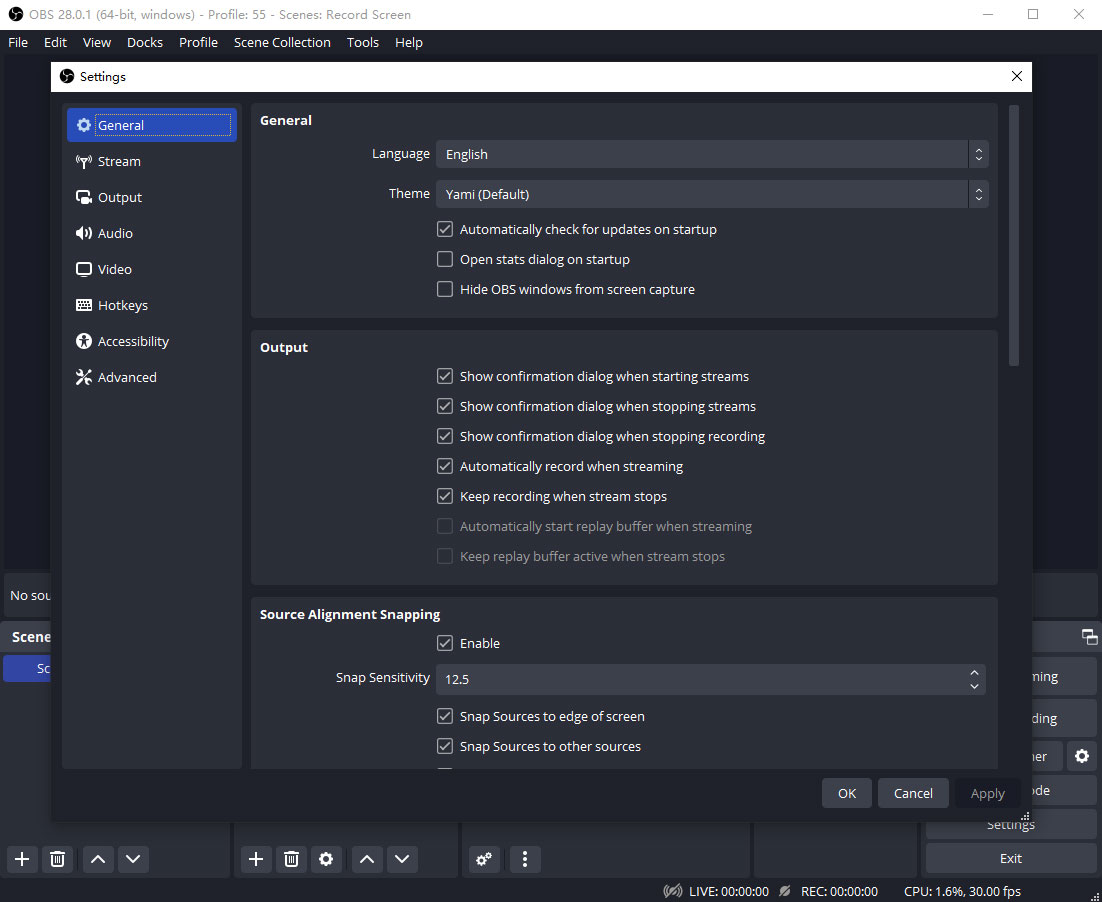
Step 4. This step is optional. If you want to stream and record a VRChat game simultaneously, click on Settings > General > Output and tick Automatically record when streaming. Then you need to set up the streaming service in Stream.
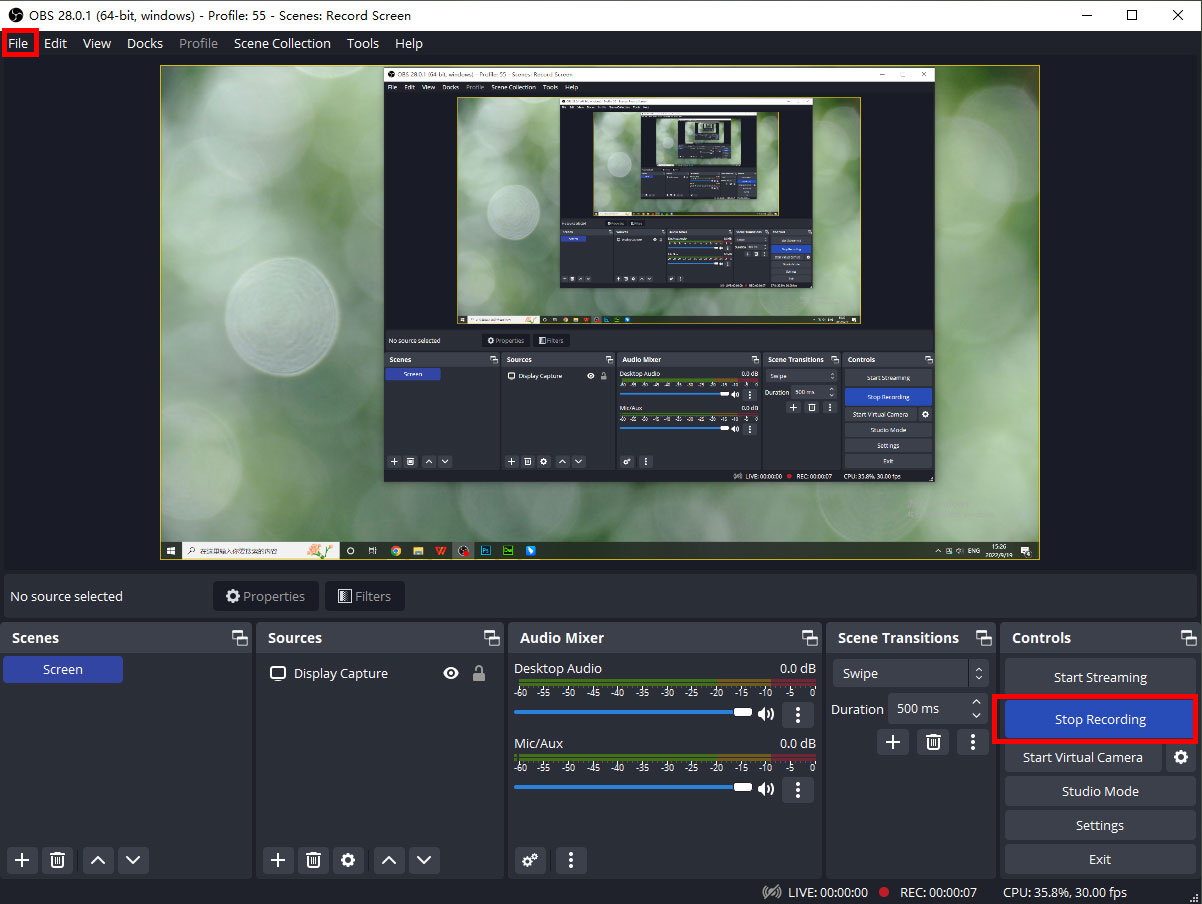
Step 5. Now you have it ready. Click on Start Streaming or Start Recording(if you don't need to live stream), and you can keep playing the VRChat game. When you finish, click on Stop Streaming or Stop Recording. Then you can find the VRChat recording video on File > Show Recordings.
Part 3. How to Record VRChat on Oculus Quest 2
Oculus Quest 2 (also known as Meta Quest 2) is a VR headset for playing VR games. It can connect to a PC wirelessly so the users can play Steam titles such as VRChat. In this part, we're going to show you a non-pc recording method, like how to record VRChat on Oculus Quest 2. Please check below.
How to Record VRChat on Meta Quest 2
Step 1. Put on your Oculus Quest 2 headset and enter the VRChat game.
Step 2. Navigate to the floating bar in front of you, click on the Share icon, and tap the Record Video button. Then the Recording option will turn red, indicating it's on the recording.
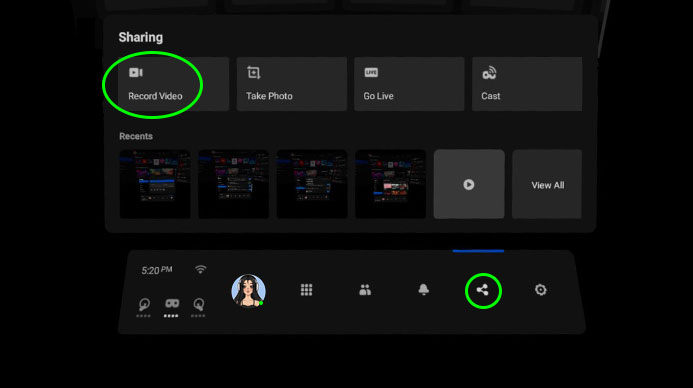
Step 3. When you finish the VRChat recording, tap the Recording button again to stop the recording. Then you can hit Recents > View All to check or share the VRChat recorded video.
Part 4. The Bottom Line
This article describes how to record in VRChat using three different methods. If you want to record VRChat games on your computer, TunesKit Screen Recorder is the best solution, as is OBS Studio. Also, you can use TunesKit Screen Recorder to record your Twitch gameplay and other game videos, as it has no time limit and no watermark. As for non-PC recording in VRChat, the Oculus Quest 2 is essential for you. Try them and see which is better for you.
