How to Screen Record FaceTime with Audio on Mac/iPhone/PC
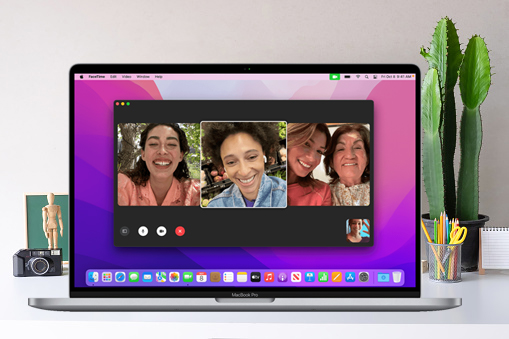
It's common to FaceTime with family, friends, or coworkers, and there's always a Facetime call you want to save. It could be a wonderful conversation with your significant other or an emergency call from work. FaceTime calls can be recorded on both iPhones and Macs thanks to a built-in screen recorder. But we also provide other screen recorders to screen record FaceTime calls in this post. All you need to do is go through the below guide and try the FaceTime recording.
Part 1. How to Make a FaceTime Recording for Free on Mac
Users of Mac computers or Macbooks should know that QuickTime Player is a free program that comes pre-installed. In addition to playing media files, this program comes equipped with a recording feature that is a surprise to users who are unfamiliar with it. So when you FaceTime with your friends on your Mac devices, you can try this feature to screen record FaceTime calls. Here are the steps for you.
How to Screen Record FaceTime via QuickTime Player
Step 1. Launch QuickTime on your Mac. Click File and from the drop-down list, select New Screen Recording. Click the small down arrow next to the record button and select Internal Microphone.
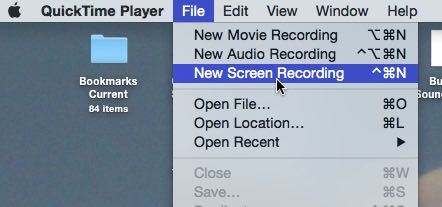
Step 2. Now you can set up your call in FaceTime. You can let QuickTime to record the entire screen or just select an area to record the FaceTime call. When all is ready, click on the Record icon.
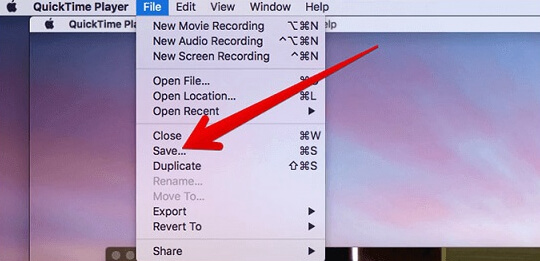
Step 3. Click the Stop icon when you finish the FaceTime call. After that, click File again and choose Save. Enter a name for the recording and decide which folder you want to save it. Confirm the settings by clicking Save.
Part 2. How to Screen Record FaceTime with Audio on Mac
The reason why we bring in TunesKit Screen Recorder is that it offers more features than QuickTime Player. Since QuickTime Player is not focused on screen recording, its FaceTime recording quality is not good enough, while TunesKit Screen Recorder can help you get a hiah-quality FaceTime recording and do more with it.
With its help, you can record FaceTime call to different output formats, such as MP4, MKV, MOV, etc., and cut the FaceTime recording with its built-in editing tool. Besides FaceTime calls, it can also record other video calls, such as Facebook, Skype, Slack, etc.
TunesKit Screen Recorder
- Record FaceTime call with high quality
- Record FaceTime screen video and sound separately or simultaneously
- Convert recorded FaceTime video to any format
- Have a built-in time scheduler and video editor
- Support recording video calls from WhatsApp, Telegram, Skype, and more.
How to Record FaceTime Call with Audio via TunesKit Screen Recorder
Step 1 Launch TunesKit Screen Recorder
Download and launch TunesKit Screen Recorder on your Mac. Click the Options button to enter the Settings panel. Here you can change the output folder and output format, personalize keyboard shortcuts, add image watermarks, make a scheduled FaceTime recording by setting the start and stop capturing time or change the cursor.

Step 2 Customize an Area to Record FaceTime Calls
Open the FaceTime and initiate a call. Click the "+" button and choose Select area. Then you can adjust the position and the size of the recording window.
Step 3 Begin to Record FaceTime Call
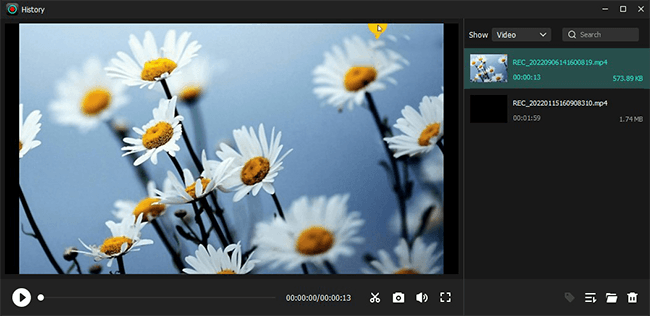
Now you can click the REC button begin the FaceTime recording. Click the Stop button on the toolbar when you want to stop the FaceTime recording. If you've set a hotkey in step 1, you could directly press the hotkey on your keyboard to finish it. After that, a window will pop up to show you the preview of your FaceTime recording and you can click the Edit icon to trim the FaceTime recording.
Step 5 Save and Locate FaceTime Recording File
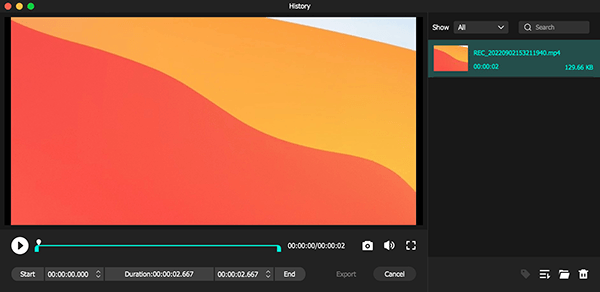
When all is done, you can check the latest FaceTime vieo recording in the History list. And you can tap the Folder icon to locate the saving path.
Part 3. How to Screen Record FaceTime with Sound on iPhone
To record FaceTime calls on iPhone, iPad, or other iOS devices, you don't need any extra help from third-party apps if you are using iOS 11 or later. The built-in screen recording feature on the iPhone will do just fine. Here are the easy steps.
How to Record Facetime on iPhone
Step 1. Simply swipe up from the bottom of your iPhone screen to open the shortcut interface of the Control Center.
Step 2. Find the Screen Recorder icon and long-press it for at least 2 seconds. Turn on the Microphone if it is disabled. This can help you record FaceTime calls with audio.
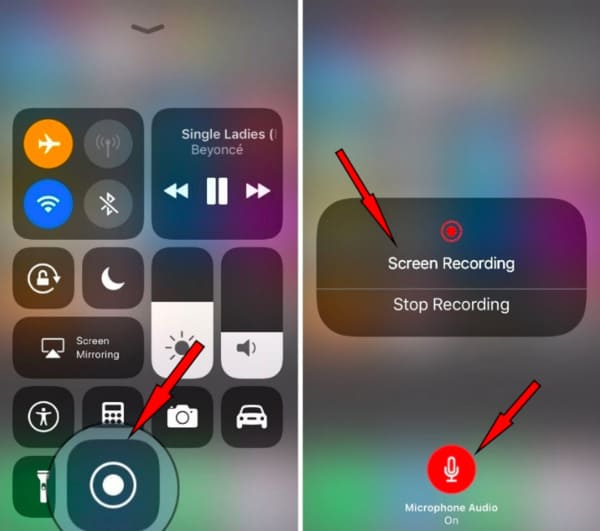
Step 3. Tap on Start Recording and after a 3-second counting down, it will start recording the ongoing FaceTime call on your iPhone.
Step 4. There will be a status bar at the top of your iPhone during FaceTime recording. Tap on the bar and tap the Stop button when you want to stop the FaceTime recording. The screen recording will later be saved as a video to the Photo Gallery.
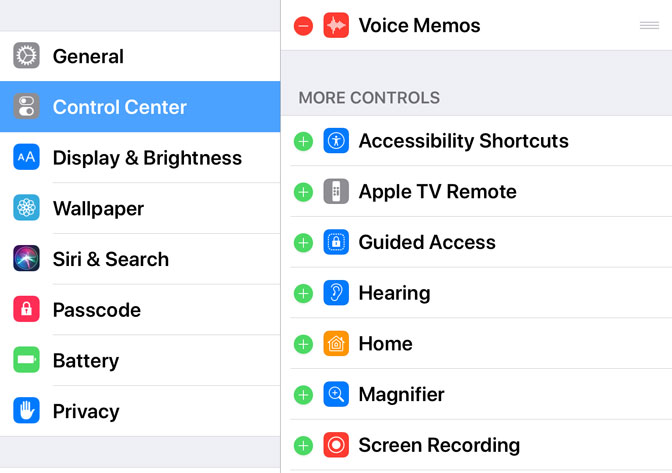
Note: If you can't find Screen Recording on the shortcut interface, please go to Settings > Control Centre Customise Controls, then find Screen Recording and add it up to the INCLUDE catalog. This can help you add the screen recording feature to the shortcut. For those who are still on iOS before 11, there are many free screen record apps out there for you.
Part 4. How to Record a FaceTime Call on PC Online
Though Windows PC does not support making a FaceTime call, you can still join FaceTime calls started by others via Google Chrome or Microsoft Edge. But the premise is that the FaceTime call initiator's Apple device needs to be in iOS 15 or macOS Monterey.
After that, whether you join a FaceTime call through Google Chrome or Microsoft Edge, you can use TunesKit Screen Recorder to record FaceTime screens in the same way. But in this part we'd like to present you with another way to record FaceTime calls, which is to record them via FaceTime call recorder online.
There are various online screen recorders on the internet, and here we want to take Screen Capture as an explam to show you how to record FaceTime Calls online.
How to Record FaceTime Calls Online for Free
Step 1. Before you join the FaceTime call, open a broswer and access Screen Capture.
Step 2. In the main page, tick the recording option such as Microphone, sound, or webcam. Then hit Start Recording.
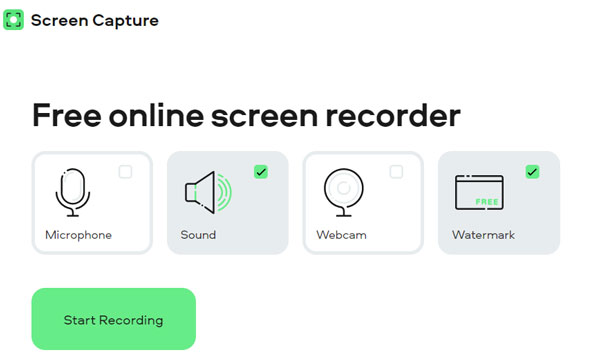
Step 3. Next, select the windows you want ot record. So in thi step, you can join the FaceTime call fist, then back to Screen Capture to choose Chrome Tab > FaceTime Call. Then click on Share.
Step 4. Now you can start your FaceTime call with your friends. When you finish, hit the Stop Recording button and check the recorded FaceTime video. And you can tap the Download button to save the FaceTime recording to your PC.

Part 5. Conclusion
We have concluded how to record FaceTime with audio using the methods above. If you prefer the freeway, you can try QuickTime Player, iPhone built-in recorder, or Screen Capture online. But if you value the video quality, you're suggested to TunesKit Screen Recorder, which will give you high quality FaceTime call recordings.
