How to Save Past Mixer Streams for Later
How to save streams on Mixer? You are not the only one to ask this question. And there are online communities like Reddit that are filled with answers. As a streaming platform, Mixer is one of the most-used gaming platforms where the streams can be saved. The Video on Demand is a feature that is liked the most by the users. It is well competing for other streaming platforms like Twitch and YouTube gaming (click to know how to download video on YouTube). Facebook gaming has also been on the hit list of this amazing platform. The best part is of this service is that you can easily store the past streams with the user-enabled features that are present. In this article, I will teach you how this can be done with ease and perfection. All the latest tools and developments in this regard will make sure that you get all the necessary information that is required.
Part 1: The Advantages of Saving the Streams
Another very popular question is that how to download videos from Mixer. This is something that has fascinated the audience and they want to make sure that the videos become their own once the streaming is over. With the best and foolproof methods that will be explained in this part, you will be able to get the work done without hassle.
There are 2 methods that are available and are known to save the streams of this platform. Before we delve deep into the subject, let's take a look at the advantages of saving the streams of Mixer.
Going towards Perfection
This is the most important aspect. There are many streamers that are of the view that there is always room for improvement. For such streamers, saving their streams and then watching it again is the perfect way to make sure that they overcome the deficiencies if any. They will obviously perform better in their coming streams for sure.
Tech Details
There is high-end equipment that is used in this regard to make sure that the streamers get the best result. Recording and watching the streams will make sure that they get the info about their equipment from a user's perspective. This will make sure that the best and the most ideal scenario is created and they get the equipment replaced if needed.
Backup
This is another important aspect that will make sure that data loss is prevented. If for any reason something goes wrong with the Mixer account then in case of saving the data and downloading it you get all your streams back with ease. It is very important as this will make sure that you get the best backup that is updated automatically.
Above are some of the most important aspects that one should consider in this regard and it is important that these are kept in mind. The 2 important and main methods that I will be discussing in this article will be explained one by one for more information.
Part 2. How to Download Videos from Mixer in The Official Version
This is the most-used method and it will ensure that each and every stream is saved on your Mixer account. The steps which you need to follow are mentioned as under:
Step 1: Open the Mixer website to start with the process
After installation, launch the program and choose the recording mode to proceed with the process.
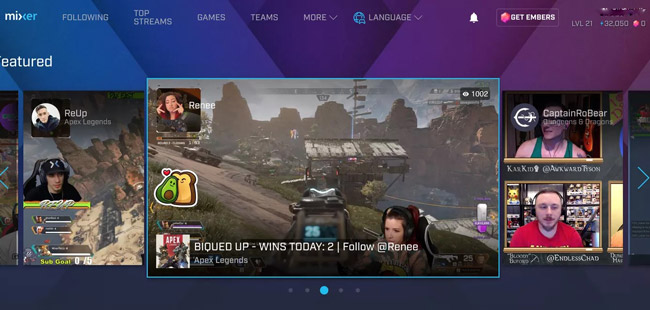
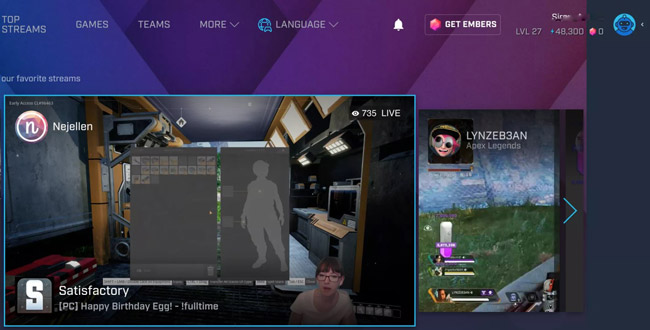
Step 2: Click on the user icon on the upper right corner of the screen
It is important that you click the "+" sign to select the recording area. You can also record the full screen if required.
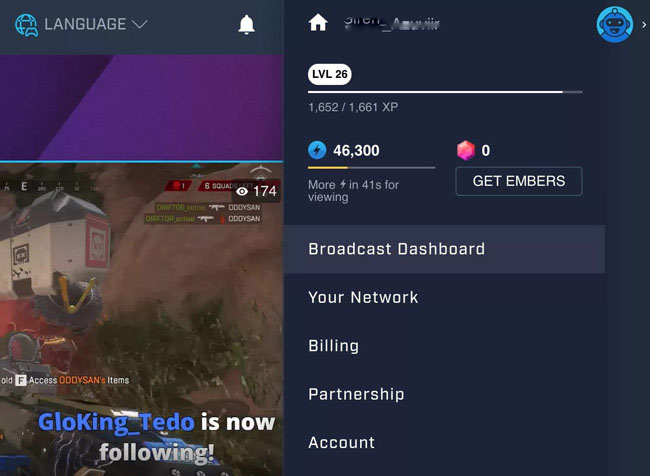
Step 3: From the drop-down menu, you need to select the Broadcast Dashboard
Step 4: Save the videos
Toggle on the option "Keep recordings of my stream". Scroll a bit down and click "save" to finish the process in full
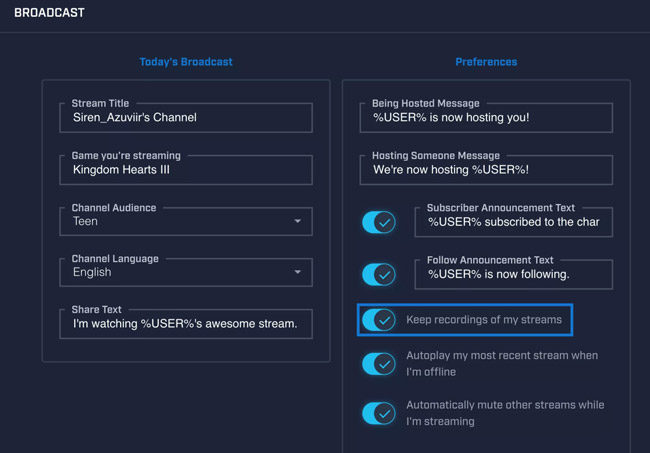
Some users might not find all the options and therefore it is necessary that the screen resolution is changed to get the full view of the Mixer. Once you get the full view, you will be able to proceed with the process easily.
Part 3. How to Download Past Streams from Mixer Using TunesKit Screen Recorder
This is the best answer to the questions like how to save streams on Mixer and can you download past streams from Mixer. Once activated, this is the best program that will make sure that you get the best results. It has been rated high by the users and this is only due to the state of the art services that it provides. With TunesKit Screen Recorder, the process becomes too easy to perform. It is also important that you get to know the stuff like screen recording that can be applied in different other fields.
TunesKit Screen Recorder
- This program is too easy to record video and audio separately. These can also be combined with ease and as per need.
- Setting recording preferences has never been as simple as it is with this tool. The well laid-out interface is too easy to deal with.
- With this software, you can save your streams in a popular format, such as MP4, M4V, MOV, MKV, WMV, MPEG, 3GP, WebM, 4K HD, and many more.
- There is a large number of devices that are supported by this program. It includes every major brand and device that you can think of.
- The best thing about this program is that it can easily extract the audio from the recorded audios with lossless quality to get you the best results.
The steps which a user needs to follow have been mentioned as under for better understanding.
Step 1: Launch TunesKit Screen Recorder

After installation, launch the program and choose the recording mode to proceed with the process.
Step 2: Set Recording Area
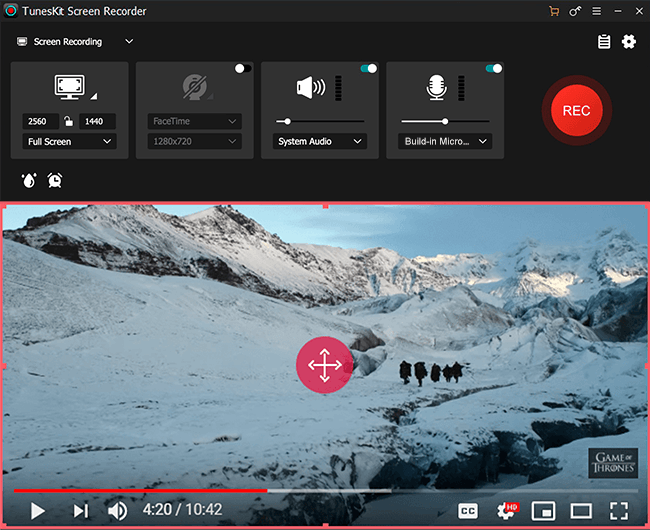
It is important that you click the "+" sign to select the recording area. You can also record the full screen if required.
Step 3: Adjust the Settings

Click the settings button on the bottom left corner of the interface to access the settings panel. Here you can easily adjust the settings as needed.
Step 4: Start Recording

Click the REC button and with a delay of 3 seconds, the recording of the designated area or the screen will start automatically. Click the stop button to stop the recording.
Step 5: Preview, Save and Edit

Once the recording has been completed, you can save and edit it as per requirements to finish off the process in full.
Conclusion
This article has been basically written to answer the questions, such as how to download past streams from Mixer. The TunesKit Screen Recorder is the best and the state of the art option that can be applied to get the problem solved. While you stream, the program will work at the backend to make sure that the best recording outcome is provided. It is also important to make sure that the program is correctly set up so that you get the desired outcome with ease and perfection. With TunesKit Screen Recorder, downloading and editing the recorded streams is also easy and user-friendly. This is, therefore, the recommended method out of all presented in this article.
