YouTube to iTunes: How to Download Music from YouTube into iTunes
"Sometimes, I often find lots of interesting music video on YouTube, and I want to extract music from YouTube video and then add the music to iTunes for listening and management. But I cannot find an appropriate solution. So, is there an easy way to download music from YouTube to iTunes library?"
As the biggest name in streaming video, there are tons of music videos for all music lovers to find. No matter of free-spirit musician or professional artists, they all tend to release their music works on YouTube as their personal account. So, when you like one of them, you are eager to save it to iTunes for enjoying.
Indeed, there are many solutions for you to download music from YouTube to iTunes library. Here we'll introduce two solutions for you to achieve YouTube to iTunes. It's easy for you to convert YouTube to iTunes. Let's get started.
Method One - Download songs from YouTube to iTunes
To download music to iTunes, you could make use of TunesKit Audio Capture. It is a handy and charming tool for capturing any audio from streaming services like YouTube, Deezer, Tidal and more and recording any sound on your computer with the original audio quality.
Key Features of TunesKit YouTube to iTunes Converter
- Record audio from YouTube Music to FLAC, MP3, AAC, M4A, M4B, WAV
- Download and capture streaming audio from any programs and websites
- Preserve streaming music with the original audio quality and full ID3 tags
- Support many customization functions like trimming, cutting, and merging
Perform the following steps to download music from YouTube to iTunes
Step 1Fire up TunesKit Audio Capture on the PC
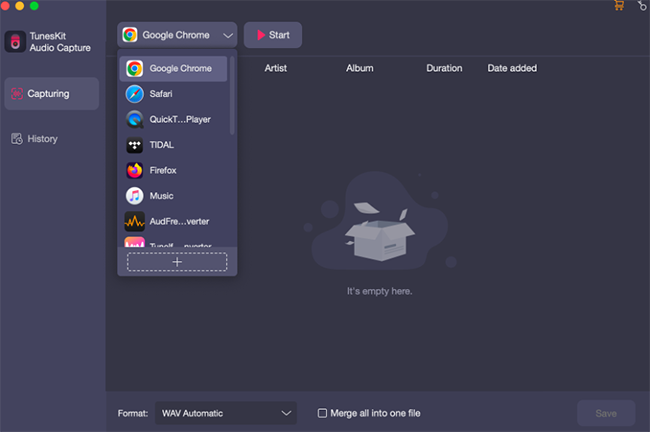
Once you launch TunesKit Audio Capture on your computer, you will see there are lots of programs listed on the interface of TunesKit. You need to check whether there the browser for navigating to YouTube website. If not, drag and drop the browser to the main home.
Step 2Configure the output audio parameters
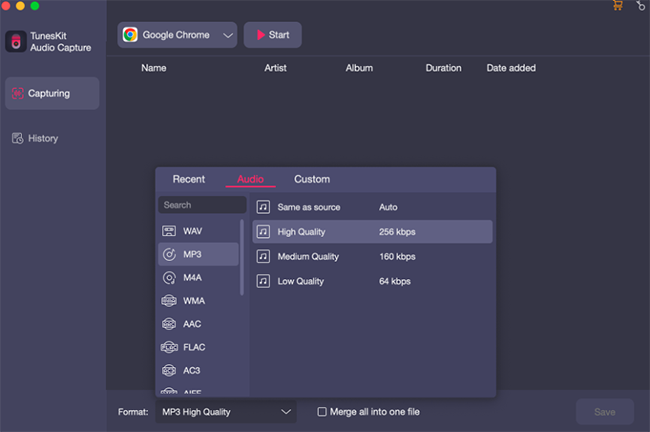
Now, you need to configure the output audio parameters. There are up to six audio formats including MP3, FLAC, AAC, WAV, M4A, and M4B for you choose from. You also could adjust the value of bit rate, sample rate, and channel.
Step 3Begin to record music from YouTube music
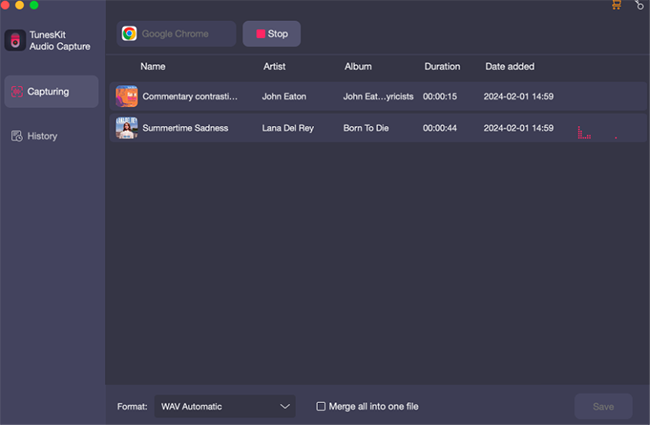
Open the browser from TunesKit and enter YouTube website to start the playback of the track. Wait for several seconds and the program will download YouTube music. Then you could stop the recording and trim the recorded YouTube music as you like.
Step 4Transfer YouTube music to iTunes library
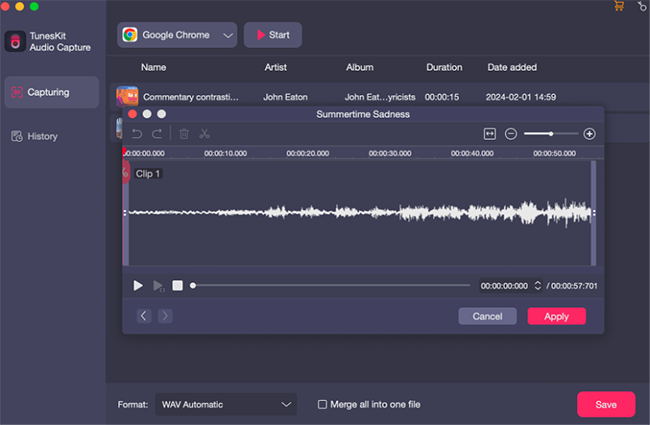
After saving all the recorded YouTube audio to your computer, you could prepare to upload YouTube music into iTunes. You can click "File > Library" to import YouTube playlist from your computer to iTunes or create a new playlist to collect all the YouTube music files.
Method Two – Download audio from YouTube to iTunes
To manage your favorite YouTube music on iTunes, you can get help from TunesKit Screen Recorder. It is a uber-popular and cross-platform video and audio recorder that captures any video and audio from any source on your computer in any format with high quality retained.
Key Features of TunesKit Screen Recorder
- Capture any audio and video from streaming services like YouTube
- Record any audio and video on screen separately or simultaneously
- Extract audio from video files to MP3, M4A, M4B, AAC, FLAC, WAV
- Serve as an audio recorder and editor and screen recorder and cutter
Follow the following process to record audio from YouTube to iTunes
Step 1Customize the recording settings

Open TunesKit Video Recorder on your computer and switch the mode of video recording to audio recording. Click the "Cog" button to open the setting panel and you can change the basic record options like audio format, output folder, time scheduler and more.
Step 2Begin to record audio from YouTube

Go to YouTube website and choose a music video to play on YouTube. Then you could click on the "Start recording" button to record YouTube audio. If you don't set the time schedule, you need to manually stop the recording of YouTube audio.
Step 3Trim and edit the recorded audio
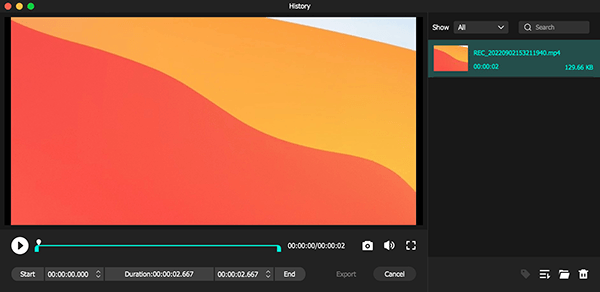
Then the recorded audio will appear in the history and you could click the "Edit" button at the rear of each track to trim and cut the recorded YouTube audio. In addition, you could also edit the tag information of each audio.
Step 4Add YouTube music to iTunes library
Finally, all the recorded YouTube audios have been saved to your computer, and you could prepare to the last step of downloading MP3 from Spotify to iTunes. Just do the same last step as in the method one. You can directly import or build a playlist for uploading.
Except for the above YouTube to iTunes MP3 converter, there still exists another YouTube to iTunes converter online. If you cannot afford the purchasing of the tool, you could choose Audacity which also can help you to download mp3 from YouTube to iTunes if you don't mind the sound quality.
