How to Transfer Music from Spotify to Audiomack

Audiomack is a music service established in 2012. In terms of the number of users, Audiomack is much less than Spotify which is one of the most popular music platforms. Despite the situation, Audiomack is becoming more and more popular in the African market so there are still many music lovers who desire to use Audiomack to listen to their favorite songs. But sometimes some songs cannot be found on Audiomack which can be listened to on Spotify. Is there a way to put Spotify music into Audiomack? Good news for you. This article will give you useful ways to transfer music from Spotify to Audiomack.
What Formats Does Audiomack Accept?
Although it is free to upload songs to Audiomack, there are some requirements you need to know before you upload your music. Audiomack only accepts 6 formats including MP3, FLAC, WAV, AIFF, OGG, and M4A. moreover, the size of each file should be less than 500MB.
Method 1. Put Spotify Music into Audiomack via TunesKit Audio Capture
The best way to transfer Spotify playlist to Audiomack is to use TunesKit Audio Capture to download the playlist from Spotify first. It is the best way to retain the original audio quality of each song in that playlist.
TunesKit Audio Capture is a specific audio recorder, which is responsible for recording all of the sound playing on your computer. Those sounds can include voice from a video, a song from a music platform and your voice when you have a meeting on your computer. Audio Capture works on all kinds of music services including Spotify and Audiomack. After downloading, Audio Capture can be a simple audio editor to trim unnecessary audio clips. As you want, the software can help you convert the audio to MP3, M4A, AAC, M4B, FLAC, and WAV in high quality.
Key Features of TunesKit Audiomack Downloader
- Download streaming music to Audiomack
- 6 popular formats including MP3, AAC, FLAC, WAV, M4A, and M4B available
- Preserve streaming music with the original audio quality and full ID3 tags
- Support many customization functions and groove the songs even offline
1. How to Download Songs from Spotify with TunesKit Audio Capture
Step 1 Download and install
Click the Try It Free button above to download the software or visit its official website to download it on your computer;
Step 2Select desired audio format
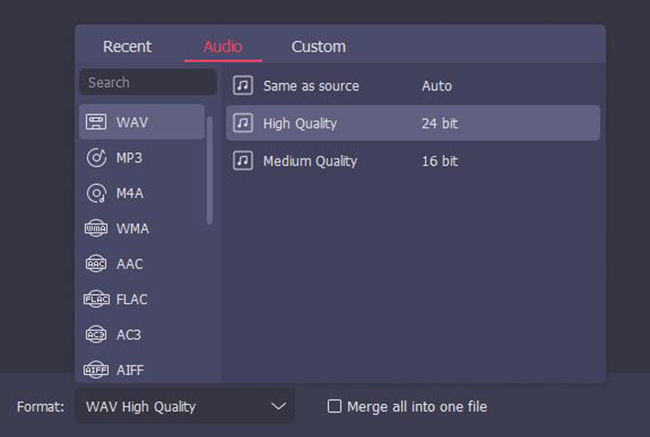
Click the Format icon on the bottom right of the main interface to choose the audio format you wa
Step 3Play and download target music
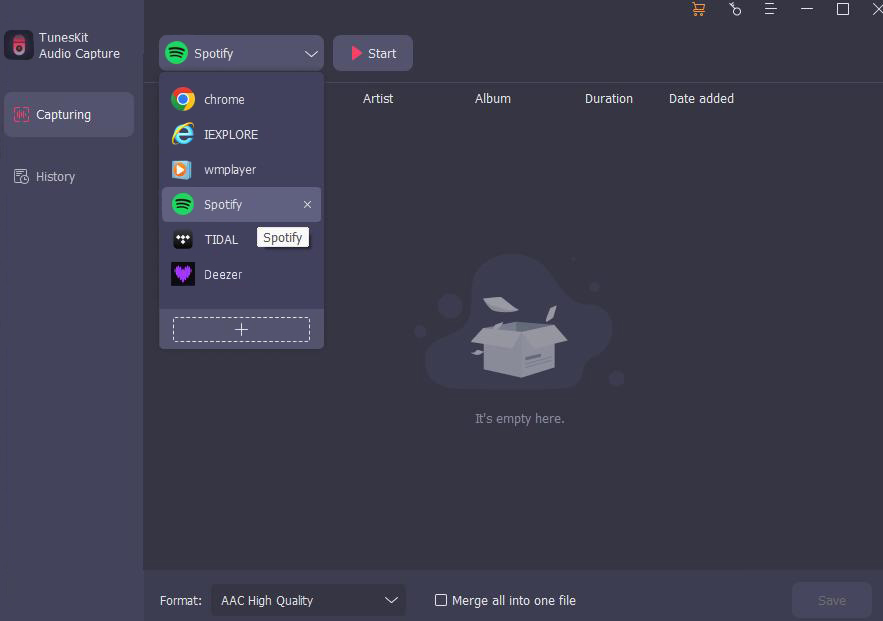
Click the Chrome icon or the Spotify icon to play the Spotify music; if there is no Spotify icon on it, you can click the + icon to add the Spotify software to the main interface; when you play the music, Audio Capture will download it automatically;
Step 4Stop and edit the music clip
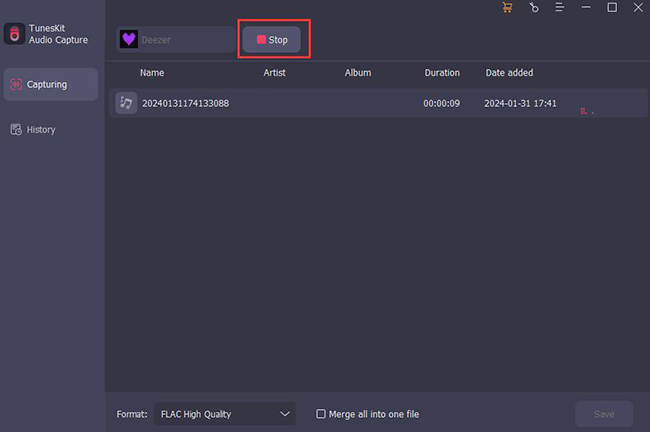
Click the Stop button to end the download; after that, if you find that there are some clips you don’t want, you can click the Edit icon to delete them;
Step 5Save and find the downloaded music
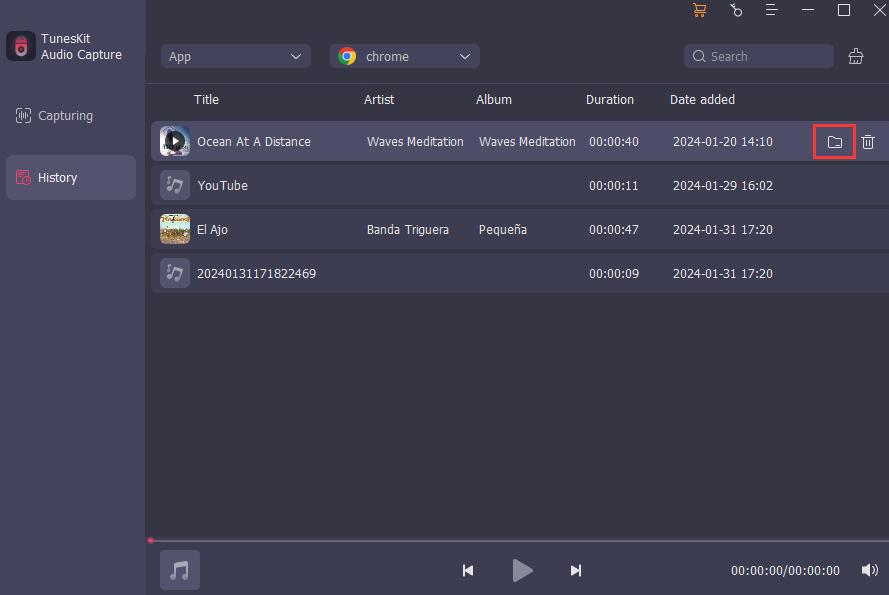
Click the Save button to store it on your computer; all of the downloaded music can be found on the History list; you can find the list by clicking the Converted icon; if you want to locate the place on your computer’s folder, just click the Search icon.
2. How to Transfer Downloaded Music from Spotify to Audiomack
Step 1: Visit the website: Audiomack.com on your search engine and then log in to it with your account;
Step 2: Click the Upload button;
Step 3: Browse your files and find the song you want to upload;
Step 4: Write all the information about the song like song title, features and producer;
Step 5: Click the Upload button.
Method 2. Transfer Spotify Playlist to Audiomack via Online Tool
Online tools are often quick and convenient, but their stability is not sure. You can use them when you meet emergency. The online tool we recommend here is Soundiiz.
Soundiiz is a comprehensive online tool for transferring music. Almost all music services can be found on this tool.
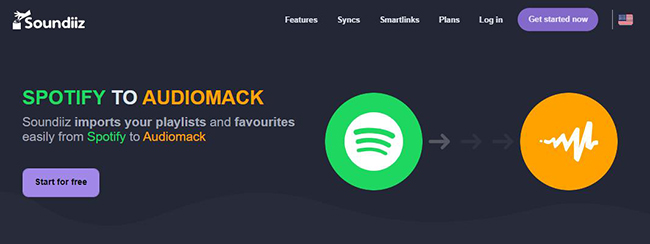
How to use Soundiiz to transfer music from Spotify to Audiomack
Step 1: Enter the website of Soundiiz and then click the Start for free button to log in to your account;
Step 2: Click the Transfer option on the left list of the screen;
Step 3: Click the first + icon to select the source as Spotify and then click the second + icon to select the destination as Audiomack;
Step 4: Click the Start > Playlist > Save configuration > Confirm icon;
Step 5: Click the Begin the transfer button; if the “Conversion success” words appear on the screen, it means the transferring process has finished.
Method 3. Transfer Music from Spotify to Audiomack via MusConv
MusConv is a useful desktop software for transferring music. It is more stable than online tools.
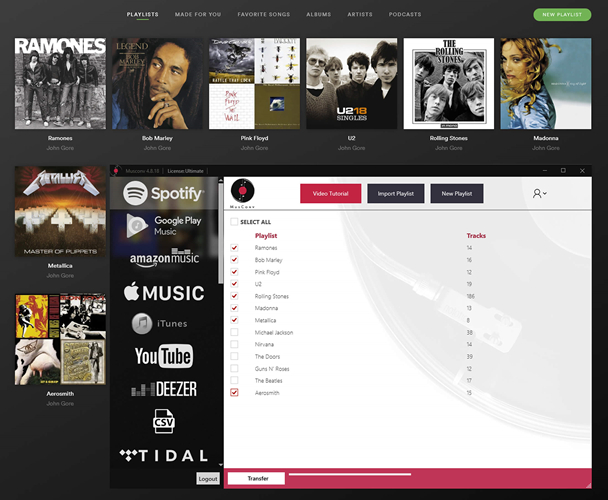
Step 1: Download the software by visiting the website of the software; remember login to it with your account;
Step 2: Select Spotify as the source and let MusConv visit your Spotify; choose the song or playlist that you want to transfer to Audiomack;
Step 3: Click the transfer icon and choose the Audiomack as your destination.
FAQ about Spotify and Audiomack
Q1: Is uploading music to Audiomack free?
It is completely free to upload music to Audiomack for all users. It allows you to share your songs, albums, and podcasts to Audiomack’s millions of users and everyone else around the world
Q2: What is the main different between Spotify and Audiomack?
Audiomack is an absolutely free music platform for content creator to share their music without any limitation and restriction. It focus on new, independent, and up-and-coming artist while Spotify is a fill-catalog streaming service.
Q3: Which country uses Audiomack the most?
According to the global distribution of visitors, Audiomack’s main audience is located in the United States followed by India and Nigeria.
Conclusion
According to the description and suggestion, you can try one of them or all of them to decide which method is the most suitable for you. Transferring music from Spotify to Audiomack is not an easy assignment. TunesKit Audio Capture let this process easier. When you do it successfully, you have done a good job.
