How to Rip Audio from DVD on Windows/Mac
DVD, also called Digital Video Disc, is a kind of disc that can store several videos. It can satisfy people’s need for large storage. However, not everywhere has the devices to play videos on DVD, so if we can rip the video or audio on DVD to our PC, we can use them on most of the devices we have. But it is not so easy to do it. We need to ask some tools for help so that we can get the video or audio successfully. In this article, we summarize the two best ways to help you rip audio from DVD on Windows and Mac. If you are looking for related solutions, keep reading.
Method 1. Rip Audio from DVD via VLC Media Player
VLC Media Player is a media player which supports most of the file formats. But it can not only play videos and audios but also convert a file from one format to another, including from a video format to an audio format. Although the audio and video converted by VLC are not so good, it is also one of the most convenient ways to convert formats. In this part, we will give you the most detailed tutorials to rip audio from DVD on Windows and Mac.
1.1 Extract Audio from DVD - on Windows
Step 1: Put your DVD on your computer’s DVD drive. You should make sure your computer has an internal DVD drive. If not, you need to install an external DVD driver to let your DVD be recognized by your computer;
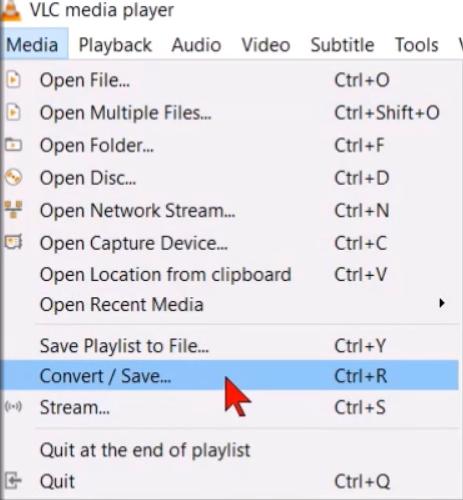
Step 2: Download and open VLC Media Player on your computer; click the word “Media” on the top left of the homepage and then choose the Convert/Save... option;
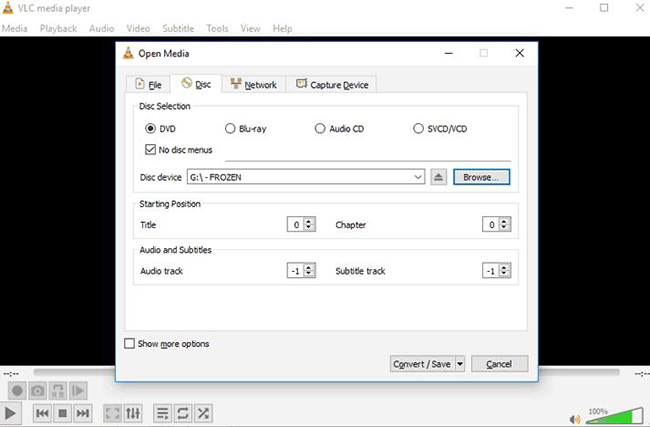
Step 3: A new pop-up will appear as follows; click the word “Disc” to enter the DVD converting page; in this panel, you need to choose DVD > No disc menus to make sure your files from the disc you want; Click the Convert button to enter a new page;
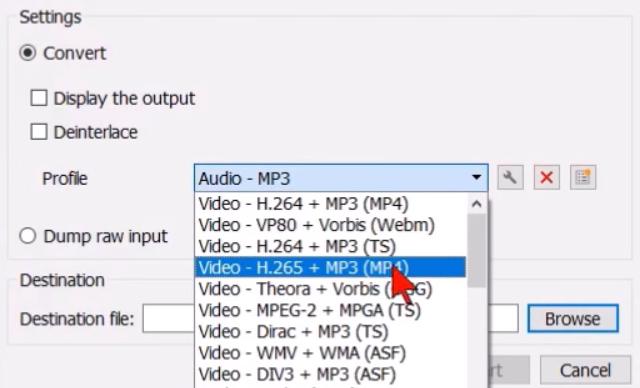
Step 4: Click the drop-down arrow to choose the audio format you want; or you can choose the Audio - MP3 directly;
Step 5: Click the Browse button to choose a folder to store the audio you will convert;
Step 6: Click the Start button to begin the converting process. According to the size of your DVD, this process will take different time; all of the converted audio will be saved in the folder you just chose.
1.2 Extract Audio from DVD - on Mac
Step 1: Insert your DVD into the internal or external DVD drive on your computer;
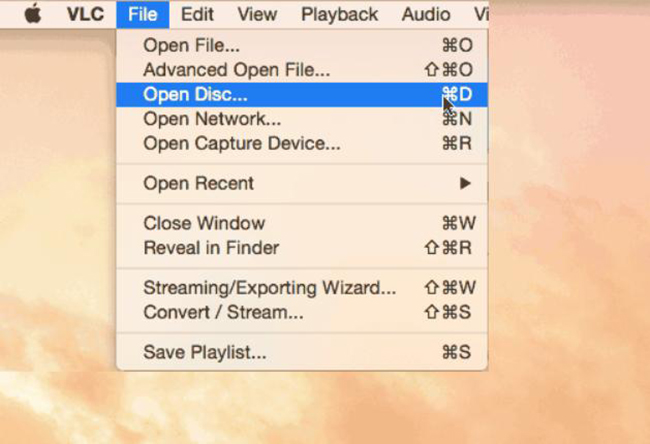
Step 2: Open the VLC on your Mac; click the word “File” and then choose the Open Disc option;
Step 3: Click the Disable DVD menus on the disc page; on the bottom right of the page, click the square before the word “Stream output” to turn it blue;
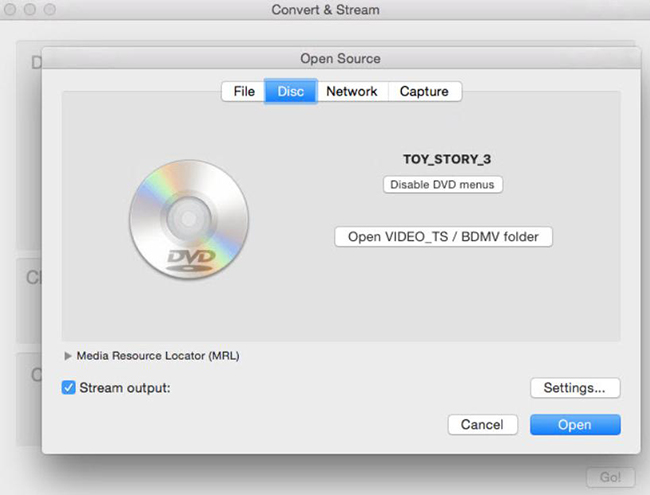
Step 4: Click the Settings... button to set some information for your converted audio;
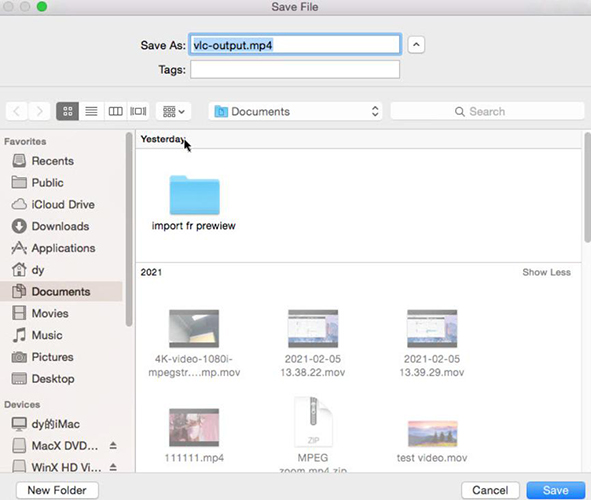
Step 5: Click the File option and then click the Browse... button to choose the location where will save all the audio you convert; click the Save button;
Step 6: On the Transcoding options part, cancel choosing the video option because here we just want to rip audio from DVD; at the same time, you should make sure that you have chosen the Audio option and then choose the audio format you want like mp3 next to it;
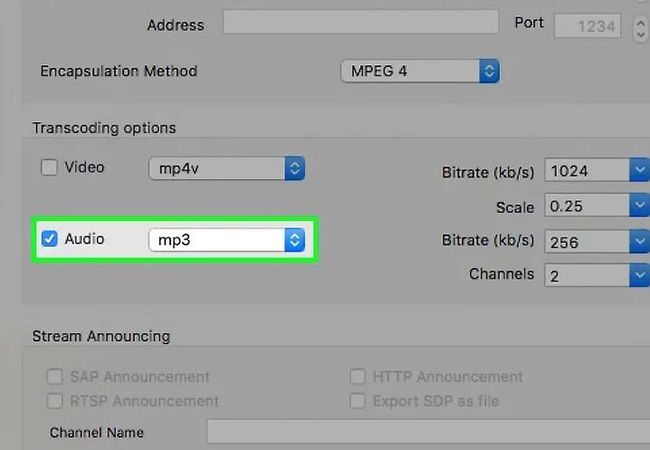
Step 7: Click the OK button to start the converting process; to complete the whole process, you need to wait about 1 hour.
Method 2. Rip DVD Audio with TunesKit Audio Capture
If the quality of the audio converted by VLC cannot meet your needs, you can try TunesKit Audio Capture.
TunesKit Audio Capture is also a good audio converter and a useful video-to-audio converter. The audio converted by it is high-quality. You can choose audio format from MP3, M4A, AAC, FLAC, M4B, and WAV. Different from VLC, Audio Capture allows you to divide audio from DVD video into several episodes. In another word, you can stop ripping audio whenever you want, and continue ripping other parts as you want. Audio Capture is suitable for both Windows and Mac.
Key Features of TunesKit Hulkshare Music Downloader
- Record any audio on Mac and Widnows
- Record audio or video sound on VLC media play
- Convert VLC recorded audio to MP3, AAC, WAV, FLAC, etc.
- Record with original audio quality and full ID3 tags
- Support multi-track downloading, audio cutting and merging
Here are the steps to rip audio from DVD via TunesKit Audio Capture.
Step 1Download software
Download TunesKit Audio Capture and a player that can play DVD on your computer; here we take VLC Media Player as an example to play DVD;
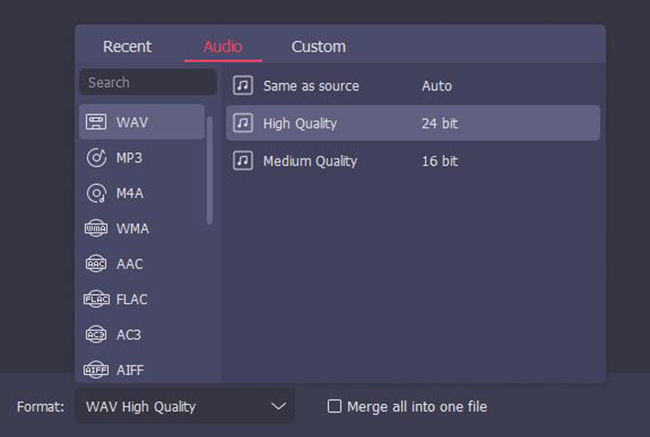
Step 2Set format for audio
Click the Format icon on the homepage of Audio Capture to set audio format;
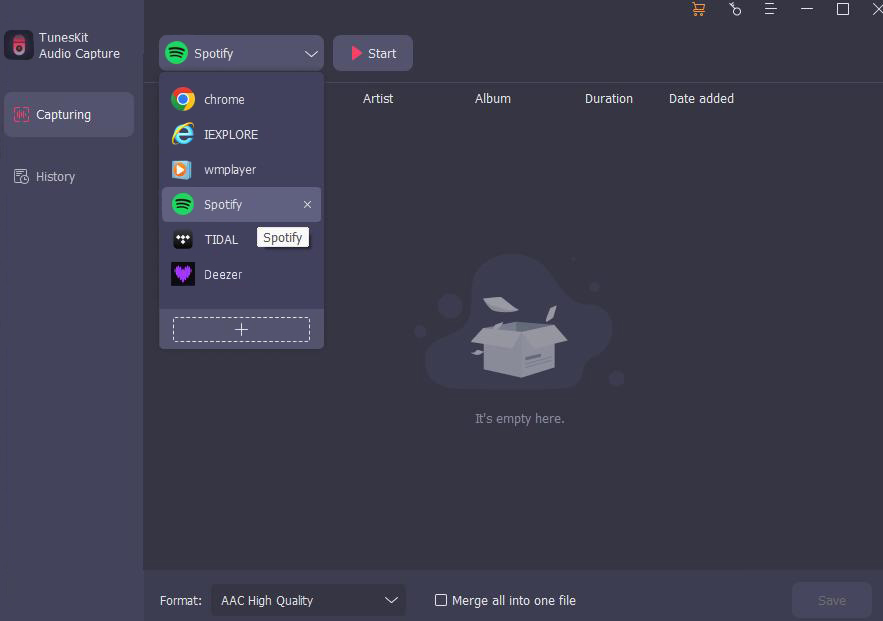
Step 3Add VLC Media Player to Audio Capture
Open Audio Capture and then click the + icon on its homepage to add VLC to it;
Step 4Play and rip audio
Click the VLC icon within Audio Capture to enter VLC and then start playing the video from DVD; Audio Capture will rip the audio automatically;
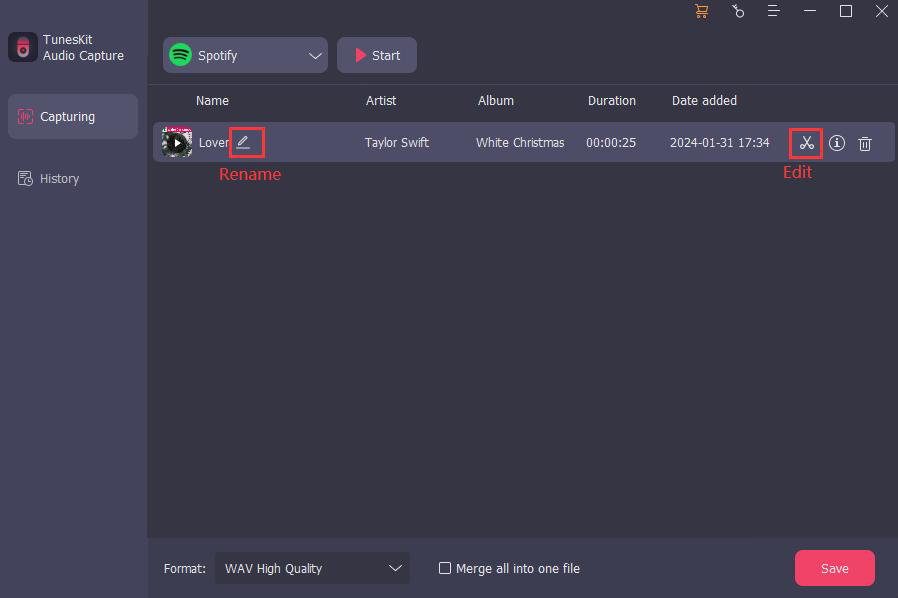
Step 5Stop and edit audio
Click the Stop button to stop the ripping process whenever on the ripping page; after stopping, you can click the Edit icon to delete the unnecessary parts; you can also click the Rename icon to change the name of this audio so that you can distinguish each audio clips from your DVD;
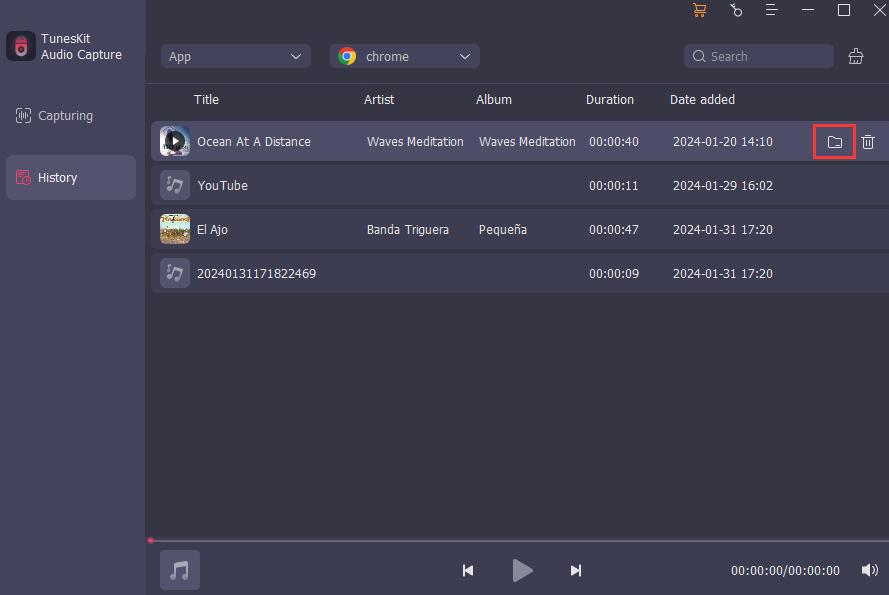
Step 6Save and search ripped audio
Click the Save button to save ripped audio to your computer and Audio Capture; click the Converted icon on the homepage of Audio Capture, you can find all of the ripped audio on the History list; click the Search icon, you can find them on your computer’s folder.
Conclusion
The two methods mentioned above are the most useful way to rip audio from DVD. VLC Media Player allows you to achieve your purpose with just one tool while TunesKit Audio Capture gives you better audio quality. They all have their pros and cons. Which one you choose depends on your needs. Hope this tutorial can help you in a way.
