How to Record a WAV File on Windows 10 in 3 Ways
Generally speaking, most of audio files people want to record are encoded in a common MP3 format. But some of them are WAV audio files. Because WAV is also one of the popular audio formats with high compatibility. So here we will present you with tutorials on how to record a WAV file on Windows 10 and export them to WAV format as well so as to keep the audio quality. Let's get started.
Part 1. How to Record a WAV File on Windows 10
TunesKit Audio Capture is one of the best audio recorders that can help you record a WAV file on Windows 10 and Mac in high quality. You can easily record any audio on Windows 10 regardless of whether you are an expert or a novice. In addition to the WAV format, this software also supports other popular formats such as MP3, AAC, FLAC, M4A, etc., and comes with an editing tool to cut and edit the ID3 tags. You can follow the steps below to record the WAV file on Windows 10.
Features of TunesKit Audio Capture
- Record audio to WAV, MP3, AAC, FLAC, M4A, M4B
- Support recording desktop audio and online audio
- Record audio losslessly with ID3 tags
- Allow trimming, cutting and editing audio records
How to Record WAV File on Windows 10 via Tuneskit Audio Capture
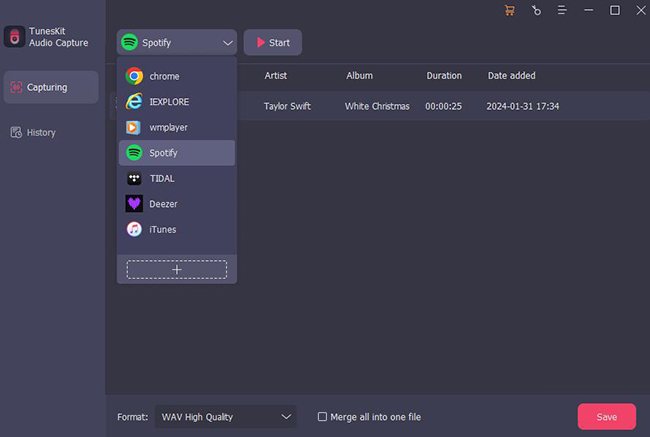
Step 1: First, you have to add the audio source to the main interface. If you have already seen the target software displayed there, you can skip this step.
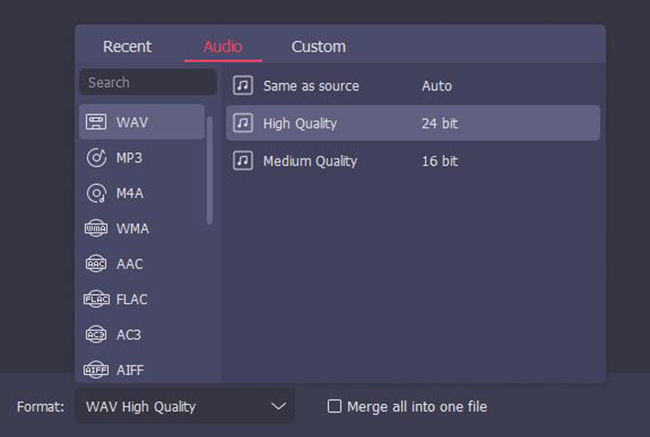
Step 2: Now click on the Format button and change the Format option to WAV. You also can adjust other parameters like codec, bit rate, sample rate, or channel.
Step 3: Next, open the audio source and start playing the WAV audio. TunesKit Audio Capture will automatically capture it. When it finishes, hit the Stop button, and you can preview, cut, or edit the WAV recording by clicking on the Edit button.
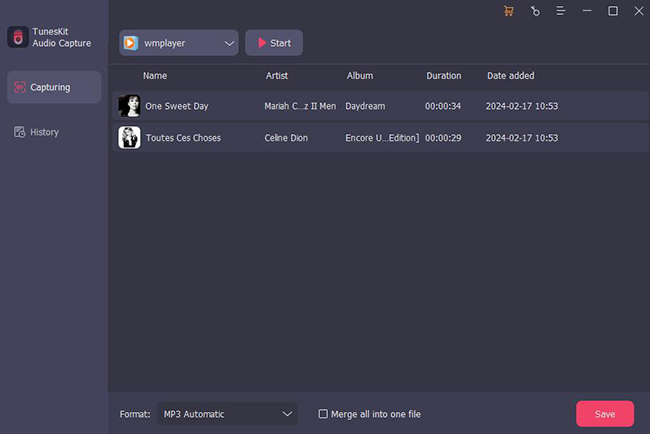
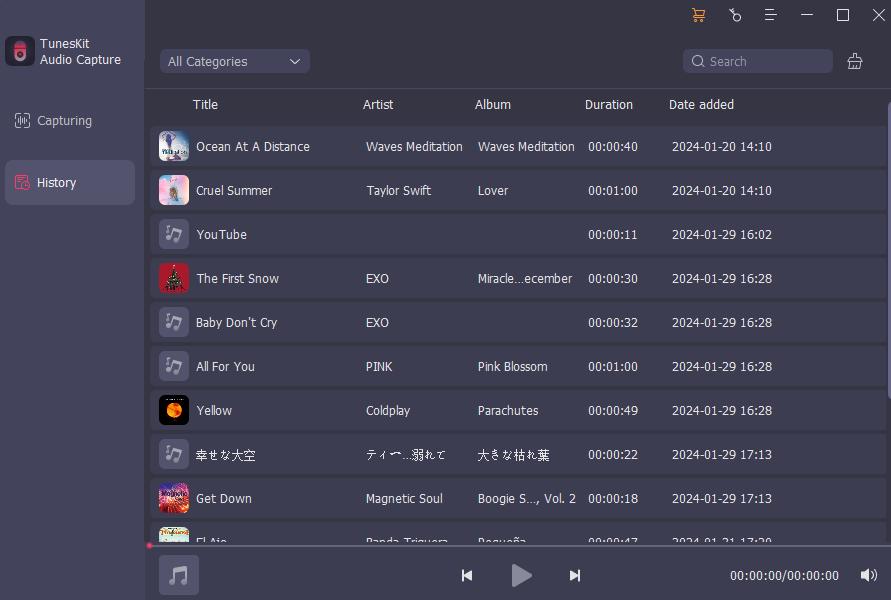
Step 4: After that, press the Save button, and the WAV audio recording will be shown in the History list. You can click the Search icon in the History list to open the destination folder.
Part 2. Part 2: How to Record WAV File on Windows 10 for Free
Apart from recording WAV file via TunesKit Audio Capture, Audacity can also record a WAV file on Windows 10. It is a free and open-source application that can be used on Windows, Mac, and Linux. It is possible to present the recorded tracks in waveform or spectrogram form, allowing you to personalize the WAV recording in a more detailed way such as copy, paste, delete, and add plug-ins and sound effects.
How to Record a WAV File on Windows 10 with Audacity
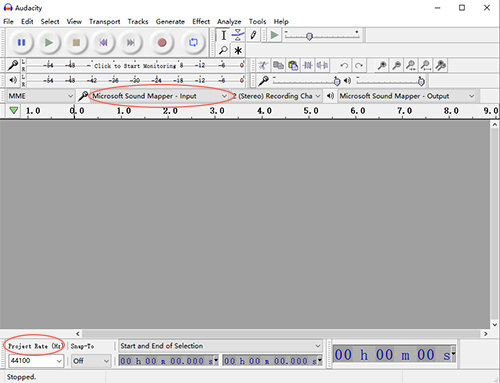
Step 1: Launch Audacity, you can select MME or Windows WASABI in Audio Host. Then select the input device and output device.
Step 2: After that, click on the red REC icon on the Transport toolbar. It is on recording now so you can open the WAV audio you want to record. When you finish, click on the Stop button on the Transport toolbar.
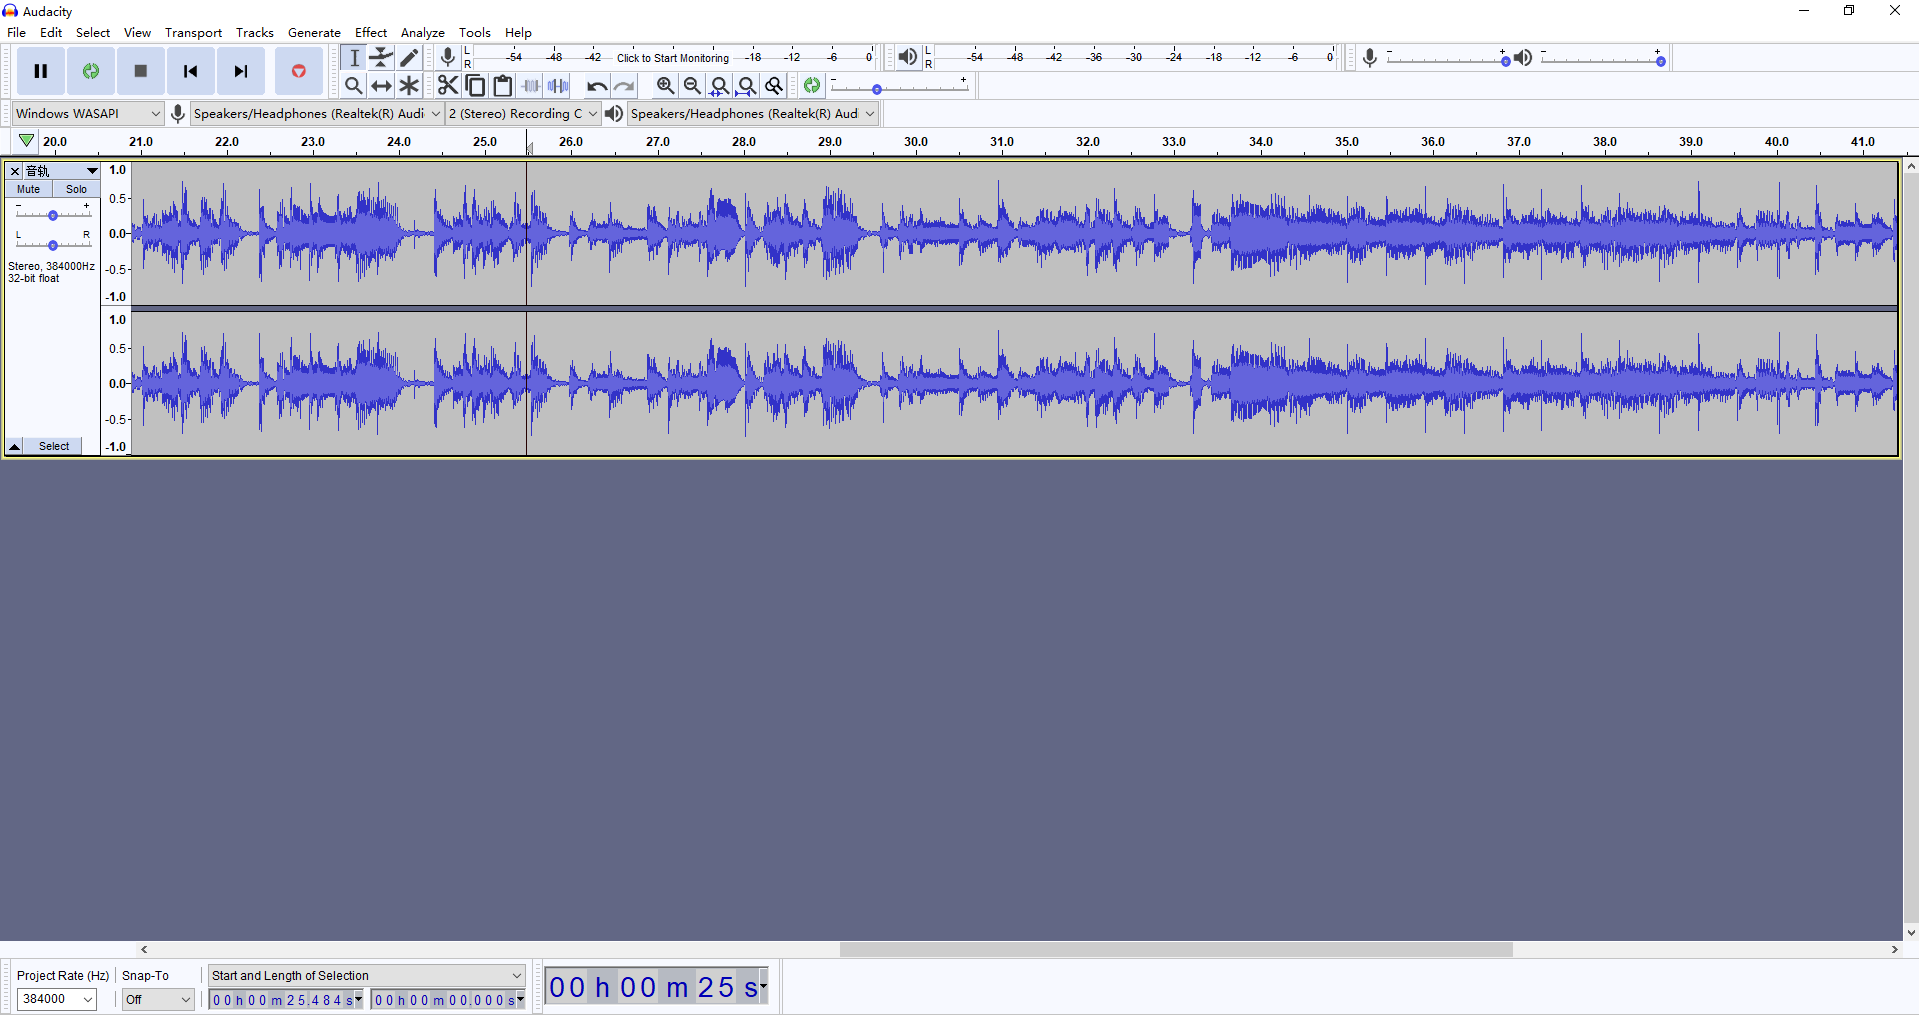
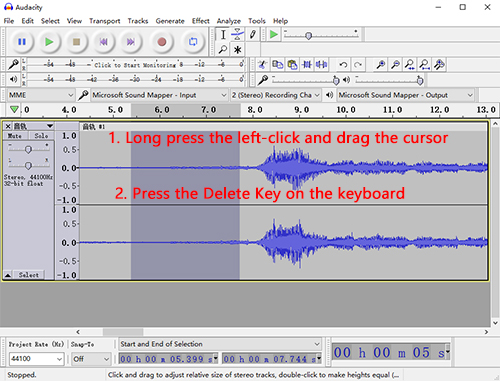
Step 3: The WAV audio recording will be displayed as a waveform in the main interface. Now you can edit it according to your needs. For example, if you'd like to remove the unwanted portion, just a long left-click and slide the cursor on that part, then press the Delete key.
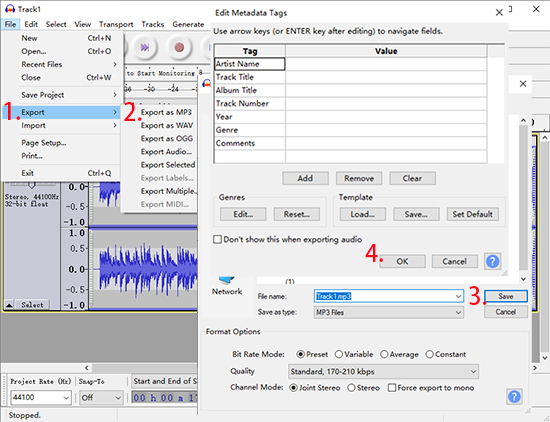
Step 4: To export the audio recording to WAV, just turn to the top menu File> Export>Save as WAV. Then you're required to edit the file name, set the saving path, and complete the ID3 tags. Once you've done, the WAV audio recording will be saved in the target folder on your Windows 10 computer.
Part 3. How to Record a WAV File on Windows 10 Online
To record WAV file on Windows 10, there is another choice for you, which is using the online WAV recorder. Without installation and payment, only doing a few clicks can WAV file be recorded in high quality. To save you time in finding a suitable online recording tool, here we recommend Apowersoft Free Online Audio Recorder.
Apowersoft Free Online Audio Recorder is a web-based free online audio recording tool that can be used on all browsers and allows you to record streaming audio, desktop audio, microphone voice, etc. on Windows 10. And it is not only recording WAV file but also still saving them to WAV or other audio formats including MP3, WMA, AAC, FLAC, and more. You can read the following tutorial to record WAV file.
How to Record WAV File Online for Free
Step 1: Access Apowersoft Free Online Audio Recorder. If this is the first time using this tool, you need to download a launcher first.
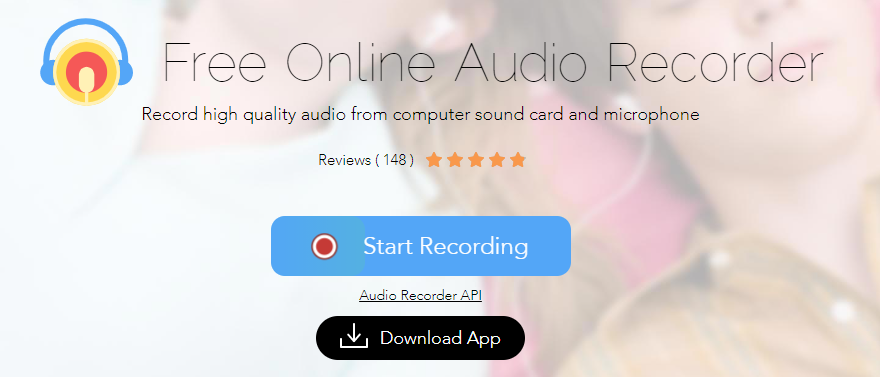
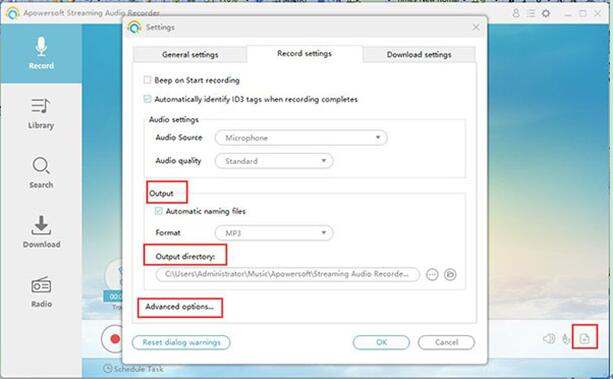
Step 2: When the launcher is installed, click on Start Recording, select the audio source at the left corner, turn to the Record option to set the output format to WAV, then hit the REC button.
Step 3: Open and play the WAV audio and leave it to be recorded. When it ends, click the Stop bottom.
Step 4: Click the Recording list and here you can check the recorded audio and edit the ID3 tags, and click on the Save icon to download the WAV audio recording.
Part 4. Conclusion
It's not difficult to record a WAV file on Windows 10. As a WAV recorder, TunesKit Audio Capture, Audacity, and Apowersoft Free Online Recorder all perform well. If you want to record a WAV file with additional editing, then you can try TunesKit Audio Capture or Audacity. If you prefer an online tool, then Apowersoft Free Online Audio Recorder is a good choice.
