How to Record System Audio with Ease on Mac/Windows
Recording system audio from a computer is a common needs whenever you want to record internal audio from your computer, the voice from your microphone, and more. At this time, you need to utilize an additional tool to record it. Great recording software is vitally important if you're wondering to further edit the system audio recordings.
Therefore, here we will talk about 4 tools to record system audio on Mac and Windows, including built-in programs and desktop software.
Part 1. How to Record System Audio on Computer with Built-in Program
To begin with, let's see the fastest and easiest way to record system audio on your computer. Windows and Mac computers both have a built-in program that allows you to record system audio with ease. And now please read the detailed steps on how to use them.
1.1 How to Record System Audio on PC with Windows Voice Recorder
Windows Voice Recorder is a built-in audio recording program since the release of Windows 10. It can be found on most different brands of Windows computers, and you can manually add the program as well. It allows you to record microphone voice and desktop audio (when plugging in an output device).
Step 1: Plug in your microphone and check if it's turned on.
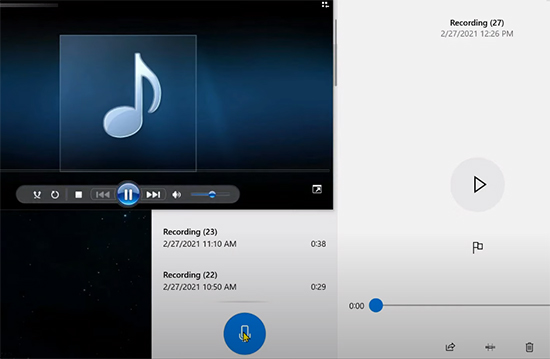
Step 2: Click the Start icon to find out Voice Recorder and launch it.
Step 3: The window of Voice Recorder will be opened. And click on the record button to start recording. Now you can begin to talk or play the audio from the system. When you finish, click the button again to stop. And you can preview the recorded system audio file or cut the audio file.
1.2 How to Record System Audio on Mac with QuickTime Player
QuickTime Player is a multimedia player on a macOS system. It can play video or audio and record the audio or screen as well. Technically it was installed in the macOS system computer automatically. If you can't find it, you can go to an app store to download it. Now let's see how to use QuickTime Play to record system audio.
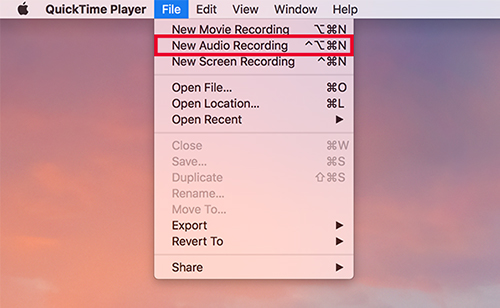
Step 1: Launch QuickTime Player, click File> New Audio Recording.
Step 2: Click the Options and choose Recording. Then you can click the REC button and start playing the system audio. Once you've done, click the button again to stop recording.
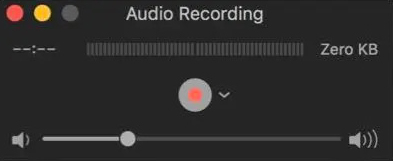
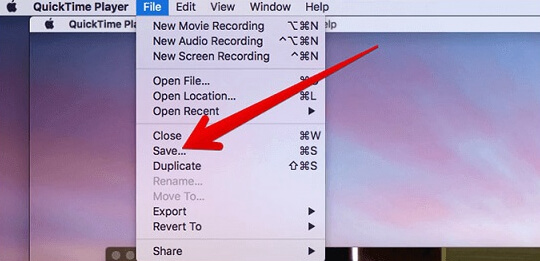
Step 3: You can preview it to check. Then click File>Save to export the system audio recording.
Part 2. How to Record System Audio with TunesKit Audio Capture (Mac&Windows)
The built-in program can help you capture system audio immediately, but it's hard for you to keep high-quality system audio and edit it. So in this part, you will get desktop software to record system audio, which is called TunesKit Audio Capture.
TunesKit Audio Capture can record various system audio both on Windows and Mac, such as gameplay sound, meeting proceedings, music tracks, etc. Meanwhile, it provides an editing platform that let you cut, trim, or split the system audio track, and edit ID3 tags. And you can export the recorded system audio to MP3, AAC, FLAC, etc.
Key Features of TunesKit Audio Capture
- Record audio on Mac and Windows losslessly
- Convert system audio to MP3, AAC, WAV, FLAC, etc.
- Support multi-track downloading, audio cutting and merging
- Support recording Tidal music, Pandora music, and other mainstream audio website
How to Record System Audio with TuneKit Audio Capture
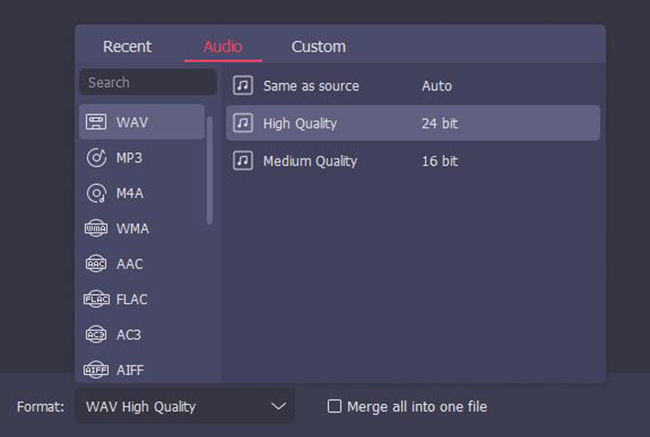
Step 1: Download and open TunesKit Audio Capture. Click the Format button to set the parameters for recording system audio. Click OK.
Step 2: There are several software icons in the main interface. Click on the icon you need to open it and get ready for recording.
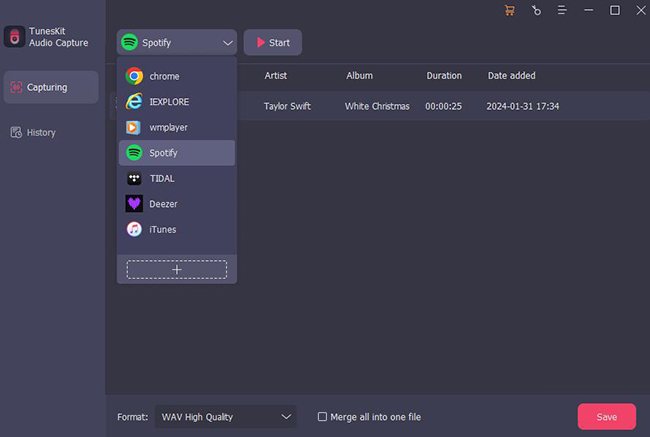
Step 3: TunesKit Audio Capture will start recording system audio automatically when the target application is opened and sounded. And you can click the Stop button to end the recording.
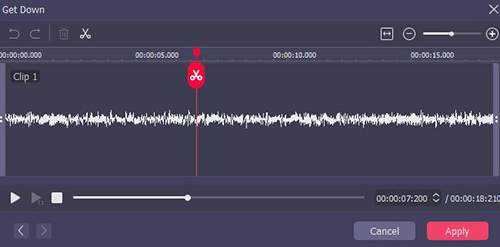
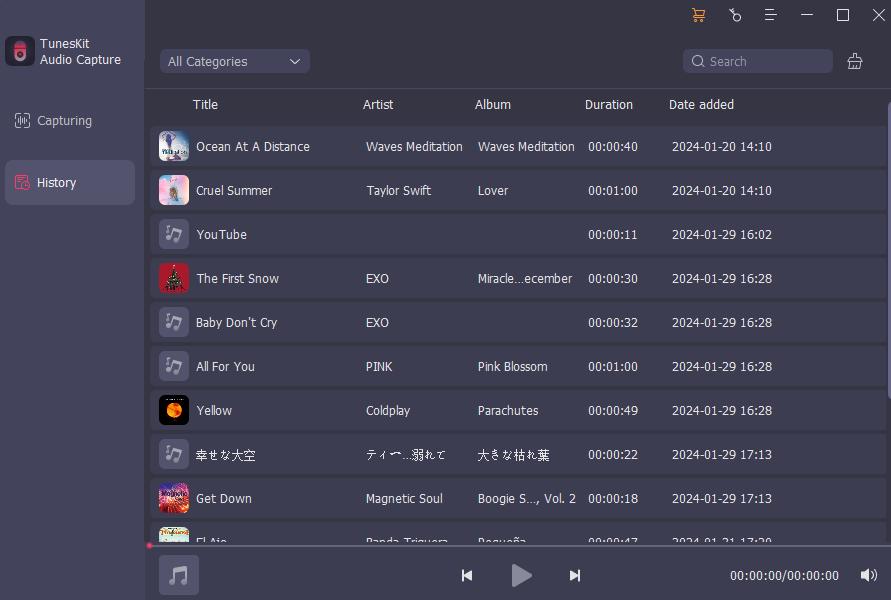
Step 4: The recorded system audio will be in the capture list. Click the Edit button to open the editing platform to cut or add ID3 tags to the system audio. Then click OK.
Step 5: Click the Save button in the Capture list, then the system audio recording will be in the History list and be saved in the folder.
Part 3. How to Record System Audio with Audacity on Mac/PC
Another desktop software we want to present to you is Audacity. This is a free audio recording and editing application that can be used to record system audio on Mac , PC, and Linux. With this software, you can record system audio without any limitations and cut the system audio clip to a more specific length as it features a visual audio track. And it is able to add sound effects and can export system audio to MP3, WAV, and OGG. You can follow the tutorial below to record system audio for free.
How to Use Audacity to Record Desktop Audio on Windows
Step 1: Download and launch Audacity. The default audio host of the software is MME. If you have a microphone device plugged in, remember to select the microphone device option on the right side of the MME
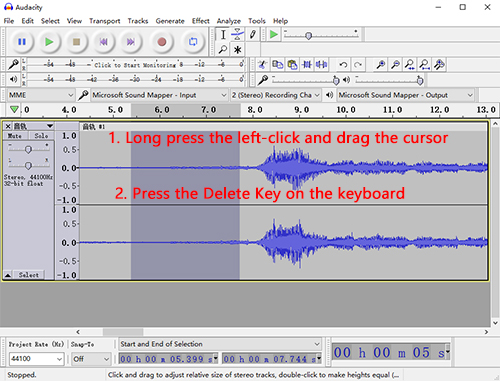
Step 2: Click the Record button and you can start playing the system audio now. Then click Stop and the recorded system audio will be in the visual track. You can tap on the Play button to preview it, or a long left-click to slide on the unwanted part and press the Delete key on the keyboard to eliminate that portion.
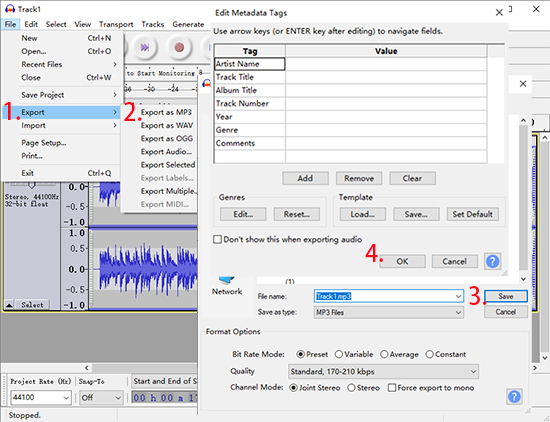
Step 3: To save the system audio recorded, you should click File>Export as ..., then type the file name, set the folder, and complete the ID3 tags of it. Next, click on OK.
Note: If you're using Audacity to record system audio on Mac, you should download an additional plugin named Soundflower. And here are the steps to install it.
Step 1: Install Soundflower on your Mac device.
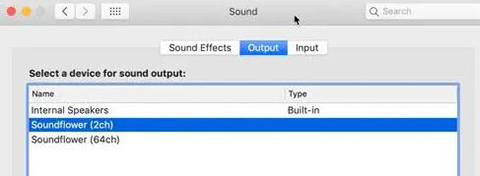
Step 2: Click System Preferences>Sounds>Output, select Soundflower(2ch).
Step 3: Tap on the Search icon and open Audio MIDI Setup. Click the "+ icon to create "Multi-Output Device", then tick Soundflower(2ch).
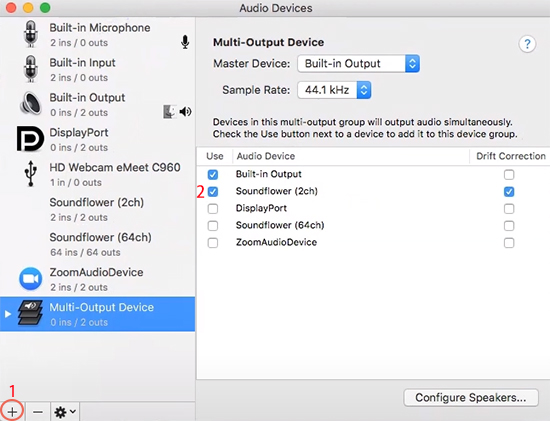
Step 4: At this time you can record system audio on Mac. Just follow the steps on PC above.
Part 4. Conclusion
These methods all have their features to record system audio. If you don't want to download any desktop software, the built-in program is enough for you. If you want to edit the system audio recording, you can try TunesKit Audio Capture or Audacity as they are both compatible with Windows and Mac. TunesKit Audio Capture is friendly to novices while Audacity has a complex interface. If you still can't decide which one is the best, you can give TunesKit Audio Capture a try first because of this easy-to-use interface and functional recording and editing tools.
