[Tips for Beginners] How to Record Music on Computer with Audacity

When it comes to recording audio, Audacity is always the most hit audio recording software among the free tools. It enables recording any kind of audio on your computer, such as streaming music.
As you know, even with a premium subscription, it is not practical to download streaming music to local storage as they are encrypted by streaming music services. That's why most people opt to record streaming music after not being able to access the local music files. In this case, we'd like to show you how to record streaming music with Audacity.
Part 1: How to Record Music with Audacity
Audacity is available on Windows, macOS, and Linux, so the first thing you need to do is download and install the correct version on your computer. Then refer to the detailed steps below to record the streaming music. Let's go on.
How to Record on Audacity with Music
Start Audacity on your computer. It is necessary for new users to set up Audacity audio preferences before recording. Recording streaming music does not require too many tedious steps, just follow the options we have prompted you to set up.
Step 1. Click on the Audio Setup, and select your preferred Audio Host, Playback Device, and Recording Device from the dropdown menus. You can also keep the default mode and there will be no need to change it manually.
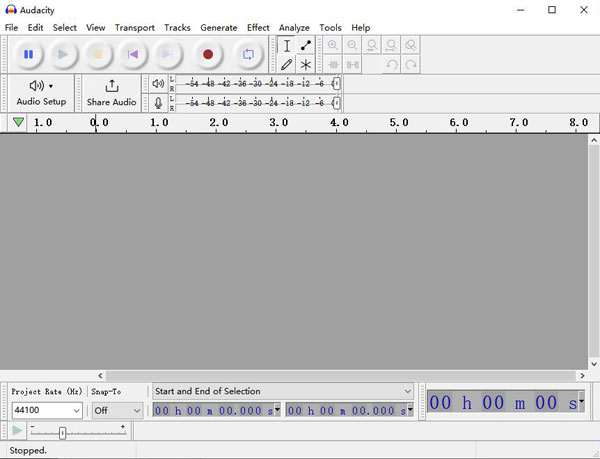
Step 2. Open the streaming music that you want to record. When the music is ready, click on the red Record button on the top bar to start the recording, and then start playing the music immediately. You'll see a waveform track generated on the main interface while recording. When the music ends, simply tap the yellow Stop button.
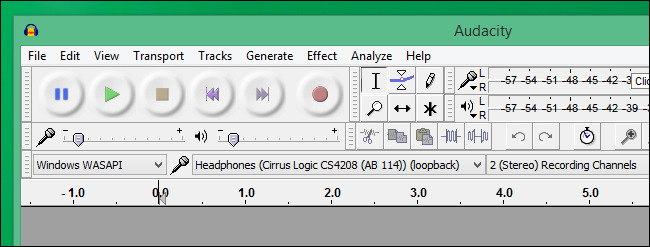
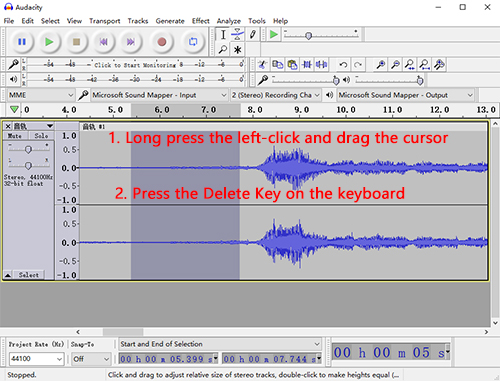
Step 3. Audacity offers various editing tools for music recordings. For example, to cut the recorded music, tap the Selection Tool button or hit the F1 key, long press the left click to drag the mouse over the part to be removed, then press the Delete key.
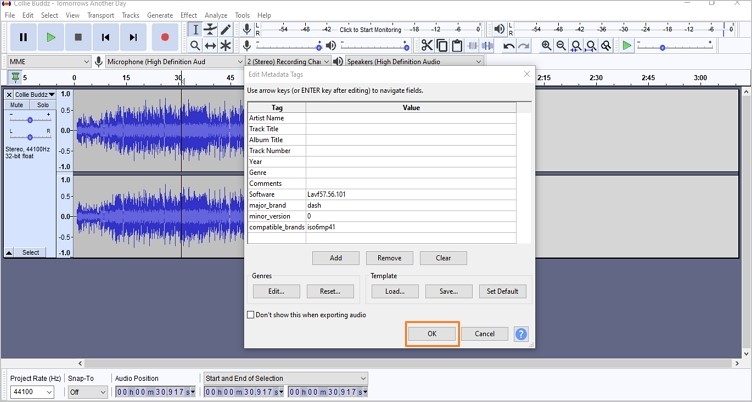
Step 4. When finished, tap File > Export and select the desired format, then select the destination folder and fill in the information tags to save the streaming music records to your computer.
Part 2: Best Audacity Alternative to Record Streaming Music
Besides recording music on Audacity, there is another solution possible to help you capture streaming music with ease. TunesKit Audio Capture is one such tool, endowing you to record and download songs losslessly from online websites or desktop programs without limits.
This program provides six plain audio formats, including MP3, AAC, FLAC, WAV, M4A, and M4B, and comes with an audio editor that makes simple edits like merging, trimming the songs, and editing the ID3 tags. Learn how to record music via TunesKit Audio Capture in simple steps as follow.
Key Features of TunesKit Audio Capture:
- Support capturing streaming music, audiobooks, background music, and other audios
- Remain the original audio quality and full ID3 tags
- Save the music recordings to MP3, WAV, FLAC, M4A, and M4B
- Support merging or trimming audio and editing the ID3 tags
How to Record Streaming Music via TunesKit Audio Capture
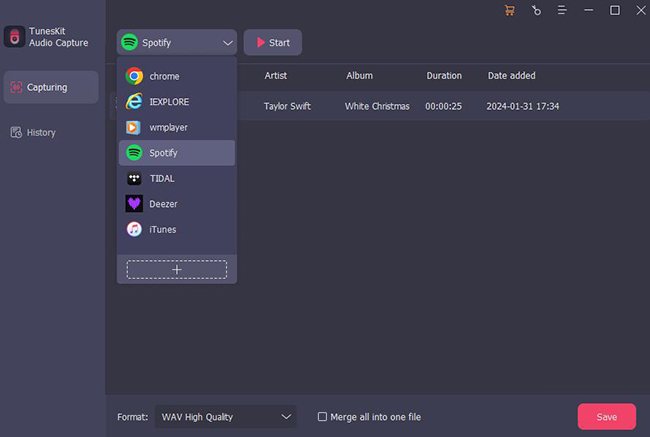
Step 1. Open TunesKit Audio Capture on your computer. There are several program icons in the main home, and you need to check which one can nevigate to the music you want to capture. If not, click on the + button to add the target one.
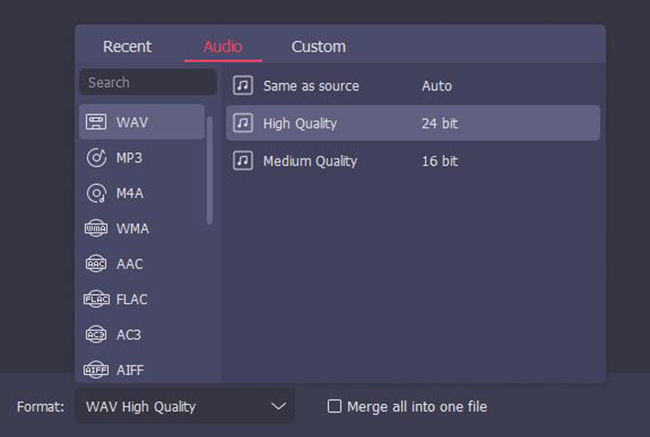
Step 2. Next, click on the Format button to customize the parameters for the recorded music, such as output format, codec, channel, sample rate, and bit rate.
Step 3. After that, launch the target program in the TunesKit interface. Search for and play your desired music. TunesKit Audio Capture will start recording streaming music right off. Then tap the Stop button when finished the recording. And the recorded music files will be in the Capture List.
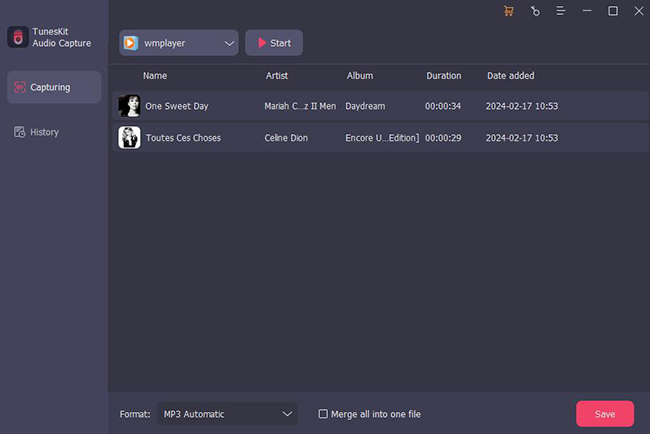
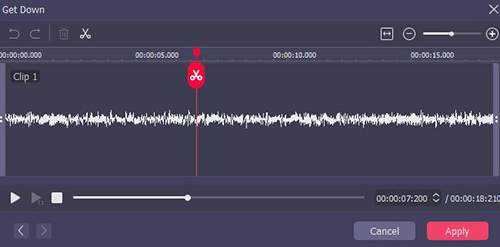
Step 4. If you need to combine the recorded song, simply tap the Merge all into on file button at the bottom left. Also, the Edit button is available at the rear of the track for trimming the music length and editing the ID3 tags.
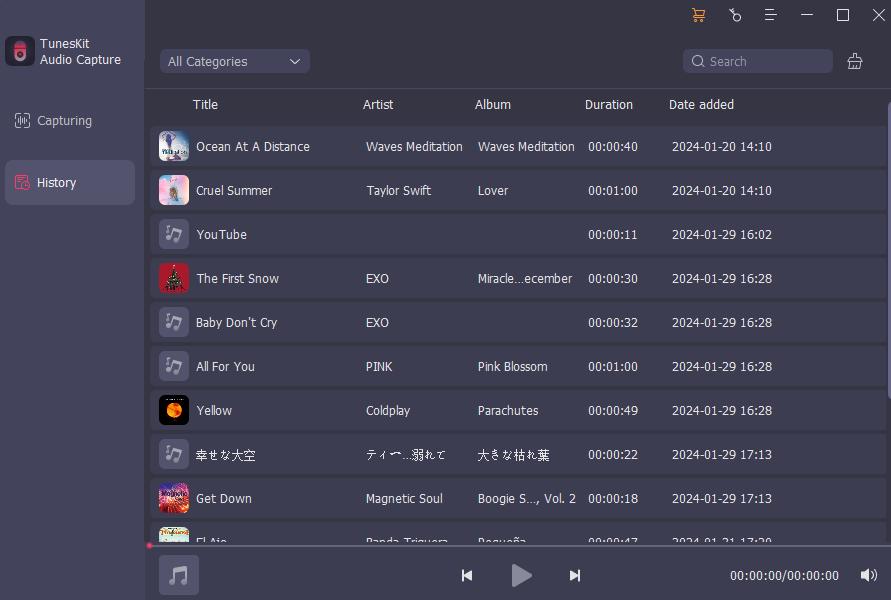
Step 5. Last, tap the Save button to export the recorded streaming music. They will be listed in the History list and you can also locate the local music file by clicking on the Search icon at the rear of each track.
Part 3: FAQs about Recording Music with Audacity
Q1: How do I record background music in Audacity?
It's easy to record background music with Audacity. All you need to do is tap the record button in Audacity and play the video with the background music you need. When the audio ends, click on the Stop button in Audacity to finish the recording.
Q2: How to record in Audacity while track is playing?
First, open Audacity and import the track you want;
Second, make sure your headphone is connected to the computer, then set it as the recording device in Audacity;
Last, go to Edit > Preferences > Recording, select Play other tracks while recording, and Record on a new track. Now you may start your vocal recording.
Q3: How do I record Spotify with Audacity?
To record Spotify music using Audacity, first, click the Record button in Audacity and then play the music on Spotify. And click the Stop Recording button when you're done.
Part 4: Conclusion
We have walked you through the detailed guide on how to record streaming music with Audacity. And also present you with an alternative, TunesKit Audio Capture, to record streaming music with the original quality. Audacity is for those who want to record and compose music, and TunesKit Audio Capture is specialized and designed for capturing streaming audio. Now, choose your preferred one and start your music recording.
