Solved! How to Record Internal Audio on Windows/Mac/Android/iPhone
In your daily life, whether you are using Windows, Mac, Android phone, or iPhone, you will surely come across times when you need to record internal audio. For example, recording a good music track or full music, recording audiobooks, recording courses, recording internet radios, recording live streams, and so on. Some people choose the built-in recording program that comes with the device they use to record audio for convenience.
Although these built-in programs are simple to use, they have their limitations, such as the inability to trim the audio, the recording sound quality is not high. If you are also troubled by these reasons, you don't have to worry anymore because this article will mention ways to record internal audio other than using the built-in programs. Read on and enjoy.
Part 1. How to Record Internal Audio on Mac/Windows
To record internal audio both on Windows and macOS, we recommend you a professional and powerful audio recorder, TunesKit Audio Capture. This software can quickly and easily record any internal audio, whether desktop audio or online audio and can also cut internal audio recordings according to your preferences. It supports users to capture internal audio with original audio quality and ID3 tags, or edit ID3 tags, and then can save internal audio to MP3, WAV, AAC, FLAC, etc.
Key Feature of TunesKit Audio Capture
- Record internal audio to FLAC, MP3, AAC, M4A, M4B, WAV
- Record and capture streaming audio from any programs and websites
- Preserve internal audio with the original audio quality and full ID3 tags
- Support many customization functions like trimming, cutting, and merging
How to Record Internal Audio on Windows/Mac
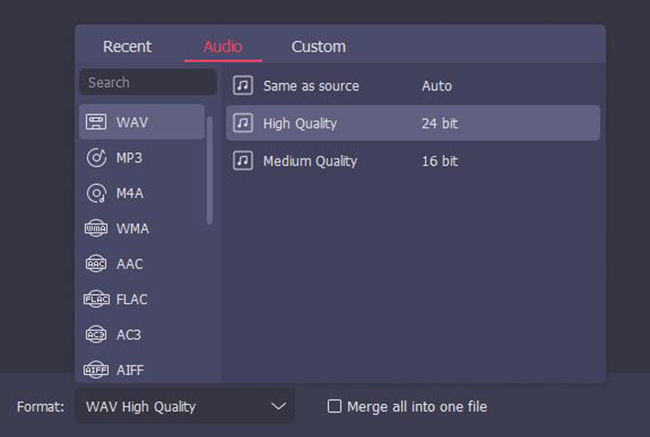
Step 1: Download and launch TunesKit Audio Capture. After you open it, you can set the output format first. Tap the Format icon, select the format, codec, sample rate, and so on. Then click OK.
Step 2: Before you open the target internal audio, you need to add the internal audio source. Click the ''+'' button to add the audio source, or you can drag the application icon into this scene. Then click to open it.
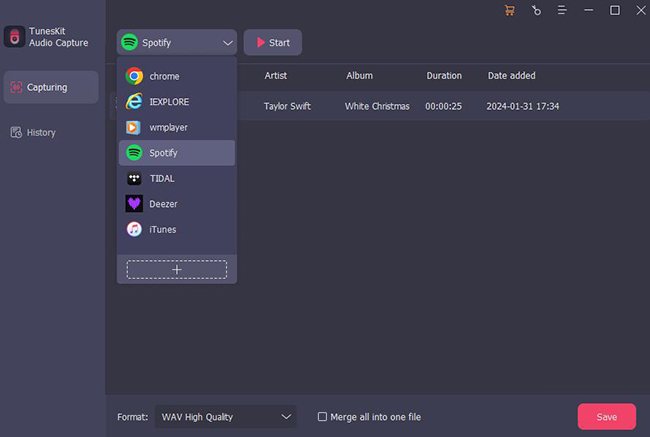
Step 3: When you open the audio source, TunesKit Audio Capture is ready for recording the internal audio. It will capture the audio automatically as long as you play it. Once it ends, you can click Stop then the recorded internal audio will be in the Capture list.
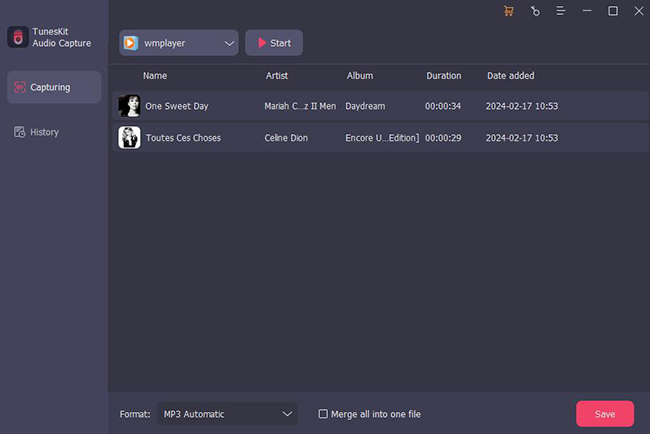
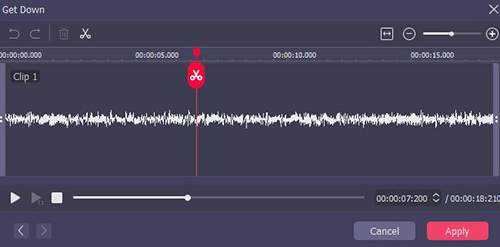
Step 4: You can preview the internal audio recording, or click the Edit icon to trim them or edit the ID3 tags. Then click OK.
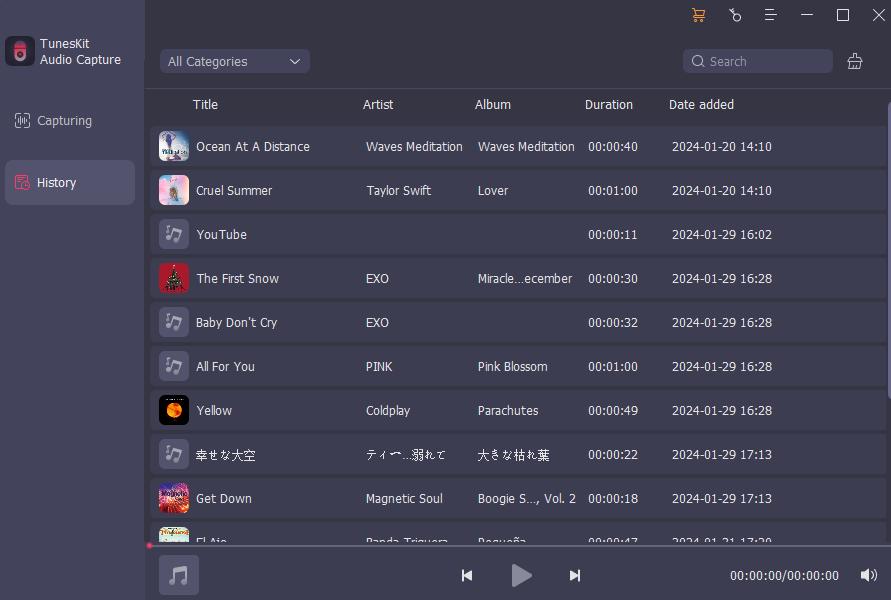
Step 5: The final recorded internal audio will be in the Capture list first. If you want to save it, click the Save button in the lower right corner. Then it will be in the History list and saved in the folder.
Part 2. How to Record Internal Audio with Audacity for Free
Since some users need to do more editing of the recorded internal audio, such as adding sound effects, mixing tracks, etc., we will introduce a software that can both record and edit internal audio, Audacity.
Audacity is both an internal audio recorder and an audio editor. It is a free, open-source audio software that can be used in Windows, macOS, and Linux. With its help, users can record internal audio without time limitation and high quality, use sound plug-ins to change or modify the audio track, and export internal audio to MP3, WAV, and OGG.
2.1 How to Record Internal Audio on Windows with Audacity
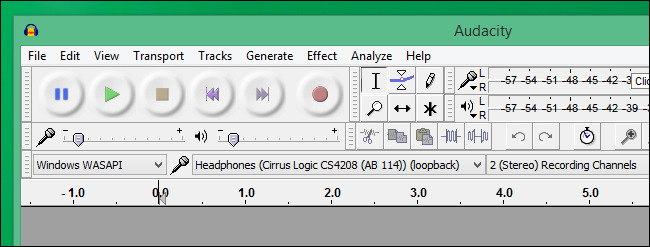
Step 1: Prepare your internal audio for recording and open Audacity. Click the Record button and play the audio. When it ends, click the Stop button. The full track of the recorded internal audio will be displayed.
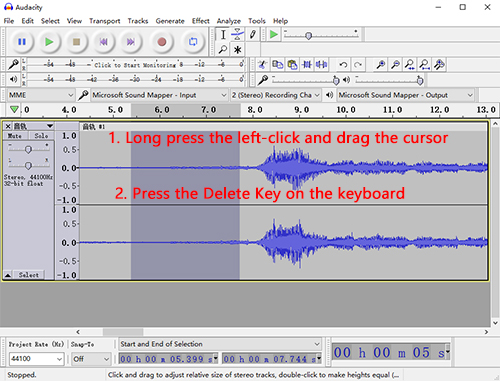
Step 2: Click the Play button to preview the recorded internal audio. If you want to remove the unwanted portion, just a long left-click and slide the mouse to select the part, press the Delete key on the keyboard, then it will be deleted immediately.
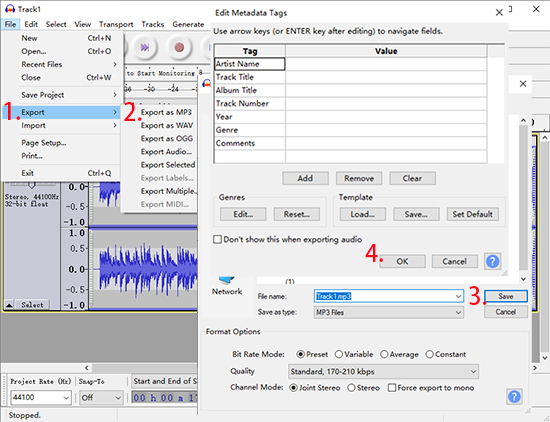
Step 3: After that, preview the internal audio recording again. Then click File>Export as ..., then select the folder and name the file, then it will show a tag window to let you edit the metadata of the internal audio recordings, and the last click on OK.
2.2 How to Record Internal Audio on Mac with Audacity
The steps of recording internal audio on Mac have slightly different as Apple has disabled the sound recording from the Mac system. So before you start recording internal audio on Mac, you need to install a third-party tool, soundflower to help you record the internal audio successfully. Now let’s see the steps.
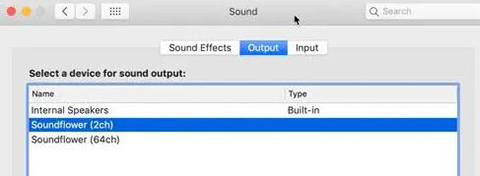
Step 1: Download and install both Soundflower and Audacity. Then click System Preferences> Sounds> Output, select Soundflower(2ch).
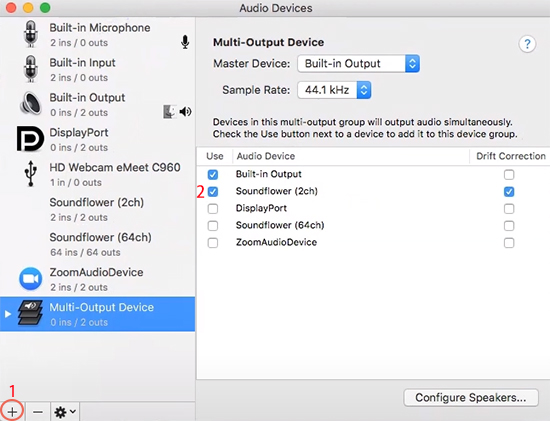
Step 2: Click the Search icon on the top bar, type Audio MIDI Setup to open it. Then click the “+” icon to create multi-output devices, choose Soundflower(2ch).
Step 3: Now you can record internal audio with Audacity on macOS computer. And you can refer to Part 1 to follow the specific steps.
Part 3. How to Record Internal Audio on iPhone/Android Phone
In this part, we are going to discuss how to record internal audio on iPhones and Android phones. Unlike the computer device, recording internal audio on the mobile phone doesn't seem as easy to operate as a computer device. This is due to some privacy policies. Therefore, you can only record internal audio while recording the screen and plugging in an earphone. And we'll briefly cover how to use the phone's built-in recording tool to record internal sound.
How to Record Internal Audio on Android Phone and iPhone
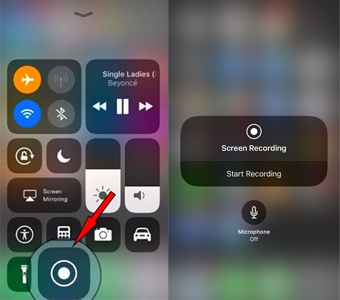
Step 1: Slide down the control center, select the record icon.
Step 2: While in the recording process, you need to turn off the microphone icon so that it won’t capture the external noise.
Step 3: When you finish, click the Stop icon, and it will be saved in the system file.
Step 4: Find the video file, and you can use a converter to convert the MP4 to MP3. And the final MP3 file is the internal audio recording you want.
Part 4. How to Record Internal Audio Online
For those who don't want to download third-party internal audio recording software, we have also thought of a solution, which is to record internal audio online. While online audio recording tools cannot re-edit the recorded internal audio like third-party recorders can, it is an extremely easy and convenient method that is favored by many people. So here we will present a free online internal audio recording tool, Online Voice Recorder.
As you can see from its name, it can not only record internal audio but also external sound, which facilitates uses to record all kinds of audio. Now let’s see how to use it to record internal audio.
How to Record Internal Audio Online
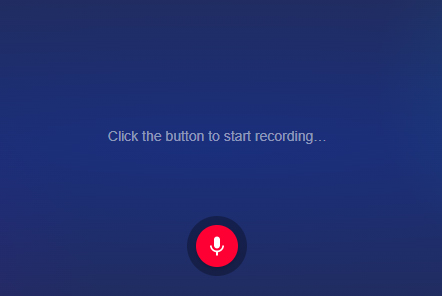
Step 1: Open Online Voice Recorder, click the red button and play the internal audio. Then click the button again to stop the recording.
Step 2: You can preview the recorded internal audio on this page. And drag the beginning play head or ending play head to define the length of it.
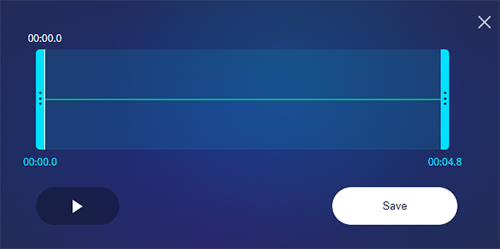
Step 3: Click Save, and it will start downloading the recorded internal audio. And you can find it in your local folder.
Part 5. Conclusion
It is not difficult to record internal audio on Mac, Windows, iPhone, Android and online. And by browsing through this article, we're sure you've mastered the useful ways to do it. By the way, all of the software is not only capable of meeting your requirements for recording internal audio but also capable of recording external audio, such as the sound of your microphone. Come to try and find out the most suitable method for you.
