How to Record Desktop Audio with Ease on Windows/Mac/Online
In the process of using the computer, whether you want to save an audio clip, keep a meeting, or for other needs, you can choose to record desktop audio to achieve it. Recording desktop audio has become a general operation for people because of its convenience and fast.
Then here comes the question, how to record desktop audio with ease? You can find any kind of audio recorder on the internet, but it is hard to find the one which is suitable and easy to use. Don’t be worry, read this article and we’ll sure you will find the proper one.
Part 1. How to Record Desktop Audio with Built-in Program
The easiest and fastest way to record desktop audio is to use the built-in program or application. This method is suitable for those who do not have high requirements for the recorded desktop audio quality or don’t want to download any third-party audio recorder. We illustrate two ways to use a built-in program to record desktop audio for you, please read as follows.
1.1 How to Record Desktop Audio with Voice Recorder on Windows
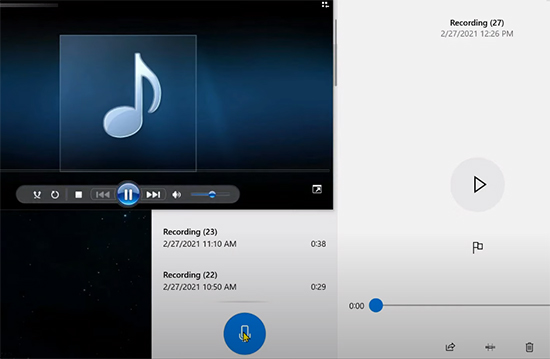
Voice Recorder is a built-in program on Windows for recording any sound. Such as desktop audio, your voice, and more. This tool can help you record desktop audio easily with some simple clicks.
Step 1: Go the Cortana, type Voice Recorder to open it.
Step 2: Prepare the desktop audio you are about to record, click the Record button on Voice Recorder, and play the target desktop audio.
Step 3: When you finish, click the Stop button. Then the desktop audio recording will be on the list. You can click to check the audio or click the Cut button to trim the recording.
1.2How to Record Desktop Audio on Mac with QuickTime Player
To record desktop audio on macOS, you can use QuickTime Player, which is Apple’s default app for media player. It can be used to record desktop audio only as well. Read the steps below to see how to record desktop audio via QuickTime Player.
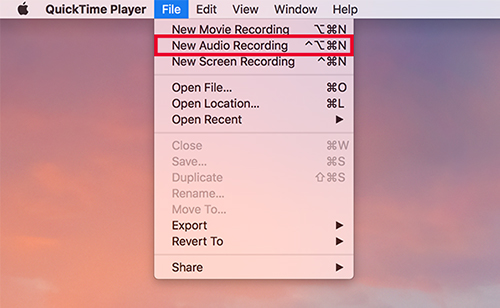
Step 1: Launch QuickTime Player, and navigate to File>New Audio Recording.
Step 2: Get the desktop audio prepared and click the REC button, and play the audio. When it ends, click the button again to stop recording.
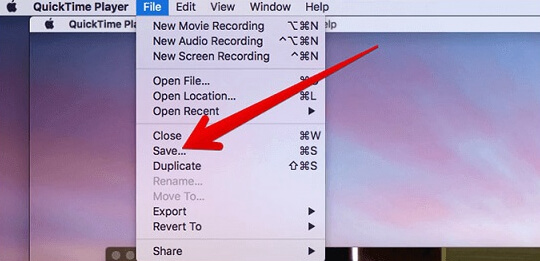
Step 3: Click File>Save to export the desktop audio recorder.
Part 2. How to Record Desktop Audio via TunesKit Audio Capture
With the purpose of recording desktop audio only on your computer, the second method is to use a great desktop audio recorder, TunesKit Audio Capture. This software is available for Windows and macOS so that you can record any kind of sound from your computer desktop. In addition to a lossless audio recording with ID3 tags, it can also trim or split desktop audio and export it to various formats such as MP3, M4A, AAC, FLAC, and more.
Key Features of TunesKit Audio Capture
- Record audio on Mac and Windows losslessly
- Convert desktop audio to MP3, AAC, WAV, FLAC, etc.
- Support eiting ID3 tags of the desktop audio recording
- Support multi-track downloading, audio cutting and merging
How to Record Desktop Audio on Windows/Mac
Step 1: Download and launch TunesKit Audio Capture, you’ll see multiple app icons in the main interface. Click and open the icon that you are going to record.
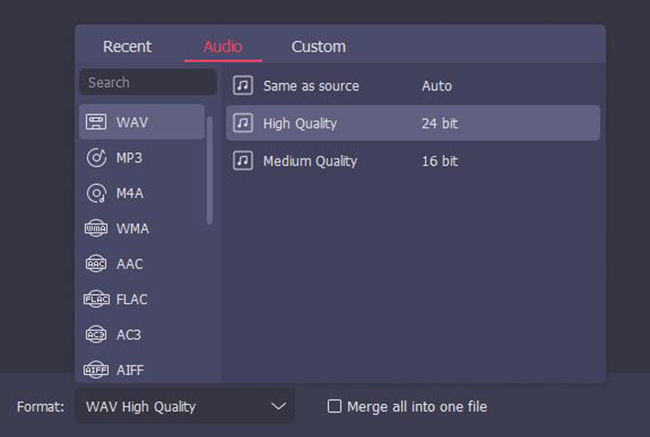
Step 2: If you need to save the recorded desktop audio to other formats, please tap the Format button to make a preset before you open the audio source. Then click OK
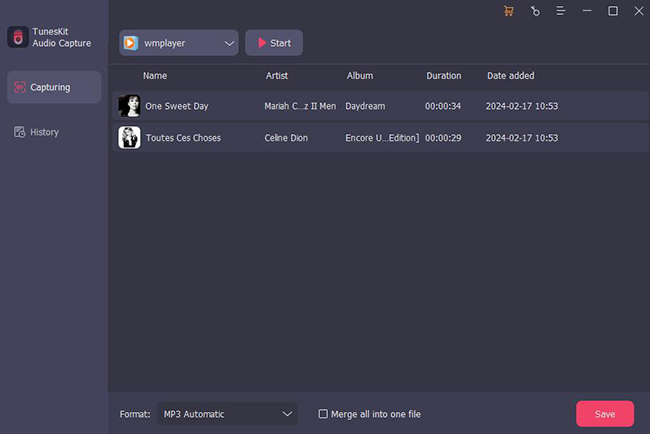
Step 3: After you open the target audio source and play the audio, TunsKit Audio Capture will start recording the desktop audio as soon as possible. Then you can click the Stop button to capture the desktop audio track.
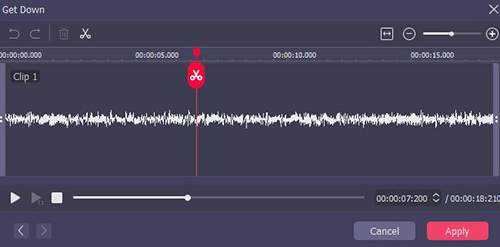
Step 4: If you need to trim or split the desktop audio recording, tap the Edit icon to display an editor. You can cut the audio here and complete the ID3 tags. Then click OK.
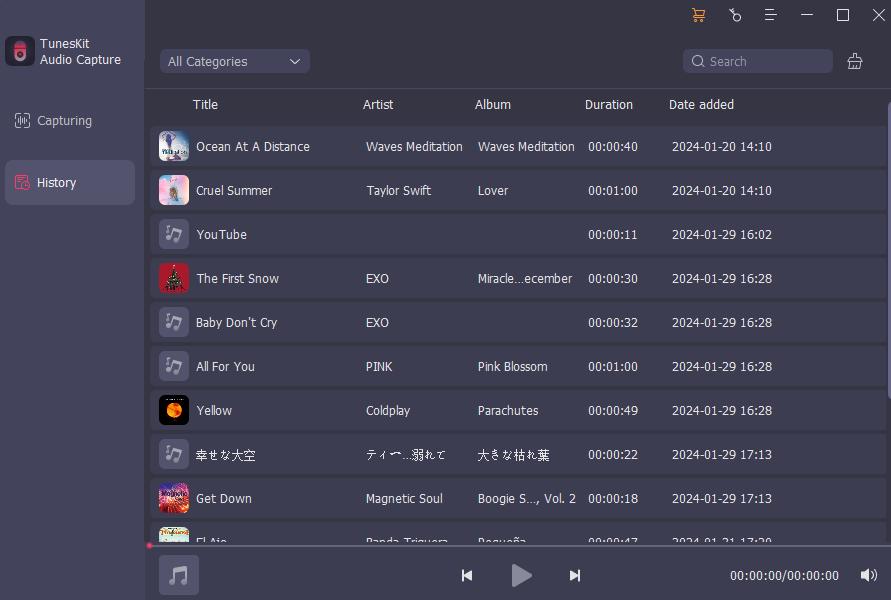
Step 5: The final recorded desktop audio will be in the History list and the destination file. You can double-click the audio track to preview or click the Search button to open the folder.
Part 3. How to Record Desktop Audio with Audacity
Another desktop audio recorder that we’re going to introduce is Audacity. It is free and open-source software that can be used on Windows, Mac, and Linux. You can use it to record desktop audio, live stream, or music on YouTube or other media sites. And it features a functional audio editor for you to edit the recorded desktop audio. Now please read the tutorial on how to record audio with Audacity.
2.1 How to use Audacity to Record Desktop Audio on Windows
Step 1: Get ready for the desktop audio, open Audacity and click the Record button, then play the audio.
Step 2: Click the Stop button when it ends. And you can see a visual audio track of the recorded desktop audio in this interface.
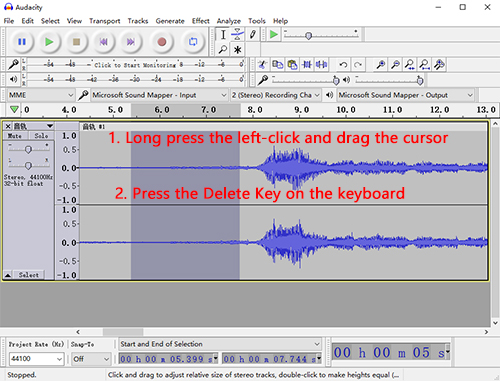
Step 3: Now you can play to check the recording. If you want to cut the unwanted part, just long-press the left cursor and slide it over the part you want to remove on the audio track to generate a range, then hit the Delete key on the keyboard.
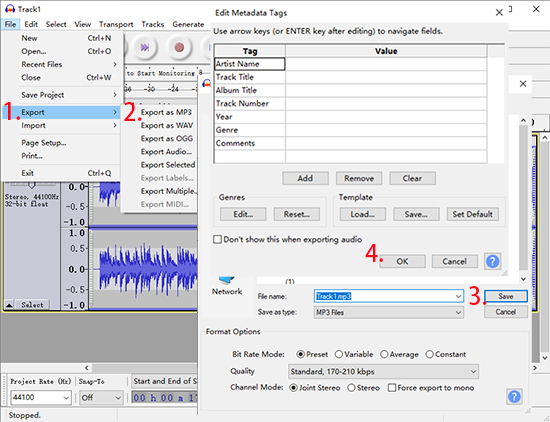
Step 4: Click File>Export as ..., write the file name and set the destination path, and click Save. Then fill in the information about the desktop audio, and click OK.
2.2 How to Use Audacity to Record Desktop Audio on Mac
The operation is the same as on Windows, but one thing you need to note is that recording desktop audio is not possible on Mac systems using Audacity directly. Before that, you need to install an additional plug-in, which is called Soundflower. The specific steps are as follows:
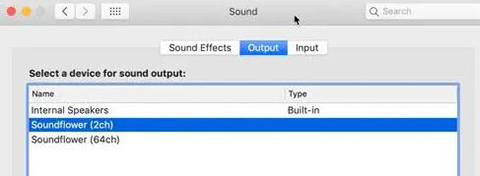
Step 1: Download and install Soundflower. Click System Preferences, navigate to Sounds>Output and select Soundflower(2ch).
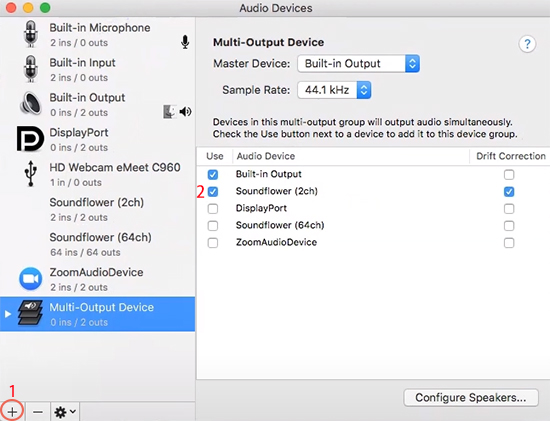
Step 2: Click on the Search icon in the upper right corner, enter Audio MIDI Setup and open it. Click the "+" to add Multi-Output Device, then tick Soundflower(2ch). Now you can refer to 2.1 to use Audacity to record desktop audio.
Part 4. How to Record Desktop Audio Online
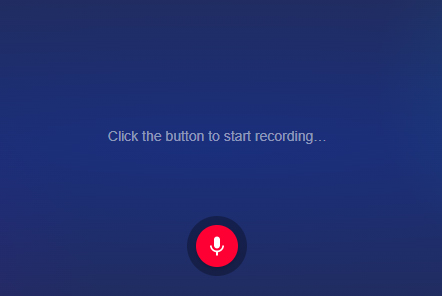
Online Voice Recorder is a free online audio recording tool that can be accessed on a browser. It allows users to record desktop audio and can cut the length of the desktop audio recording. Then save it to MP3 on your computer directly.
Step 1: Make sure you have opened the desired desktop audio. Access the Online Voice Recorder on the browser, click the REC button and start the desktop audio.
Step 2: Click the Stop button, and it will show the recorded desktop audio track. You can preview it or cut it to the length you want. After that, click Save and it will soon download as MP3 to your computer.
Conclusion
Today we've listed 4 great audio recorders to show you how to record desktop audio. There are four options for you to choose from: the built-in programs, TunesKit Audio Capture, Audacity, and Online Voice Recorder. Try them all and find the best one for you.
