[2022] Effective Ways to Record Desktop Audio with OBS Studio on Windows/macOS
OBS Studio is a free and functional recording product for Windows & Mac. Most of the time, people are likely to use it to record computer screens or video clips. But it also supports recording audio only. It’s supposed to record any audio on your computer, including the audio tracks in films, TV shows, videos, live streams, as well as the sound of the system, microphone, and more.
It is not difficult to capture the desktop audio with OBS Studio. But one thing should be noticed is that for recording audio on OBS, the output format of the recording is still a video format with a black screen. That’s to say, you need to use additional video converters to convert the recorded file to audio format. But if you don’t mind that, just keep reading and you’ll find the complete tutorial of recording audio with OBS Studio on Windows/Mac for free in the following content. In addition, we’ll also introduce some effective fixes and alternative to you in case you may encounter the OBS desktop audio stopped recording during the process.
Part 1. How to Record Desktop Audio with OBS Studio on Windows/macOS
For beginners, it seems that the OBS Studio’s interface is too complicated so that you may have no idea about how to use it to acquire desktop audio with this tool. Don’t worry. Here is the detailed guide on how to get desktop audio with OBS Studio on both Windows and Mac. Now let’s dig into it.
1.1 Record Desktop Audio on Windows
Before you begin recording desktop audio by OBS Studio, you have to check your Sound Settings on the computer and enable desktop audio on OBS Studio.
Step 1Check Your Sound Settings
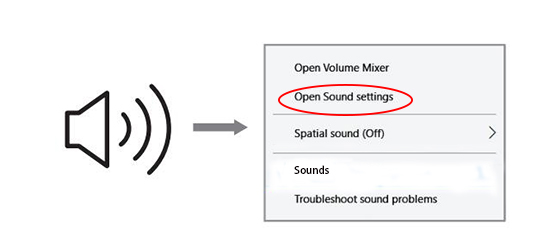
1. Open your desktop and move your cursor to the bottom and right-click the audio icon, then open the Sound Settings.
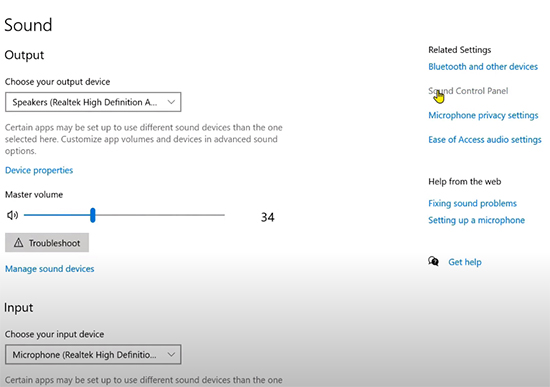
2. Choose your output device, then open the Sound Control Panel. In this scene, you need to confirm your output device is outputting now. If not, right-click and set Default. And you can right-click to disable the output device that you don’t want to output.
Step 2Enable Desktop Audio on OBS Studio
1. Launch OBS Studio. When you open it, firstly, click "+" in the Scenes to add a new scene and you can name it. Secondly, click "+" in the Sources to choose Audio Output Capture.
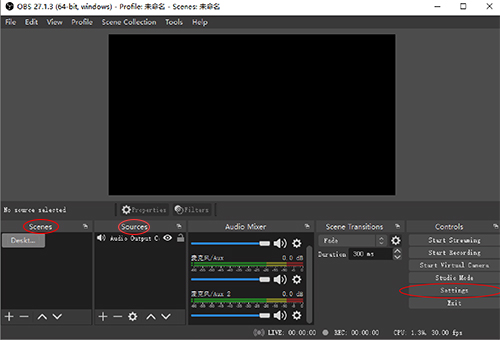
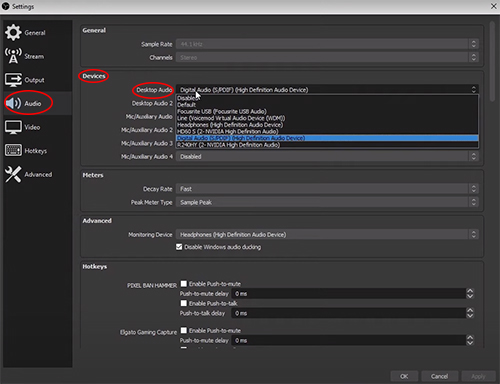
2. Now you need to enable the desktop audio. Click Settings. When this window pops out, click Audio on the left side and turn to Devices. Select the device that you have plugged into the computer. Once you have done, click Apply and OK. So now you have enabled desktop audio on OBS Studio.
Step 3Ready for OBS Desktop Audio Recording
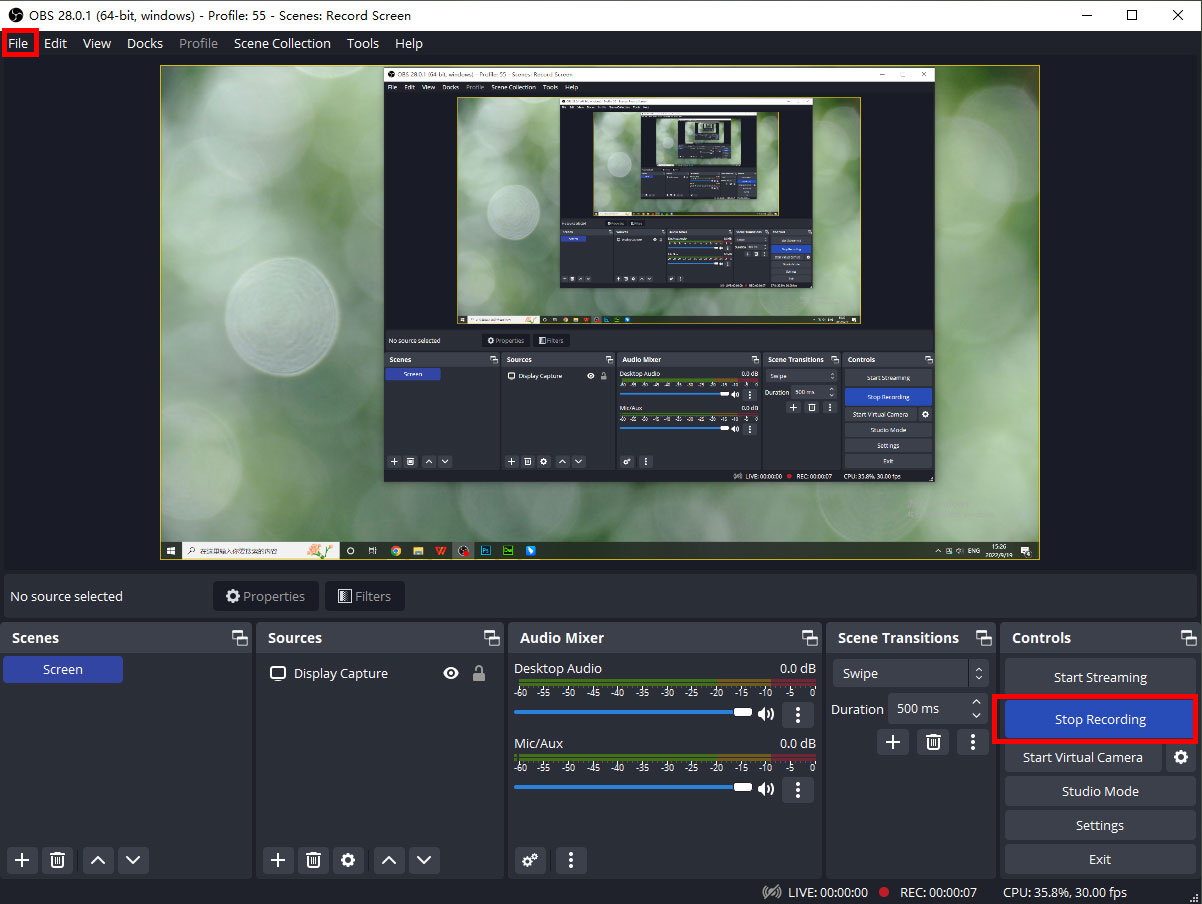
After you completed the settings, you can open the target desktop audio, click Start Recording in the OBS Studio interface, and play the audio, then the software will begins capturing the sound. Once it’s done, click Stop Recording.
Step 4Check Your Desktop Audio Recording
If you want to check your recorded desktop audio, click File on the top bar and click Show Recordings. Then you can locate the target audio file from the opening folder.
1.2 Record Desktop Audio on macOS
You can record desktop audio with OBS on Windows by following the above steps. However, it can't be used directly on the Mac because Apple has disabled the internal audio recording functionality for the macOS. Luckily, there's a free third-party plugin that will enable you to record desktop audio with OBS on macOS called SoundFlower.
Step 1: Download SoundFlower.
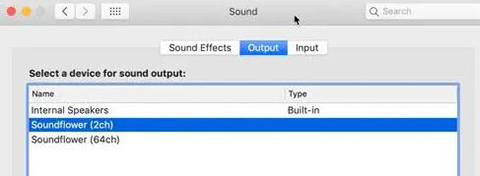
Step 2: Click the Apple icon in the lower-left corner of the top menu bar, click System Preferences, Sound, and Output. And choose Soundflower as the output.
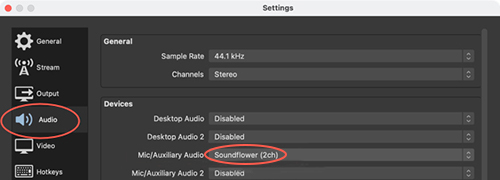
Step 3: Launch OBS Studio for Mac, in this scene, you need to click Settings and turn to Audio. Then you can see Desktop Audio and Mic/Auxiliary Audio, keep Desktop Audio in Disabled, and click Mic/Auxiliary Audio to choose Soundflower. When you have done, you can record the desktop audio now.
Part 2. OBS Studio Not Capturing Desktop Audio? Best Fixes & Alternative
When you are using the OBS Studio to record desktop audio on PC, you may encounter the bug that the desktop audio stopped working or recording in OBS unexpectedly. In this case, you can try the following solutions or OBS alternative to fix the problem.
2.1 How to Fix OBS Studio Not Recording Desktop Audio
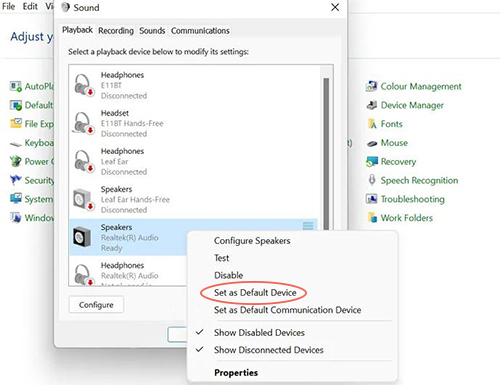
If you found OBS Studio can not record any sound, the first solution is to open your Sound Control Panel. Turn to check your output device, right-click and set Default.
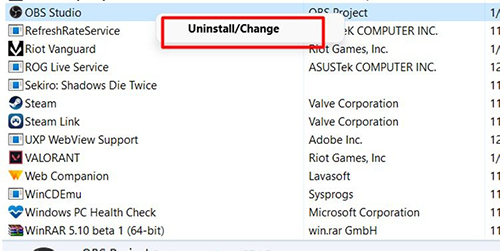
The second solution is that reinstall OBS Studio. You need to uninstall OBS Studio firstly and go to the official website to install the latest version.
2.2 Best OBS Alternative to Capture Audio on Desktop
If somehow the problem cannot be fixed in OBS, we highly suggest you to try the best alternative of OBS Studio in recording desktop audio on Windows/Mac, that is, TunesKit Audio Capture.
TunesKit Audio Capture is powerful audio recording software that enables users to capture all kinds of sound losslessly on Mac & Windows computers. Unlike the OBS software which has a complicated user interface, TunesKit Audio Capture has a more concise interface and is friendly for beginners.
You can use TunesKit Audio Capture for recording desktop audio, capturing any sound on the browser or on software, splitting, merging, or cutting your audio recordings to make it more exquisite, etc. And it has an ID3 tags function so that it will automatically recognize the message of the audio recording, and allows you to add some information to your audio recordings. You can download the trial version below to try it out. For more detailed operations, please refer to the tutorial below.
Step 1: Download and launch TunesKit Audio Capture.
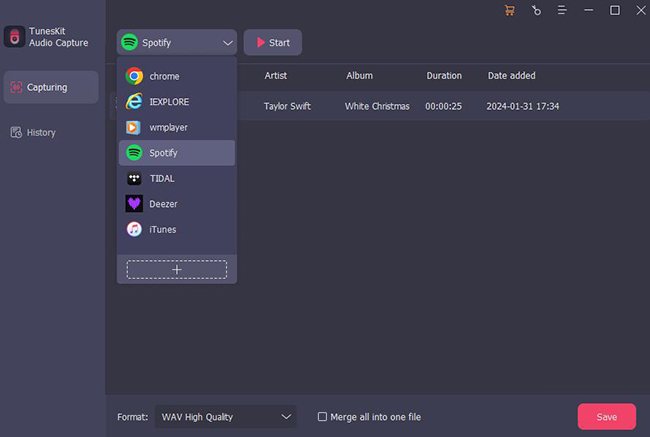
Step 2: Add the recording source and open it.

Step 3: Open the target audio and play it. Once TunesKit Audio Capture recognizes the sound, it will record it automatically. When it is finished, click Stop or wait to stop recording automatically by TunesKit Audio Capture.
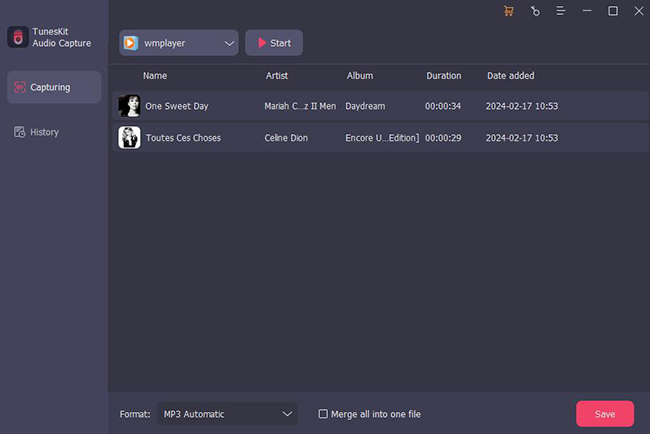
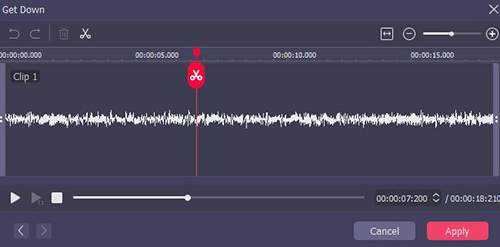
Step 4: If you need to trim or edit ID3 tags, open Edit, in this scene, you can cut the recording length as you like. Then turn to Tag to add some message about the recorded audio. Then click OK.
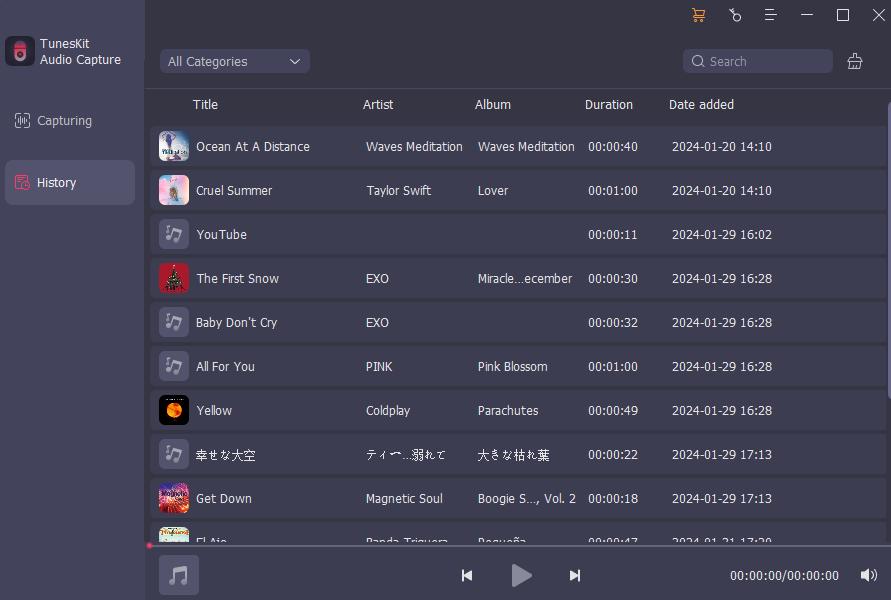
Step 5: The final recording will be saved in the folder. You can open it and have a check.
Part 3. Conclusion
We’ve explained the complete steps of using OBS Studio to record desktop audio on both Windows and macOS in today’s post, while providing some simple solutions and alternative to fix OBS Studio audio recording failures too.
If you are a professional user who are looking for recording multiple sounds simultaneously and not minding to do a re-encoding after recording, OBS Studio is suitable for you. But if you are a beginner and seeking for an easier desktop audio recorder, then TunesKit Audio Capture is your better choice.
