How to Make iPhone Ringtone
Although the classic Ripple and Chime are good enough as ringtones, most people would want their own specially customized ringtone, which is not an easy task that everyone knows how to do. While Android mobile phones can easily set whichever song you want as the ringtone, achieving the same thing on iPhone requires some tricks. But worry not, after reading this article, you will know how to make a ringtone for iPhone as well as how to trim a suitable clip to be used as a ringtone on Android devices.
Part 1. Prepare the Audio Clip to Make a Ringtone
Since ringtone of iPhone and most android phones only plays 30 seconds, songs that you want to set as ringtone needs to be clipped. And secondly, you should have the song file stored on your computer to trim. To meet these two demands, a useful tool is required - TunesKit Audio Capture.
TunesKit Audio Capture is a streaming audio recorder that allows you to record almost every kind of internal audio of your computer, which enables you to record any song losslessly without premium. The built-in trim tool will help you make a clip with ease. In addition, its large formats selection of recorded audio is also necessary for making a ringtone. All in all, this software is a combination of music downloader, converter and clipper.
Download TunesKit Audio Capture from the links above and start to make iPhone ringtone according to the tutorial below.
Step 1Set Preferences of TunesKit Audio Capture
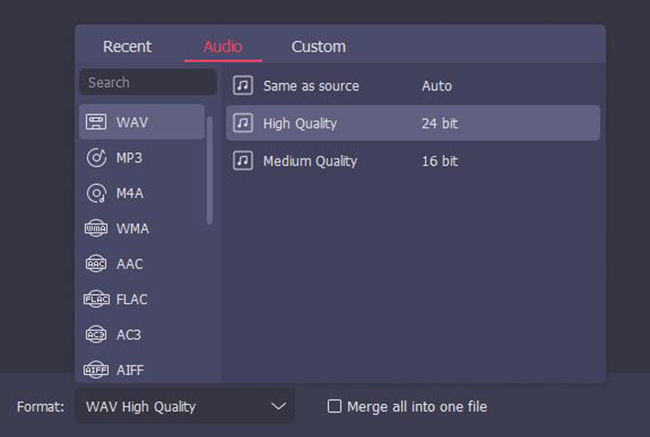
Open TunesKit Audio Capture and click the trumpet-shaped button to open the output preference interface. Here you can change the format, codec, channel, etc. Since we are making a ringtone for iPhone, the output format should be changed into M4A, but the rest options can be adjusted according to your own needs.
Press the "Preference" button on the top right can change the location where recordings will be saved.
Step 2Start Recording
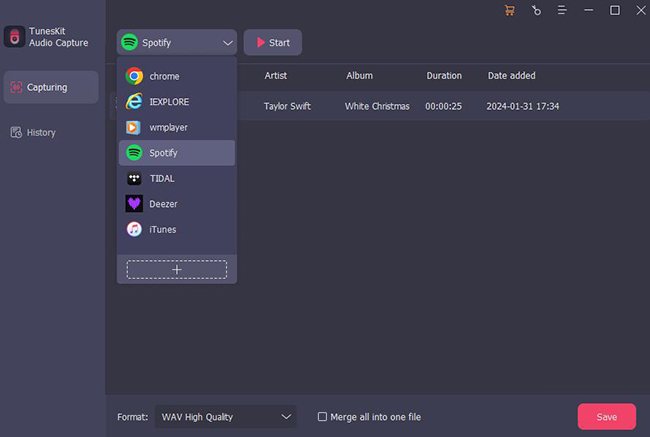
Select the target software that you want to record audio from. If the target the software is not on the main interface shown on the image above, click the "+" button or drag and drop it to add it to the list. Once the software is selected, the recording software will pop up, and the recording will automatically begin once you play the song.
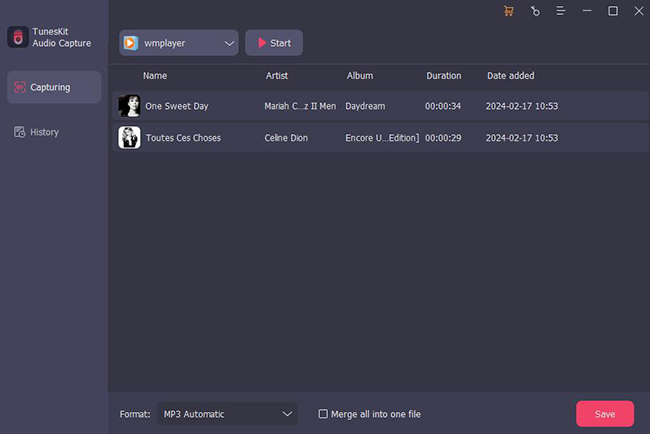
To finish the recording, stop playing the song or press the "Stop" button on the bottom right corner.
Step 3Trim the Recordings
Click the "Trim" button at the right side of the recorded tracks, and trim the audio into a 30-second clip since the length of ringtone is 30 seconds. After the trimming, click the "Save" button on the bottom right corner to save the recordings in the designated folder.
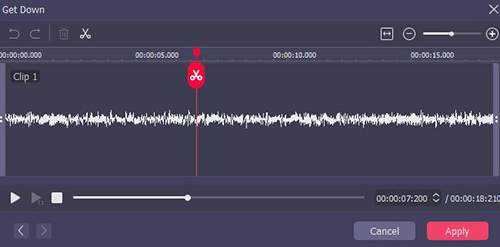
The usage of TunesKit Audio Capture is now completed, and you may close it now.
Part 2. Transform Recorded Audios into iPhone Ringtones
Step 1Rename the Extension
After the recording, you'll find the recorder songs in the designated folder. Click the files three times and rename the extension of the file as m4r.

Step 2Add the Ringtone to Your iTunes
Connect your iPhone with the computer and the iTunes interface will automatically pop out. Press the iPhone icon shown on the screenshot below.
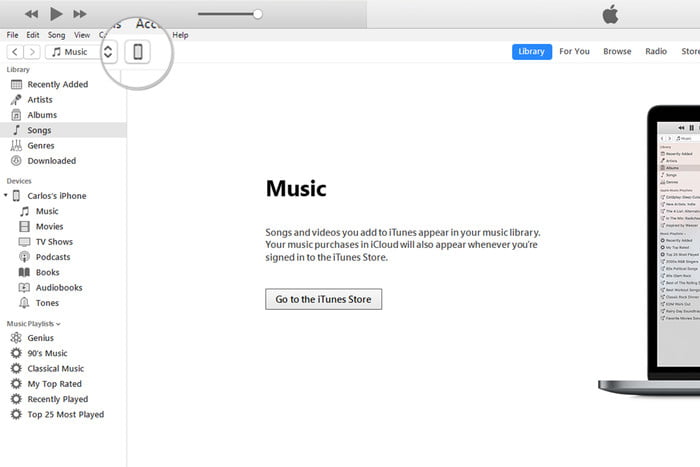
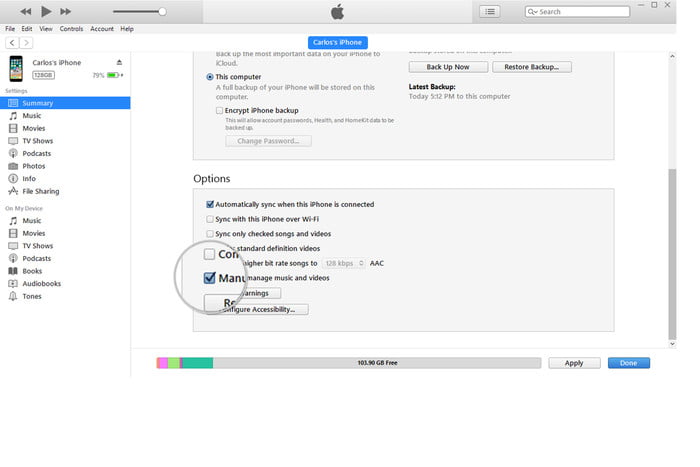
Under the "Summary" menu, scroll down to the "Option" section and tick "Manually manage music and videos" box. Click the "Apply" at the bottom to apply the change you just made.
Drag the audio file into the Tones list and it will be automatically synced into your iPhone.
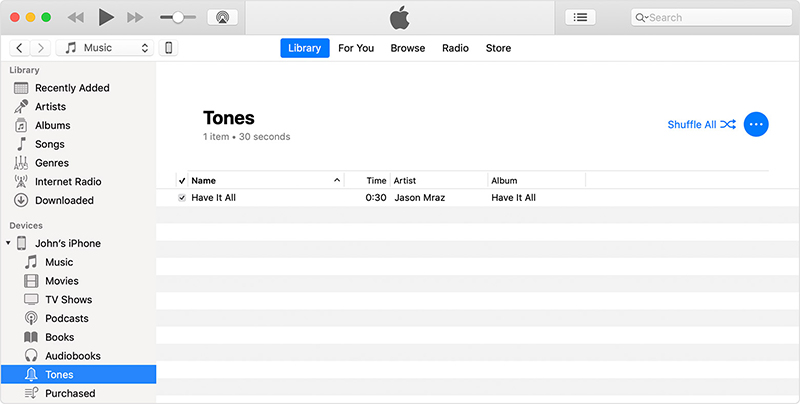
Step 3Select the Ringtone in iPhone Settings
Now you should be able to see the ringtone you made in your iPhone settings for you to select.
Conclusion of Making iPhone Ringtone
All in all, the process of making an iPhone ringtone can be concluded into two major steps - record and trim the audio, then upload it to iTunes in the suitable format. With the tutorial, you will be able to own a unique iPhone ringtone to show you special characteristics.
