How to Download Audio from Messenger on PC/Phone
Facebook Messenger, one of the most widely used chat and messaging apps, might store many meaningful or important text, images, videos, and voice messages of your conversations. However, the app does not provide a direct download option for voice messages. Fortunately, there are still a few other ways to store audio messages on your desktop or laptop.
In this post, we will show you how to download audio from Messenger with just a few steps. Just follow the article to the end!
Part 1. How to Download Audio from Messenger on PC/Mac
If you're looking for a reliable way to download audio from FaceBook Messenger, one suggestion is to use the audio recorder on your PC. There is numerous software available on the internet for audio recording, but here, we recommend TunesKit Audio Capture.
This Messenger Audio Downloader allows you to record and extract high-quality audio messages or live calls from Messenger without any hassle. Whether you're using Windows or Mac, it ensures lossless audio recording with flexible format options. More importantly, it supports recording from multiple sources, meaning you can record audio tracks from other online audio and video-sharing websites, social networking sites like Instagram, media players, and more.
Key Features of TunesKit Audio Capture:
Record audio from any source on your Mac/Windows computer and support 16 output formats as well as flexibly edit with built-in tools.
Now, let's explore how to record audio from Messenger on desktop via TunesKit Audio Capture.
Step 1Prepare to Record Voice Messages
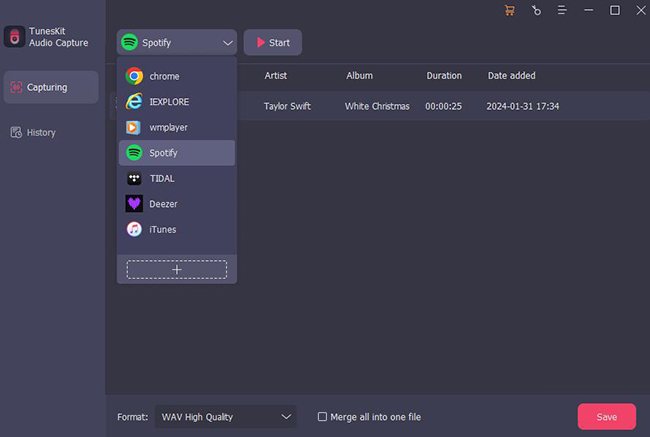
When you launch TunesKit Audio Capture from your desktop, you'll notice that it contains icons for various software you've installed in the dropdown list after clicking the app icon. If your desired software is not listed, you can add it by pressing the '+' button.
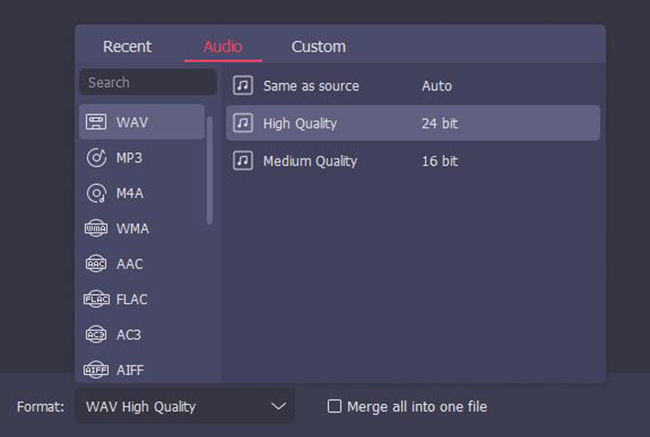
Click the 'Format' drop-down arrow to set the output format before beginning to record. You can also skip this step and retain it as MP3 by default.
Step 2Play and Download Audio from FaceBook Messenger
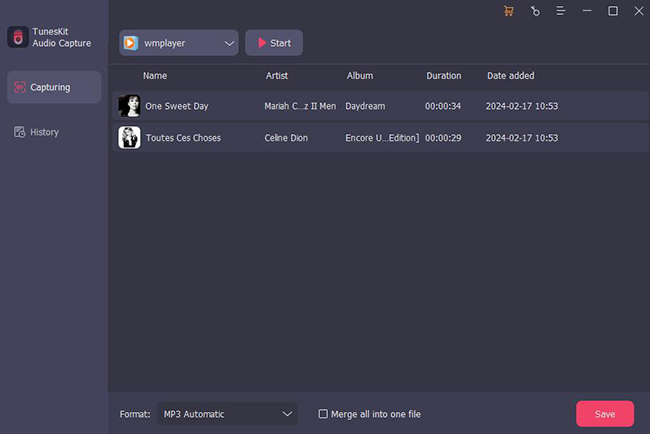
Find the Messenger audio tracks you wish to record and start playing them. Then TunesKit Audio Capture will automatically start recording and extracting audio from Facebook videos, lives, or video calls. By the way, it offers multi-track audio recording, so you can listen to and record all of your favorite Facebook Messenger audio files at the same time.
Step 3Stop and Locate Downloaded Messenger Audio
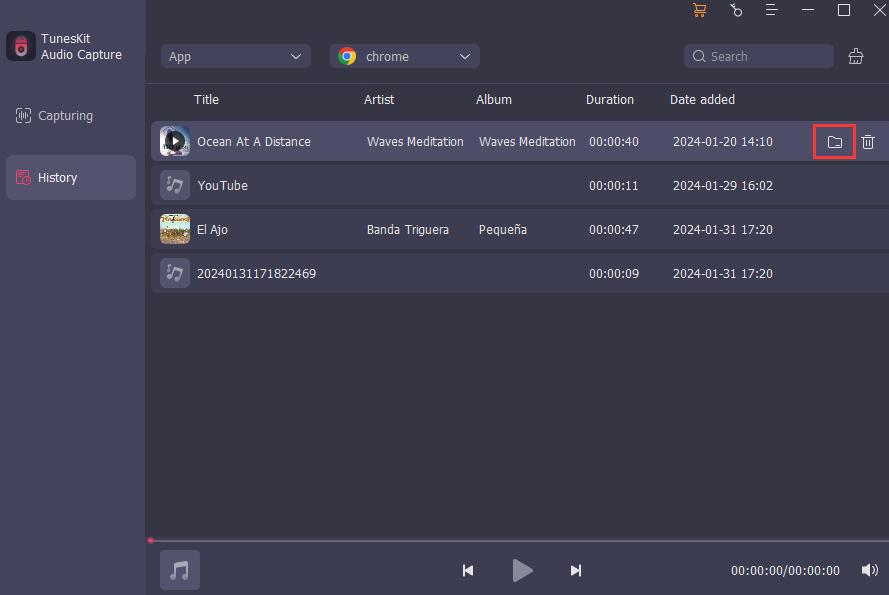
After the editing, all recorded Facebook audios can be accessible in the History list when you click the Stop and Save icon. The recorded Facebook audio can also be found in the destination folder by clicking the Open icon.
Part 2. How to Extract Audio File from FB Messenger via Chrome [PC/Mac]
If you're only looking to save audio from Messenger without using extra software, you can do so directly through Google Chrome's Developer Tools. This method allows you to extract audio from Messenger without additional downloads.
However, it does require some basic knowledge of web page elements. But don't worry - we've got you covered with this step-by-step guide!
Step 1. Open Facebook Messenger on Google Chrome and navigate to the conversation with the voice message.
Step 2. Right-click the page and choose Inspect to open Chrome Developer Tools.
Step 3. Refresh the page, click on the "Network" tab, and select "Media".
Step 4. Play the voice message while monitoring the media files.
Step 5. Locate the audio file named "audioclick-xxxx", right-click, and choose "Open in new tab."
Step 6. Click the three-dot menu in the player and select "Download" to save the file.
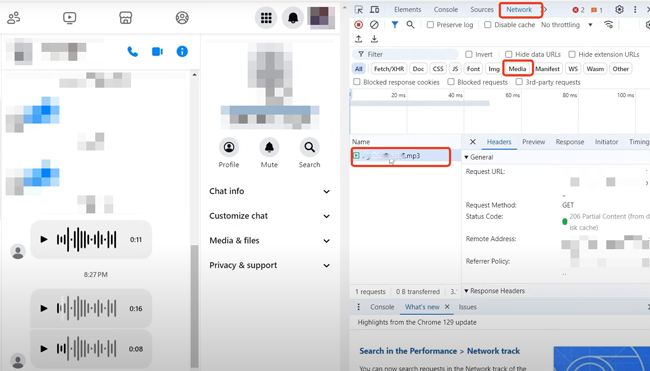
Then, you should get the audio in M4A or MP4 format stored on your computer now. Be aware that the downloaded audio file may have a random name, making it hard to identify. To keep your files organized, consider renaming them after downloading.
Part 3. How to Save Audio from Messenger to Phone Directly [Android/iPhone]
Since you cannot download audio files or voice communications from Messenger mobile app, you'll have to go to m.facebook.com on a browser instead.
The m.facebook.com is the mobile version of Facebook's website, which has the ability to download audio files from Messenger. So, if you enter the facebook.com, the desktop version of Facebook, you'll not find the Download option.
Follow these steps to download your audio on massager successfully:
How to Download Voice Message from Messenger on Facebook Web Version on Android
Step 1. Go to your web browser and search for m.facebook.com. Once on the website, log in to your Facebook account by entering your email/mobile and password.
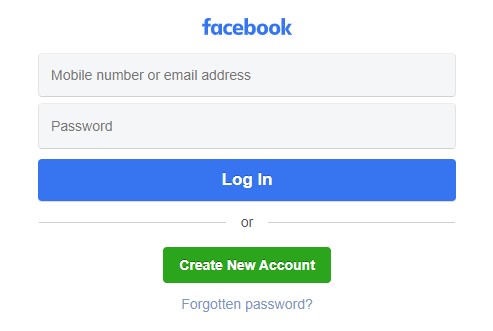
If you're redirected to facebook.com automatically, ensure you turn off the Desktop mode on your browser settings and re-try with the Incognito window.
Step 2. After successfully logging in, go to the navigation bar and click on the Messenger icon. This will provide you with a list of messages on your Facebook account. Find the message with the audio you want to download and click on it to open.
Step 3. Once you are in the message conversation with the audio, move to the audio you want to download. You'll see a "three dots" icon at the right side. Tap it and the three dots indicator will provide a Download option. Tap the Download option to save Messenger audio to your phone directly.
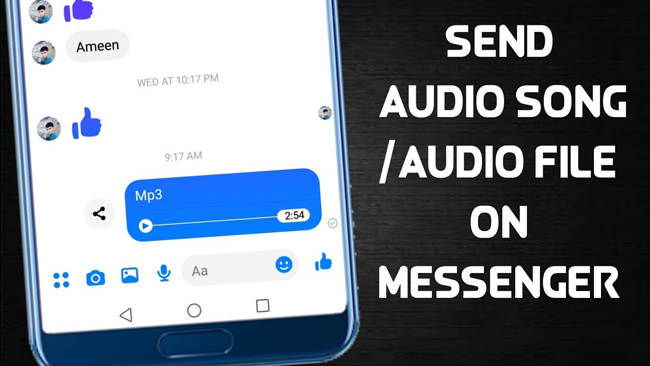
Part 4. How to Record Audio from Facebook Messenger on Phone [Android/iPhone]
If the above methods don't work or too complicated to operate, record audio from Messenger via the built-in screen recorder on your Android/iPhone is also a great alternative. To use the built-in screen recorder, proceed as follows.
How to Record Audio from Messenger on Phone
Step 1. Open the "Control Center" and tap the "Screen Recording" button. If you don't see it, you'll need to add it from Settings > Control Center.
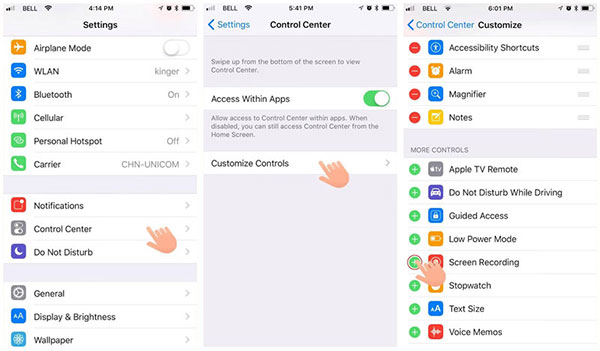
Step 2. Ensure the microphone is enabled for audio recording. Then, tap the Start Recording button and play the Messenger voice message.
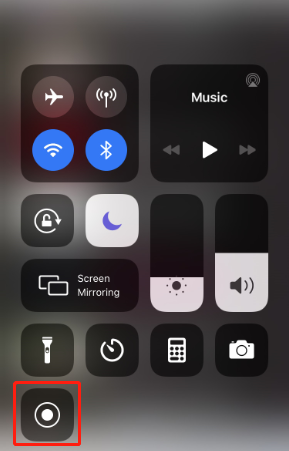
Step 3. Tap each voice message and audio file one by one. Once you record all audio clips on the conversation, stop the recording and save it in the "Photos" app.
If you only need the audio, you can use the online converter to convert the MP4 format into MP3 or other audio formats.
The Bottom Line
Now you have got several methods about how to download audio from Messenger. Among them, downloading audios from Messenger on your PC is easier and faster with the TunesKit Audio Capture. This is because it does not require much complex knowledge, just following 3 steps outlined above. It makes audio downloading easier and even more secure. Get your TunesKit Audio Capture and enjoy its benefits.
