How to Get Scanned Documents from Notes? 3 Ways Here
With the advancement of smartphones, the previous notebook is no more the sole manner of taking Notes. Regardless students, commuters, businessmen, and travelers, are inclined to take out phones, pick up the note app, and tap on the screen to type in ideas the moment they prepare to create Notes. In contrast to the notebook, the new type has fewer limits on time and location. Often, some note apps like iPhone Notes offer more, as you can also add images or scan photos, invoices, or cards to produce documents. Thus, there store some scanned documents on the Notes app. But some iPhone users want to recover these documents that are deleted and disappeared. For this reason, this tutorial will focus on how to recover scanned documents on iPhone Notes.
Part 1. How to Recover a Deleted Scanned Document on iPhone Notes
Option 1. How to Recover Deleted Scanned Documents on iPhone from Recently Deleted Folder
Some of you may unwittingly delete the scanned documents on Notes. If you are among these persons, you are lucky. You can directly open Notes on your iPhone and go to its folder. To learn how to recover scanned documents on Notes, refer to the details below.
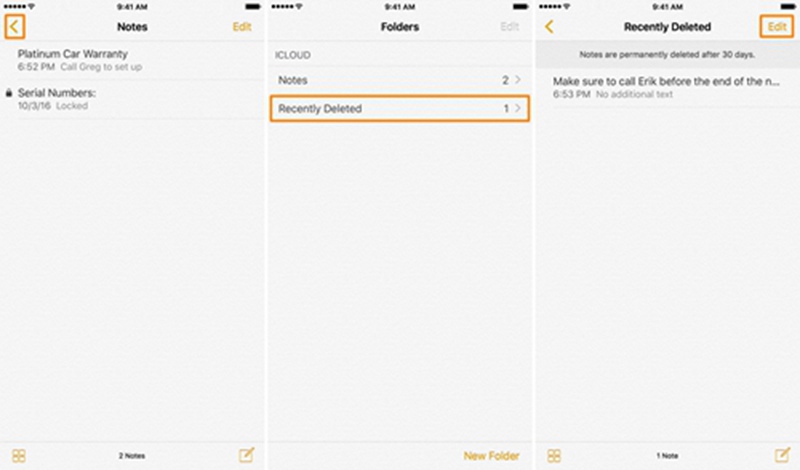
Step 1: Tap the Notes app on the home screen of your iPhone. On its top-left screen, you will see an arrow icon. Proceed to click it.
Step 2: Then, tap the Recently Deleted option and choose any document you want to retrieve by clicking Edit on the top-right screen.
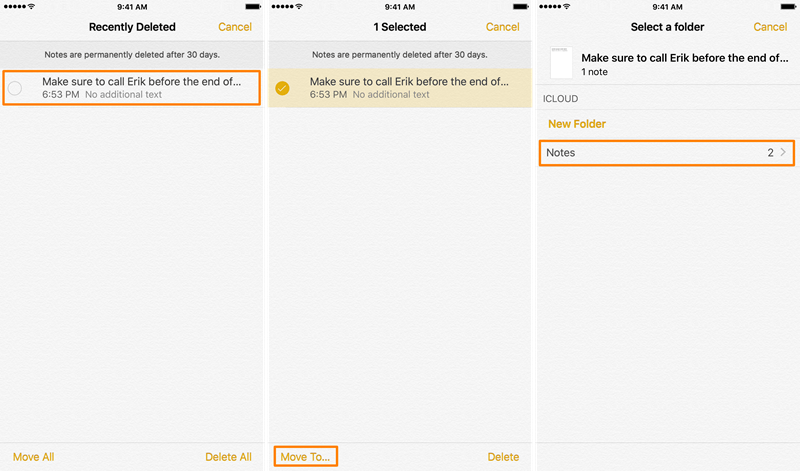
Step 3: Last, select the Move to option and then check if the scanned documents are displayed again.
Option 2. How to Recover a Deleted Scanned Document Using TunesKit iPhone Data Recovery [Data Lossless]
When the scanned documents on Notes are lost by themselves or disappeared unnoticeably, the first way is in vain. But targeted at such a severe case, an iPhone data recovery tool will be the best one. It gives you a chance to recover any deleted or lost or stolen data. Here, we recommend the TunesKit iPhone Data Recovery software which receives good feedback from its users.
TunesKit iPhone Data Recovery is an outstanding desktop recovery tool for iPhone/iPad/iPod data. A total of 20 more kinds of data, for example, call history, contacts, text messages, files, app messages or photos, and videos, can be restored by utilizing the program. Most users have been praising its sound efficacy and performance. In addition, on the condition that your iPhone is broken, jailbroken, water damaged, or locked, it can also help find out any data. Three modes are embedded into the program, including Recover from iOS, iTunes backup, and iCloud backup.
Key Features of TunesKit iPhone Data Recovery
- Recover data from different iOS devices like iPhone, iPad, and iPod
- Retrieve data under various scenarios including mistaken deletion and software update failure
- Restore diverse types of data like scanned documents on Notes, videos, photos, etc.
- Fully compatible with all iOS versions including the latest iOS 15
- Support previewing and selecting required data before recovery
Now, follow us to learn how to retrieve scanned documents from Notes of iPhone.
Mode 1. How to Recover a Deleted Scanned Document on iPhone Notes Without Backup
Step 1: Install and Run the Program, Connect iPhone to PC
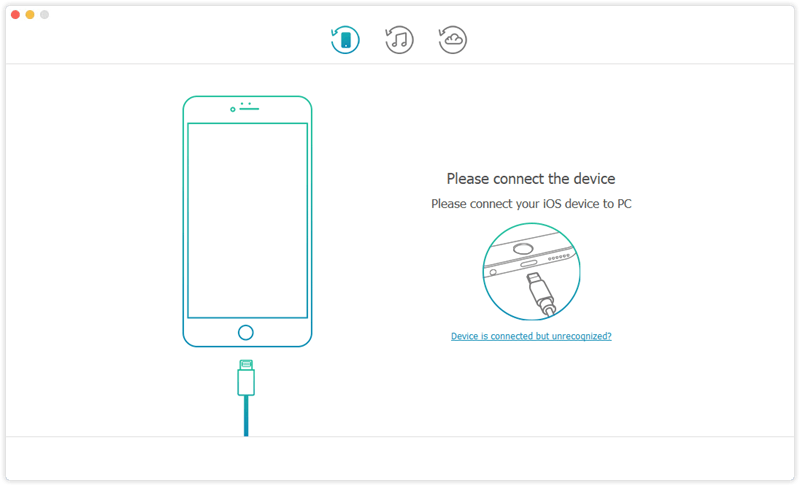
First, open TunesKit on your computer where you should use an original USB to connect the device correctly. The iDevice may require you to trust the computer, and just enable the Trust option. On the interface, click the Recover from iOS option. After this, TunesKit can scan your device info.
Step 2: Begin to Scan Your Scanned Documents from iPhone Storage
Second, TunesKit will show the data types on the interface. Preview and decide, and then click the Scan button. TunesKit will start scanning all data including scanned documents on Notes.
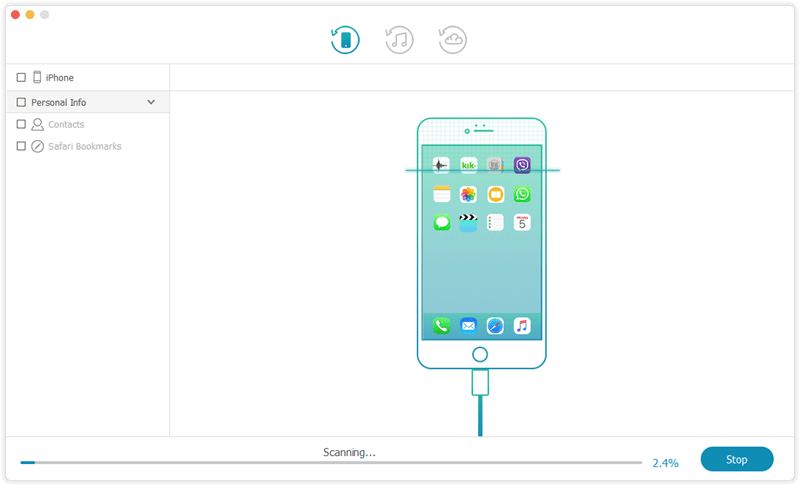
Step 3: Preview and Begin to Recover Scanned Documents on Notes
When the scanning process is complete, all the data you are willing to restore will be displayed. Then, view these data and choose the documents you want to retrieve. Next, click the Recover button to recover scanned documents on Notes of iPhone.

Mode 2. How to Recover Deleted Scanned Documents on Notes from iTunes Backup
Apple makes backups unreadable by default, so users can't access them. Even if your iPhone device has been broken, damaged, or stolen, TunesKit iPhone Data Recovery may provide the best solution for retrieving scanned documents on Notes and other important information from your iTunes backups. In this way, you can view them without any restrictions.
Step 1: Set "Recover from iTunes" Mode
Once the program is installed, it starts automatically detecting backup files. After that, switch to "Recover from iTunes".
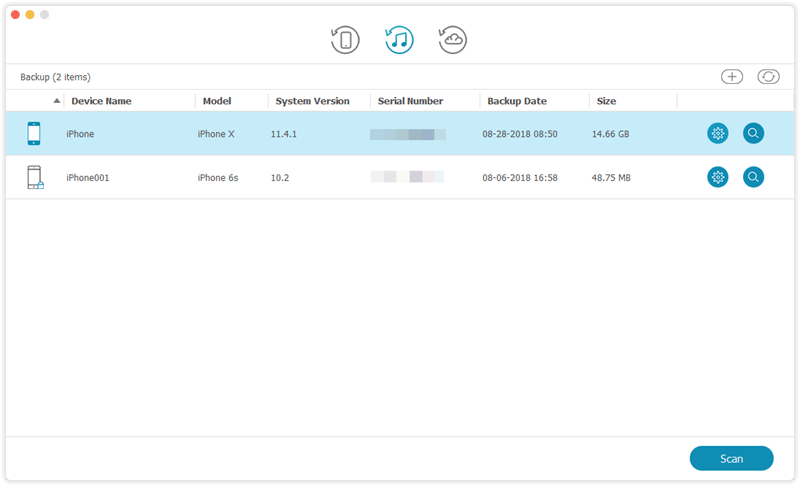
Step 2: Scan Documents from iTunes Backup
Choose the scanned documents you need to recover and click on "Scan". Wait for a few seconds until it extracts all of the backup files.
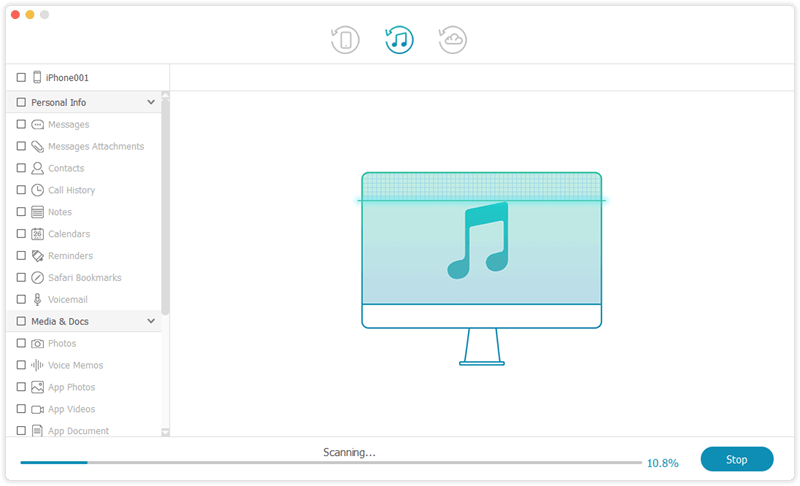
Step 3: Preview and Recover Scanned Documents on Notes
By using this program, you can analyze your selected backup file in detail. Upon completion of the analysis, you will see a well-organized list of all backup data on the left. You can first preview the documents on your computer, mark the ones you want, and then click "Recover".
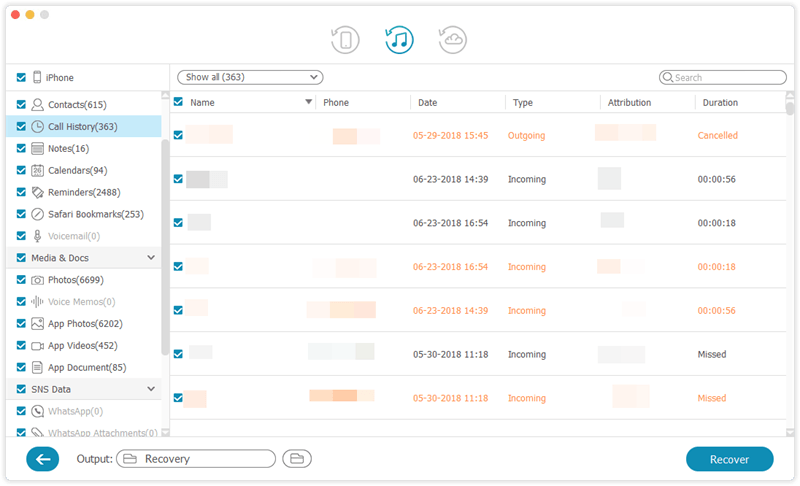
Mode 3. How to Recover Deleted Scanned Documents on Notes from iCloud Backup
If your iPhone is damaged or lost, you can also retrieve your scanned documents from iCloud backup.
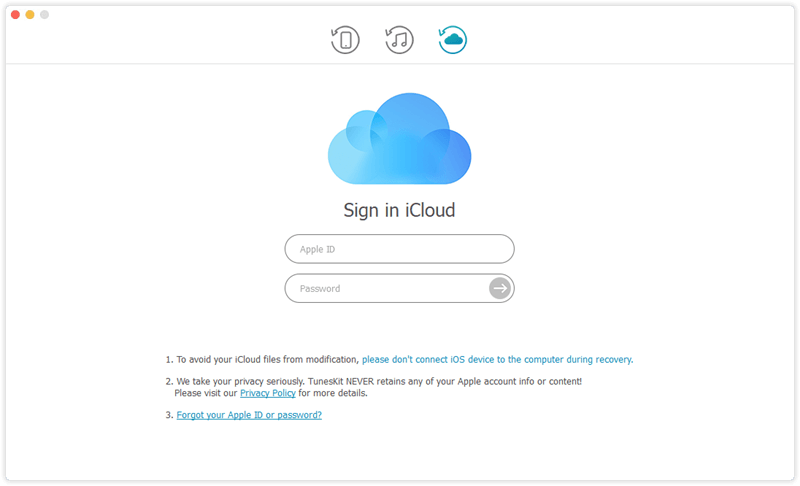
Step 1: Choose iCloud Mode and Log in iCloud Account
The top bar of the main screen should show an icon of a cloud. You can choose "Recover from iCloud" mode by clicking on it. Signing into your iCloud requires your Apple account and password. We promise never to keep a record of your iCloud content or information.
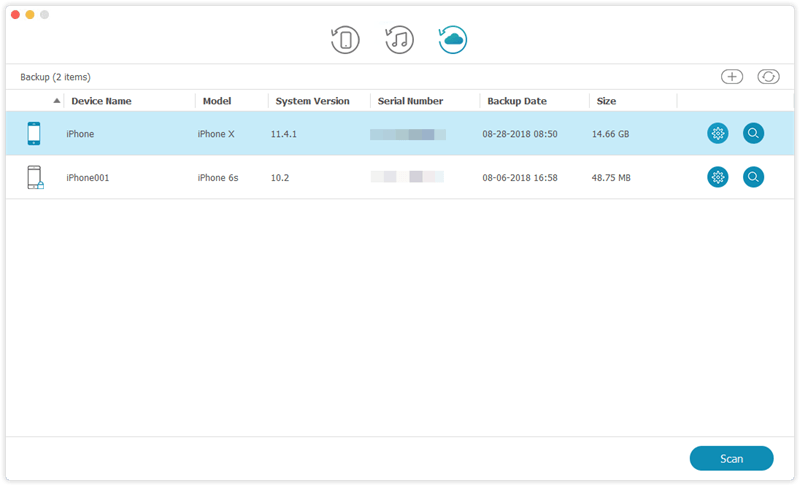
Step 2: Download iCloud Backup and Scan Files
After you log in to your iCloud account, Joyoshare will show all the backup files that you have created. Once you have selected the file you wish to recover, click the "Download" button. You will be prompted to choose the type of file you wish to download once you click it. Check the box "Select all" or select them selectively. Click "Next" to begin downloading.
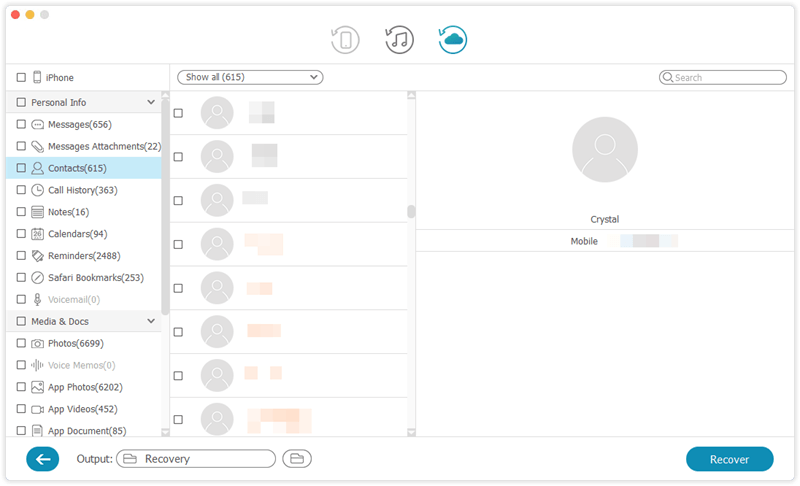
Step 3: Preview and Restore Scanned Documents from iCloud
Scanning will be completed after a short period. Your iCloud account now allows you to preview the contents. You can save your chosen items with one click by clicking the "Recover" button after selecting them. Make sure your device is connected to your computer at all times.
Option 3. How to Recover Unsaved Scanned Documents from iCloud Website
In this part, you will get how to recover scanned documents on Notes of iPhone via iCloud.com. iCloud is a solution offered by Apple for backing up and restoring data. To recover scanned documents, you can search for its official website and then check the steps below.
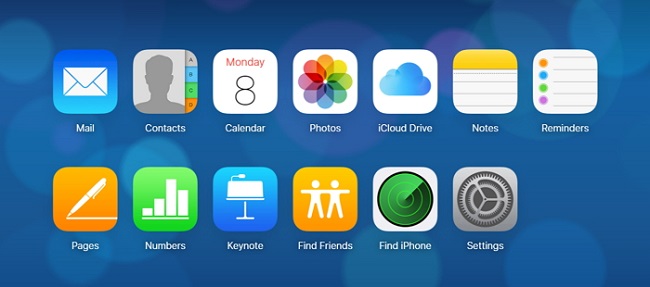
Step 1: Open the iCloud official website. Then, the website will ask you to log in with your Apple ID account.
Step 2: Once you are signed in with the account, choose the Notes icon. Then, check the scanned document shown and select the Notes you wish to restore.
Step 3: Finally, click the Email button and enter your email address for receiving the Notes. Then, log in with your email address and download the Notes sent.
Part 2. Additional Tips: How to Scan and Save Documents in Notes
Before concluding, we'd like to introduce the full steps to scan documents on the Notes app and how to save scanned documents from Notes.
Tip 1. How to Scan Documents on Notes?
Before beginning to scan documents, you need to make sure that your device is running iOS 11 or later on OS. Then, see the steps below.
Step 1: Open the Notes app on your iPhone. Then, you need to launch a new note and open the written note.
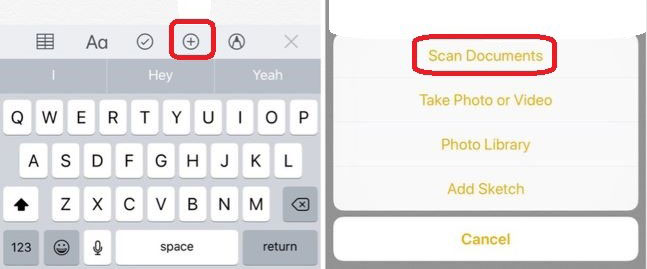
Step 2: Now, you will notice the + button at the bottom screen. When a page prompts, choose the Scan Documents option shown. Then, the built-in scanner will take photos of the paper you place.
Tip 2. How to Save Scanned Documents from Notes?
To protect and store your scanned documents better, you can save these documents as files or other forms. By doing this, you can take full advantage of its Share option. Also, sending it as emails can be a try.
Besides, always make a backup of these Notes to iCloud or iTunes on your computer. In this way, whenever you miss these Notes, you will not be at a loss.
Part 3. Final Thoughts
So, when you read this part, you should know how to recover deleted scanned documents effortlessly. And we sincerely hope that it will be a full guide on how to get scanned documents from Notes of iPhone. After making a comparison between these 3 ways, we can conclude that TunesKit iPhone Data Recovery software is better.
