Top 4 Ways to Recover Photos from iPad after Restore

Restoring iPad is a useful way to fix almost all the problems occurs on the device including iPad stuck in recovery mode, iPad cannot sync with iTunes or cannot be found in iTunes and so forth. Generally speaking, restoring the iPad completely removes all files and settings on your device, which means that all the apps you have installed will be deleted as well as the data on the default app. It also brings another problem which is the photos on your iPad will get lost due to restoring. If you encounter with the situation we mentioned, you may probably take a look at this post to find out how to recover photos from iPad after restore.
First of all we will introduce the efficient iOS data recovery tool you'll need to fix the problem – TunesKit iPhone Data Recovery. To ensure the utmost possibility of secure and complete data recovery on iOS devices, this powerful software comes with three smart data recovery modes, namely, Recover from iOS devices, Recover from iTunes Backup, and Recover from iCloud Backup. It is capable of retrieving over 20 types of data on the iPad including photos, videos, iMessages, WhatsApp messages, calendars, notes, reminders, etc. Besides, you don't need to worry about the compatibility of the program as it supports all models of iPad Pro, iPad Air, iPad mini, and iPad.
1. Selectively Recover iPad Photos from iTunes Backup after Restore
The first solution is to recover iPad photos from iTunes backup file selectively with TunesKit iPhone Data Recovery. It scans and extracts the backup file and enables you to select specific files to recover. Here's how to do.
Step 1Choose iTunes backup files
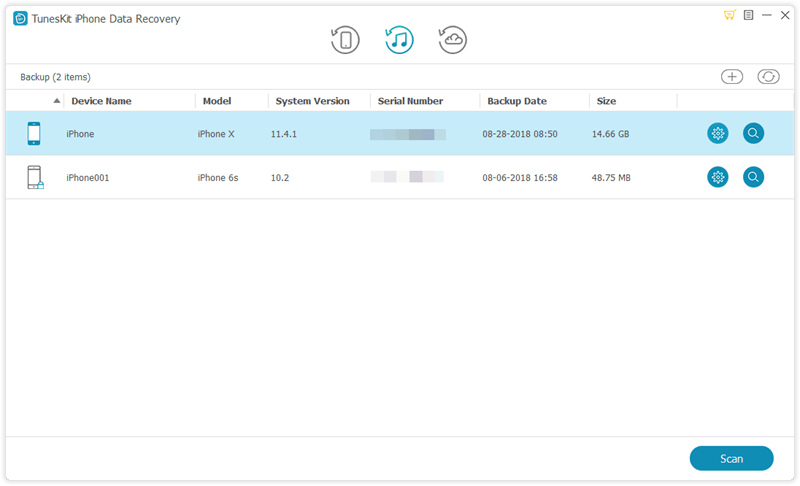
Launch TunesKit iPhone Data Recovery on your computer and choose "Recover from iTunes Backup" mode from the main product window. It will start detecting all your iTunes backup files.
Step 2Scan deleted photos
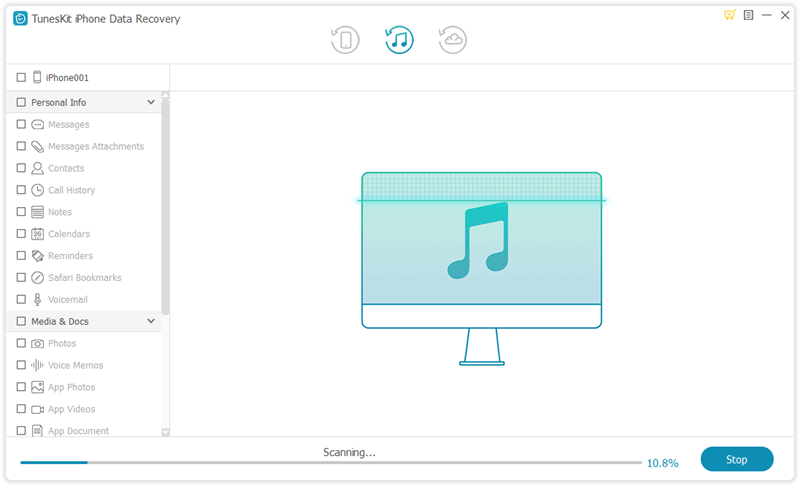
It will show the list of iTunes backup files, select the right one you want and then tap on the "gear" icon of the backup column, choose Photos and click Next to continue.
Step 3Recover photos from iTunes backup
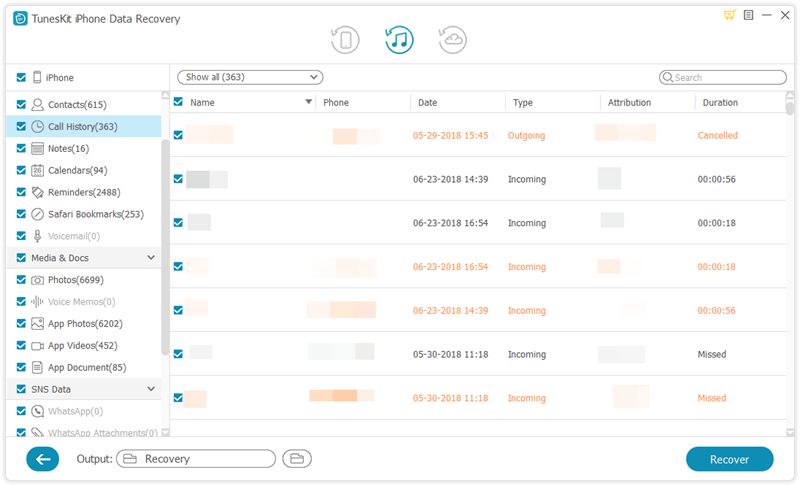
When it finishes scanning, you will be able to see all the recoverable photos in the interface. You can choose the specific ones you want and press Recover button at the bottom to revert them back to your computer instantly.
2. Selectively Recover iPad Photos from iCloud Backup after Restore
If you have backed up your iPad to iCloud in advance, then you can take this method. Simply follow the instructions below to learn how to retrieve photos from iPad after restore via iCloud backup with TunesKit.
Step 1Log into iCloud account
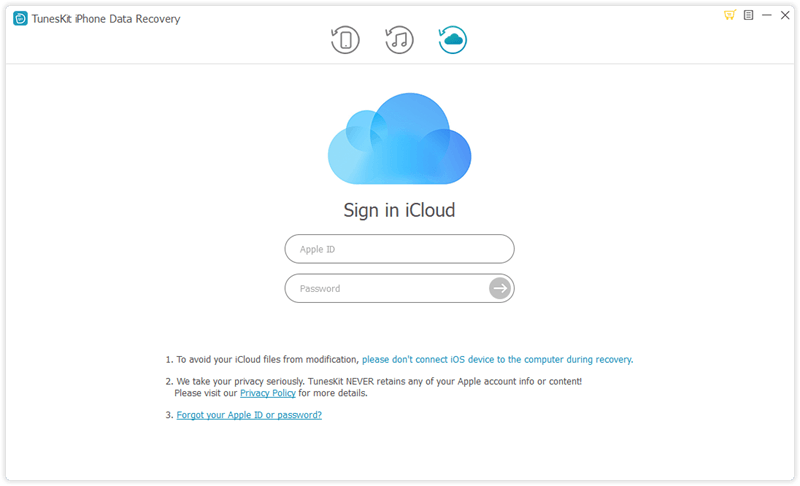
Open TunesKit iPhone Data Recovery and set the recovery mode as "Recover from iCloud Backup", sign into your iCloud account as required.
Step 2Download iCloud backup
TunesKit will display all the iCloud backup files enable you to choose the appropriate one you need, then tap Download option. From the new pop-up, choose Photos and then click Next button to download them.
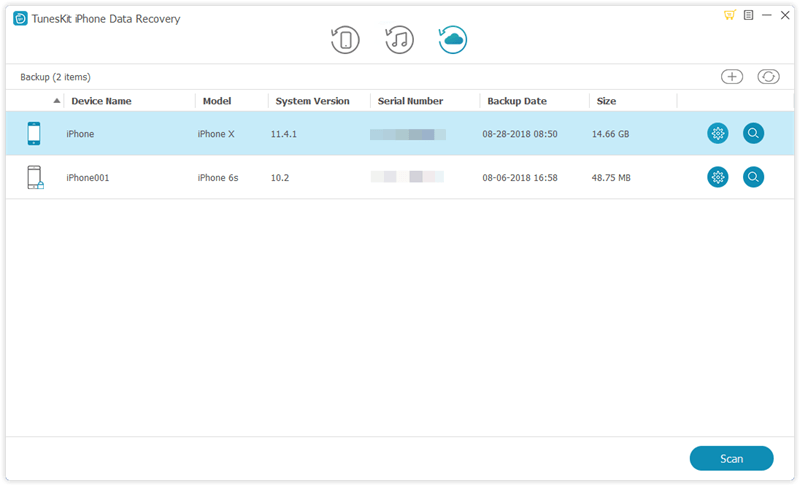
Step 3Recover photos from iCloud backup
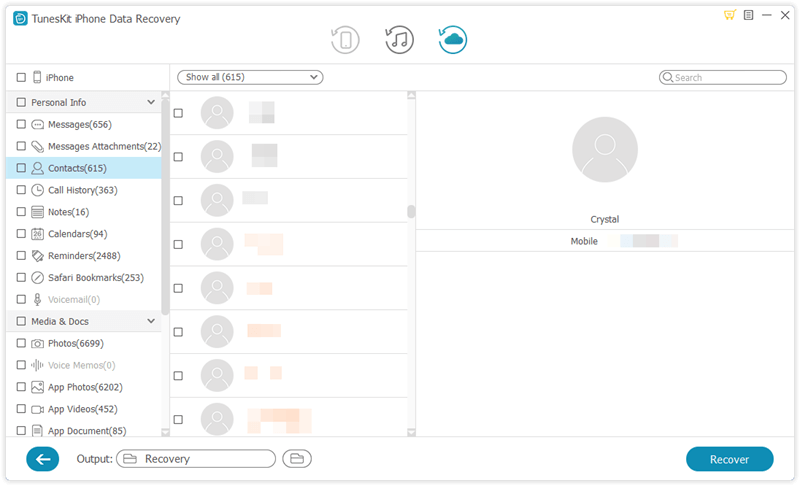
Once it has completed scanning, all the recoverable photos will be shown in the window, mark in the check box to select the photos you want, and then click on Recover to get them back to your computer in seconds.
3. Recover Photos from iPad after Restore with iCloud Backup
The solution Apple provide to recover photos or other data from the iOS devices may not be familiar to the new users, but it is necessary to note that taking this way means that all the current files on your iPad will be replaced by the backup file you select to restore. What's more, you are not allowed to preview the data before recovery. The detailed steps you need to take are shown as follows.
Step . Go to Settings > iCloud > Storage > Manage Storage, click the iPad icon under Backups to make sure you have a recent backup.
Step . If you make sure that there is a backup, then the next step you need to take is to reset the device, navigate to Settings > General > Reset, tap on "Erase All Contents and Settings".
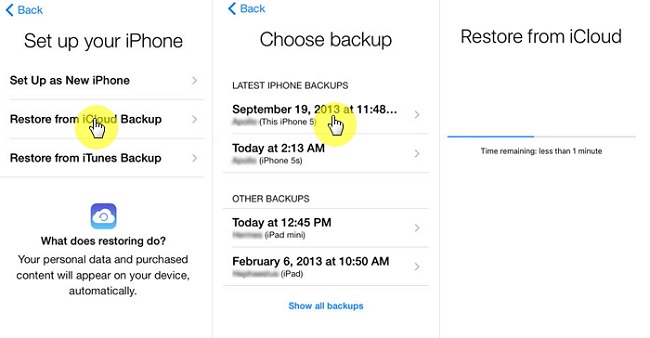
Step . At this point restart your iPad and set it up as required. When you get to the "App & Data" screen, choose Restore from iCloud Backup.
Step . Log into your iCloud account and choose the right one to restore, wait until it finishes.
4. Recover Photos from iPad after Restore with iTunes Backup
If you have created backups with iTunes beforehand, then you can easily restore the entire backup from iTunes including Photos. Simply follow the steps below to recover deleted photos from the iPad after restore once you have made sure that the iTunes backup contains the photos you have lost from the device.
Step . Connect your iPad to the computer using the USB cable that comes with it and launch iTunes. Tap Trust on your iPad if asked.
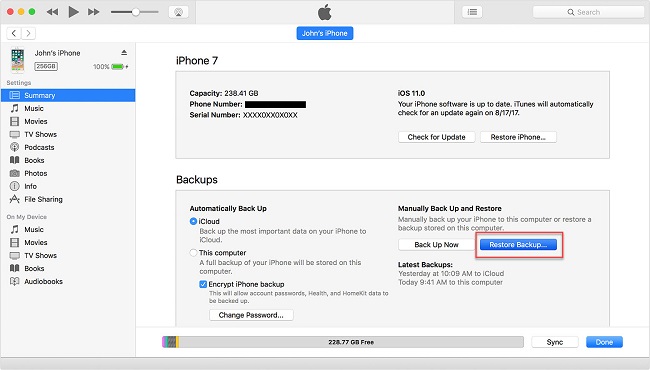
Step . Click the iPad icon from the interface and then tap on Restore Backup.
Step . Select the appropriate backup file and tap Restore, enter password if you have encrypted the backups. Wait until it completes restoring.
The Bottom Line
If you're looking for the most convenient and effective way to recover iPad photos after restore without backup, then TunesKit iPhone Data Recovery will be an excellent choice for you for the reason that it can scan all the recoverable files on your iPad including photos and get them back to your computer as soon as possible. Please feel free to leave comments below if you have any questions about this topic.
