How to Recover HEIC Photos on iPhone? Look Here
You, if an iPhone user running iOS 11 or newer versions, probably have been found photos in the HEIC format or inadvertently taken photos and saved them in this format. HEIC, Apple's equivalent of HEIF, is defined as highly efficient photos or images occupying less space than the JPEG/JPG formats. Most users must have stored a lot of such photos which are valuable for them. However, as a result of the deleted or disappeared HEIC photos, you may be harboring suspicion about the possibility of recovering these photos. Well, we'd like to tell you just be relieved, as this tutorial will uncover how to recover HEIC photos on iPhone more easily.
Simple Check from iPhone
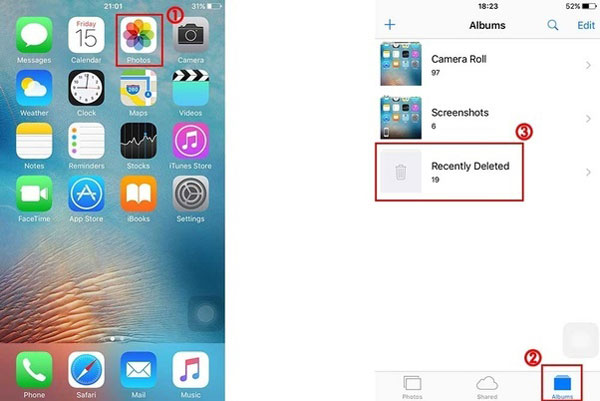
Factually, you have recently removed HEIC photos. In this case, try opening the Photos app and its Recently Deleted folder. Preview all photos and check if there are photos available you are finding. If not, try the following way or skip to the next parts.
Way 1: Pick iPhone Data Recovery Software
The first way we recommend is an ace photo recovery tool. For iOS users, attempt to use a piece of iPhone data recovery software. The software is quite qualified for restoring deleted or lost HEIC photos. The following will be an introduction to TunesKit iPhone Data Recovery software that you must not leave behind.
TunesKit iPhone Data Recovery is well-known for its main role in recovering more than 20 varied data in iPhone/iPad/iPod from text messages, call history, contacts, calendars, HEIC photos, and even app data like Kik messages, WhatsApp photos, Viber call history and much more. Whether the data is deleted permanently or lost randomly, or the iPhone itself is broken, wiped, or locked, TunesKit is highly workable, too.
Key features of TunesKit iPhone Data Recovery
- Recover data from different iOS device like iPhone,iPad and iPod.
- Retrieve data under various scenarios including mistaken deletion and software update failure.
- Restore diverse types of data like HEIC photos, videos, photos, etc.
- Fully compatible with all iOS versions including the latest iOS 14.
- Rescue encrypted files.
- Support Previewing and selecting required data before recovery.
To recover HEIC photos on iPhone, read the following steps about how to use this desktop program.
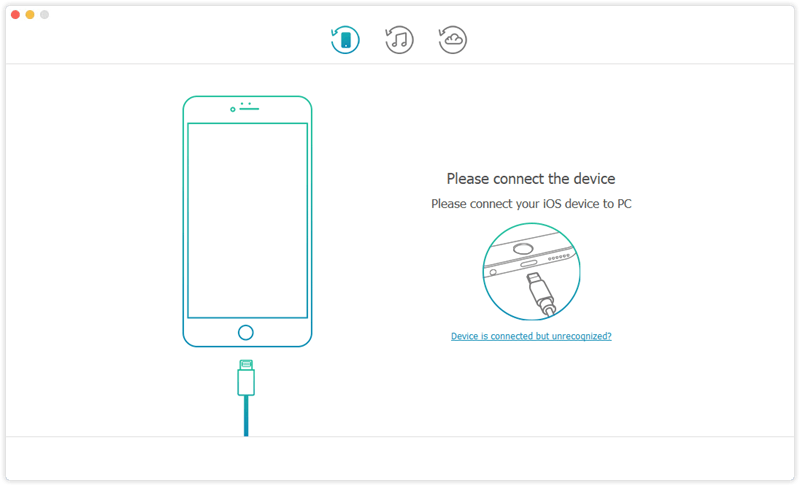
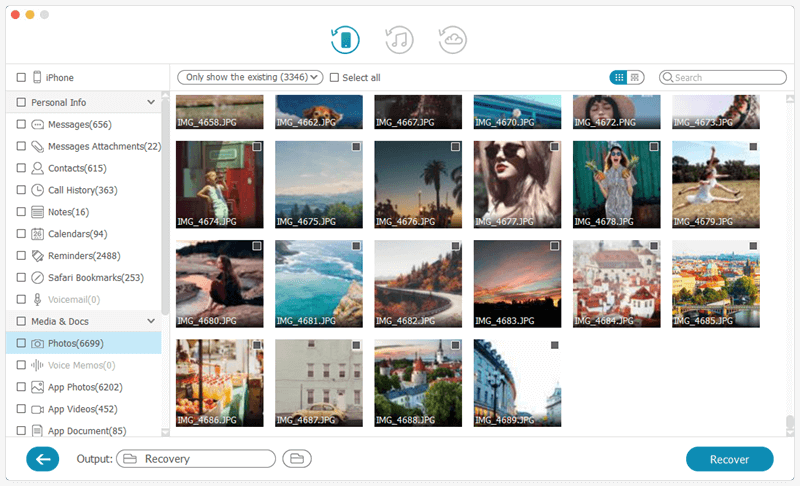
Step 1: If you have downloaded the program, directly open it on your computer where the iPhone should be connected then by an original lightning or USB cable. After connection, the iPhone may ask you to trust the computer, and then you should tap the Trust option. On the home interface, click the Recover from iOS icon to let the program scan your device info.
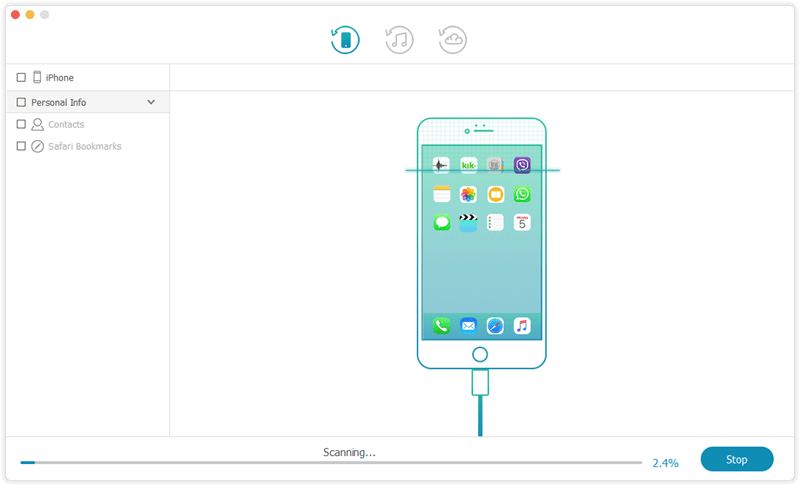
Step 2: Now, the program will show the data types on the interface. Preview them, decide parts or all, and then click on the Scan button. It will start scanning all data including HEIC photos.
Step 3: The final step is to retrieve these data. Before doing this, view all data scanned and shown. If you only want to retrieve HEIC photos on your iPhone, just choose them. Last, finish the recovery process by clicking on the Recover button to find out HEIC photos.
Way 2: Turn to iTunes
In response to users' needs, Apple endows iTunes with the backup feature. Hence, iTunes should recover HEIC photos on iPhone on the condition that you have backed up your iPhone data. If you think this will work for you, refer to the following steps below.
Step 1: Launch iTunes on your computer and then plug a USB cord into iPhone and the computer port correctly.
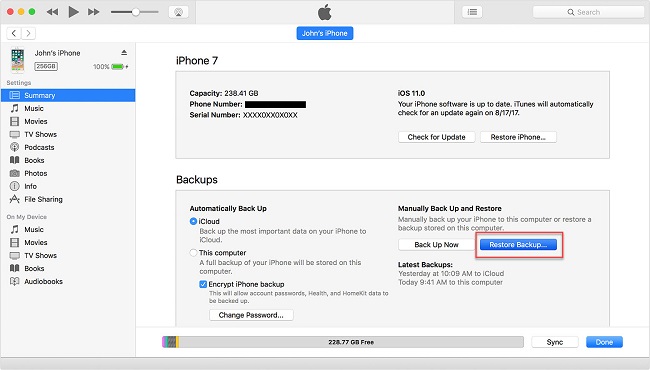
Step 2: Wait for a while. Once iTunes recognizes iPhone, find your Device icon and then the Summary option or the General option (based on the iTunes versions).
Step 3: Then, you will see a button showing Restore Backup. Tap it and confirm the operation by tapping it again. Finally, wait patiently for iTunes to complete restoration.
Note: You can also use TunesKit's iTunes backup mode.
Way 3: Utilize iCloud
Likewise, iCloud is designed as a built-in feature for backing up and saving data. To recover HEIC photos on iPhone, why not try it? The following displays details about how to restore backup from the iCloud website.
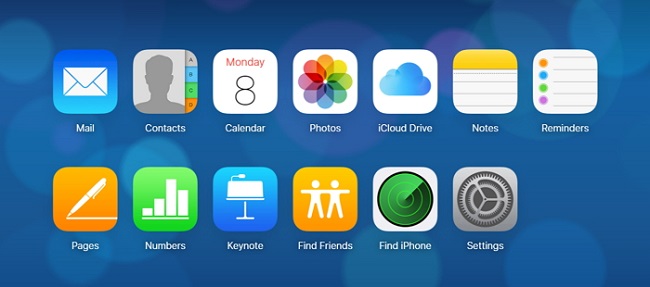
Step 1: Type iCloud.com using any browser. Then, the website will show the login interface to sign in with your Apple ID account.
Step 2: After login, the website page will show all app data like photos, emails, calendars, and others. Just select the Photos option to recover HEIC photos.
Step 3: Finally, preview and choose photos and then tap the Download button to recover HEIC photos to the computer or your email addresses used to receive the data files.
Note: TunesKit also offers iCloud backup mode. As you will need to log in with your account, do not worry that the privacy of your information. TunesKit promises not secretly save any of your data.
Additional Tips for HEIC Photos on iPhone
1. How to avoid capturing and saving HEIC photos?
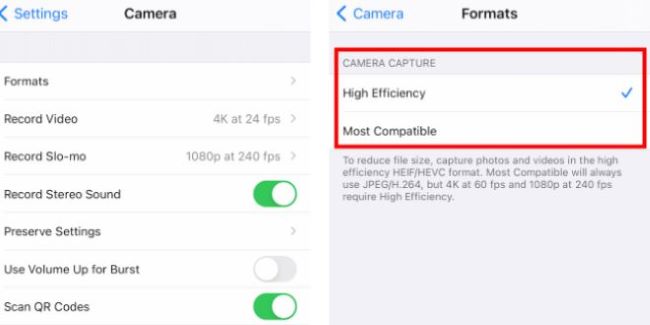
If HEIC photos are not so convenient for you, you can adjust the HEIC settings to always taking photos in JPEG/JPG formats. Go to Settings > Camera > Formats. Under the Camera Capture section, there are 2 options: High Efficiency or Most Compatible. To enable the JPEG/JPG formats, turn on the Most Compatible option based on the explanation shown.
2. How to convert HEIC to a compatible format when sending to computer?
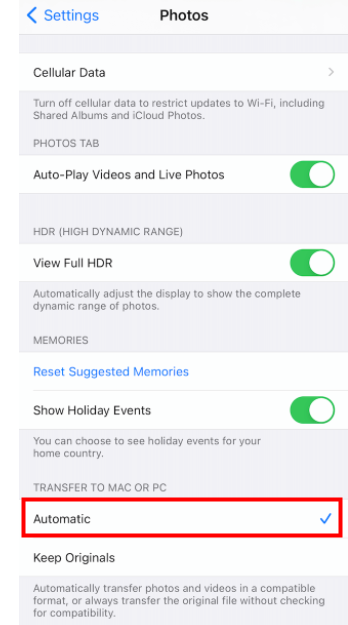
You may ask how to ensure that you alter your iPhone photos as the JPEG/JPG formats instead of HEIC when you send them to your Mac or PC. To do this, go to the Settings app on the iPhone > Photos. Scroll down to choose the Transfer to Mac or PC section, under which the Automatic option can be enabled. And iPhone also shows the difference between Automatic and Keep Originals.
The Bottom Line
Now, our guide on how to recover HEIC photos on iPhone is closing its curtain. By a total of 3 primary ways, especially the TunesKit iPhone Data Recovery software, you should retrieve these photos. If you have any other methods, welcome to leave comments to us.
