How to Retrieve Blocked Messages on iPhone? 5 Ways!
"I would like to bring back the messages I blocked on my iPhone 7, could you please help me to achieve this?" Have you ever watched this question before or are you looking for related issues right now? Well, you are not unique to other iPhone users as there are many people seeking a solution to this problem when they feel regretful for blocking someone's texts. In this case, how to retrieve blocked messages on iPhone? Just check out the following context.
- Part 1. Can you retrieve blocked messages on iPhone
- Part 2. How to unblock someone on your iPhone
- Part 3. Recover blocked messages with/without backups HOT
- Part 4. Recover blocked messages via iTunes after/before unblocking
- Part 5. Recover blocked messages via iCloud after/before unblocking
- Part 6. Summary
Can you retrieve blocked messages on iPhone
Generally speaking, it is not possible to restore blocked texts on iPhone 7 or other iPhone models, because there is no blocked folder on iPhone to save messages and texts that are stopped from receiving. It means that no blocked messages are saved on your iPhone. But don't worry, you still get chances to retrieve the messages before blocking or after unblocking.
How to unblock someone on your iPhone
Before you get these messages back, you could unlock the person on your iPhone's contact list. Here are the simple steps.
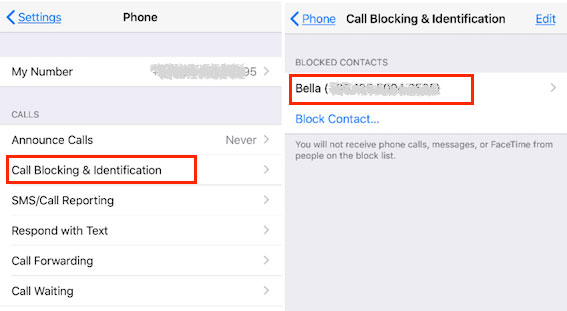
Step 1: Open Settings on iPhone and locate the Phone option.
Step 2: Choose Call Blocking & Identification tab and you will see the blocked contact list.
Step 3: Click on Edit button or swipe to left to unblock.
How to retrieve blocked messages on iPhone with/without backups
After that, you can receive the messages again and if you delete or lose them by mistake, you could bring them back on iPhone by virtue of professional iOS data recovery tools, for instance, TunesKit iPhone Data Recovery. This application can retrieve lost and even encrypted data with the fastest speed. Besides, it can recover different types of data like Facebook messages, reminders, videos, etc. And it supports diverse iOS devices like iPhone, iPad, and iPod. Moreover, whatever the causes that give rise to data loss such as accidental deletion and virus attack, this software can rescue them. Finally, no matter you backed up the messages before or not, TunesKit iOS Data Recovery can get them back.
Key features of TunesKit iPhone Data Recovery
- Recover data from different iOS device like iPhone,iPad and iPod.
- Retrieve data under various scenarios including mistaken deletion and software update failure.
- Restore diverse types of data like messages, videos, photos, etc.
- Fully compatible with all iOS versions including the latest iOS 16.
- Recover iPhone data from any situation within several simple clicks.
- Support Previewing and selecting required data before recovery.
Retrieve blocked messages with backups before/after blocking
With backups already, the following two recovery modes can be workable to bring back the messages on iPhone. You can follow the related steps below.
1. Restore from iTunes backup
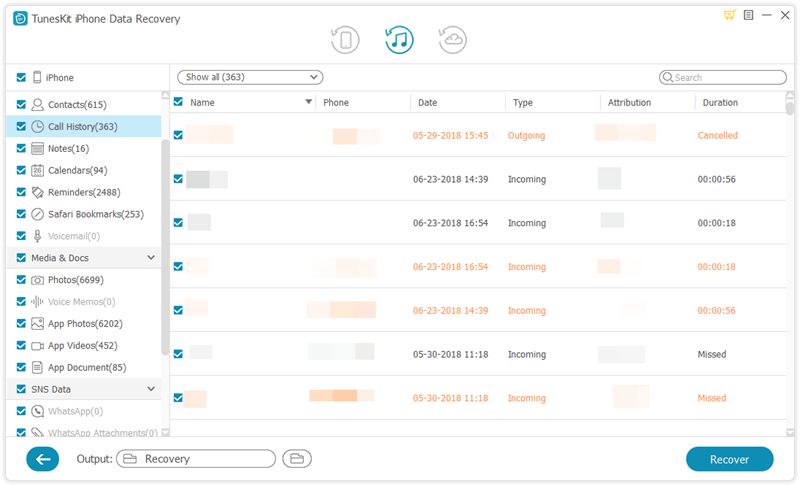
Step 1: Launch TunesKit iPhone Data Recovery on the computer and hook up your iPhone with the PC. Then choose the recovery mode called as “Recover from iTunes backup” on the main screen of the program.
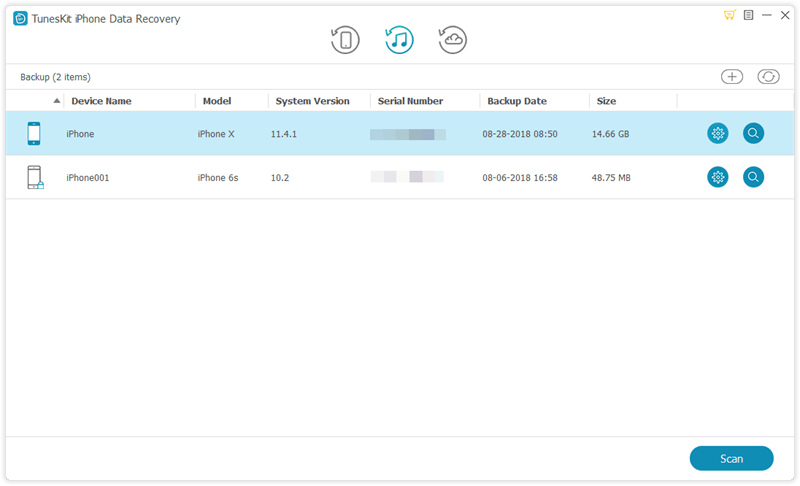
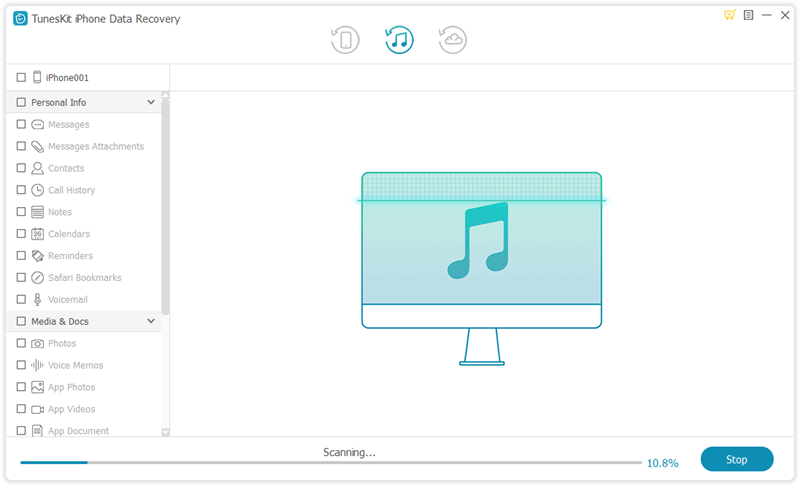
Step 2: Hit on the "Scan" button to examine your iPhone 7 data and select the "Messages" option on the left column.
Step 3: Find out the deleted or lost messages on your iTunes you desire to restore and then click the "Recover" button to restore them to the computer.
2. Recover from iCloud backup
Step 1: Open TunesKit iOS Data Recovery on the computer and connect your iPhone with the PC. Then select the mode named as "Recover from iCloud Backup" from the main interface.
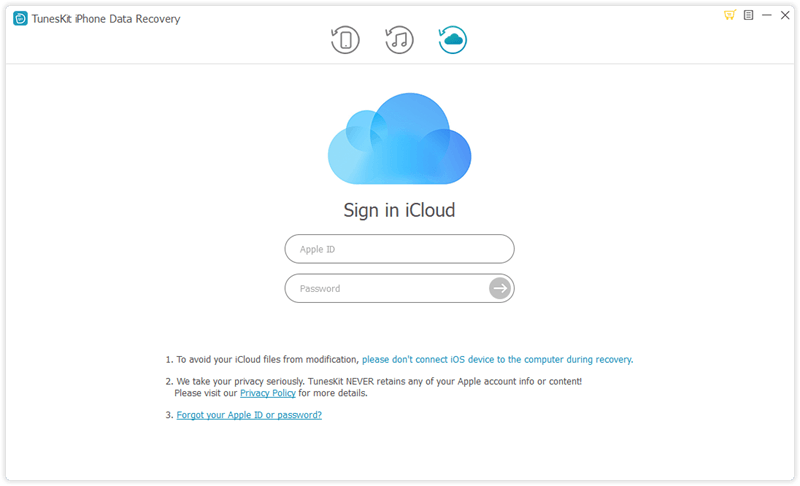
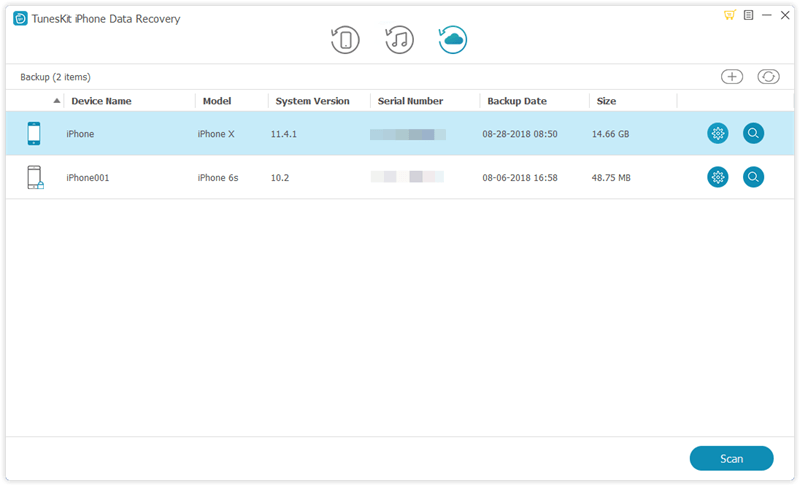
Step 2: Enter your Apple ID and password to log in iCloud. Next select your own device and model.
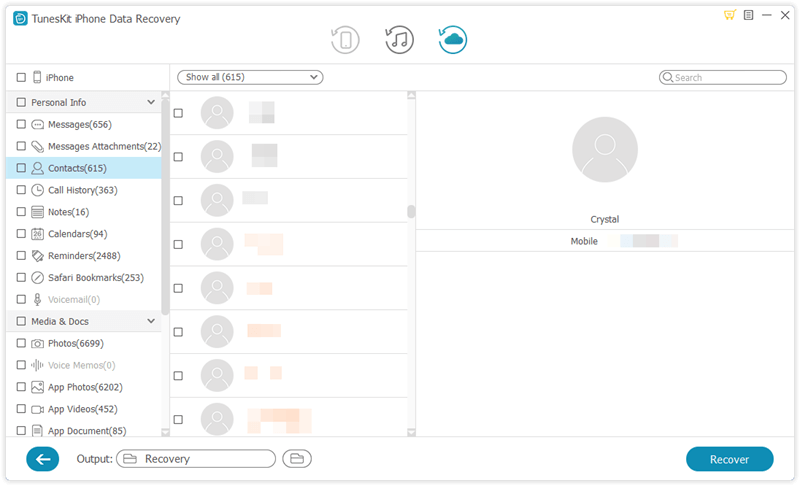
Step 3: Choose your unblocked messages under the column of “Messages” and tap on the “Recover” button to rescue them to the computer.
Restore blocked messages without backup before after blocking
Yet if you don't back up the messages earlier, this product can also help you to restore them successfully. Just continue with the procedures shown below.
Step 1: Double click to open TunesKit iOS Data Recovery program on your computer and make your iPhone connected to the computer. Then click "Recover from iDevice" mode. If it is the first time for you to use the application to recover data, you are suggested to click trust to the computer.
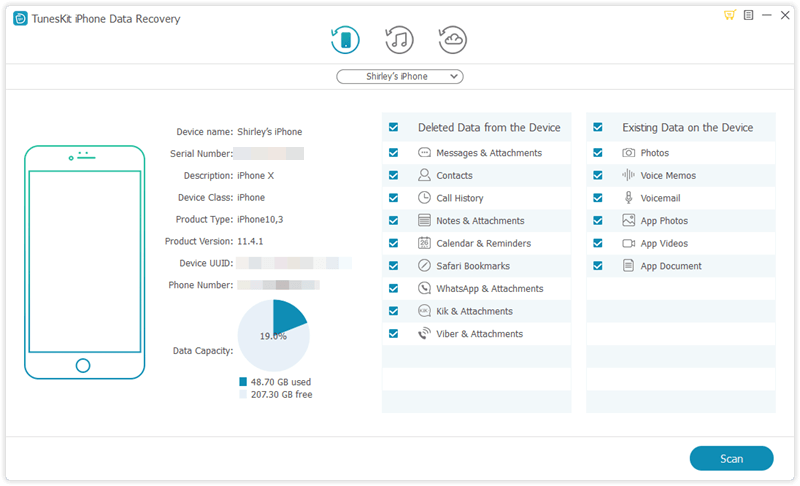
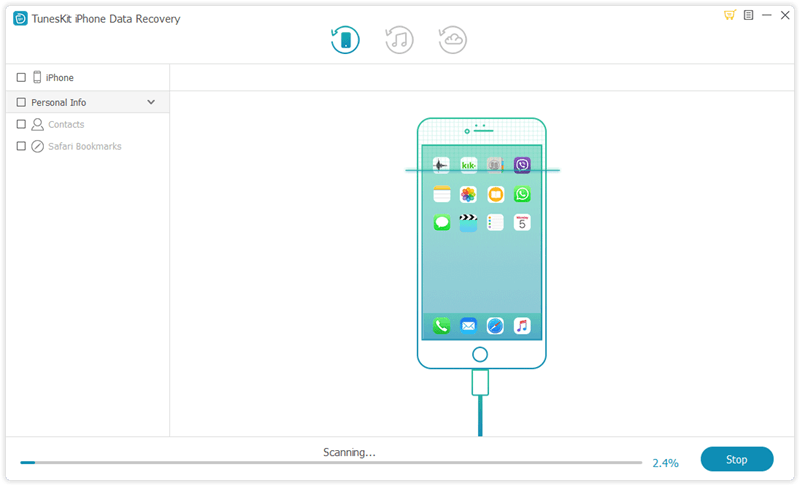
Step 2: After the device and different data pop up on the screen, select the categories on the right column that are required to be scanned. Then press the Scan button and the program will start scanning. At this time, the percentage that about how much it is scanning is shown on the interface.
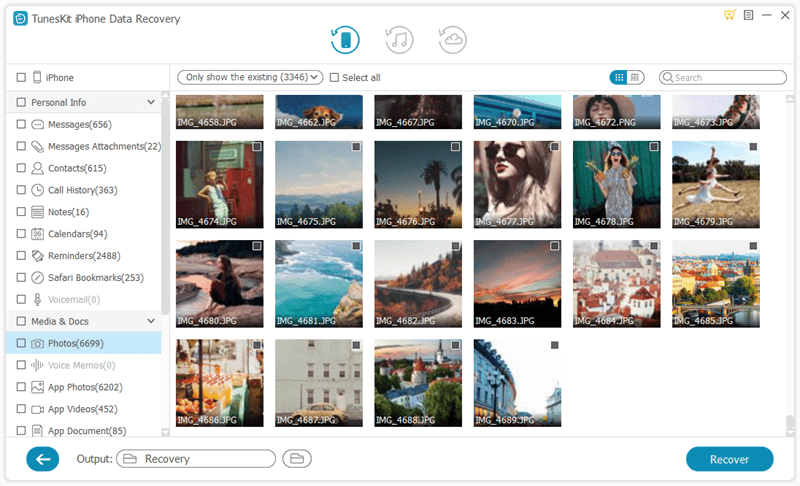
Step 3: At this step, all data examined will appear on the left column. Before you tap on the "Recover" button, you can preview the messages you want rescue from "messages" column. After that the software will begin to bring your messages back. Besides, you can set the formats of output files on the left corner.
How to retrieve blocked text messages on iPhone via iTunes backup after/before unblocking
If you have a backup file on iTunes, using iTunes to get your messages back is a feasible solution. Restoring the iTunes backup will allow you to get various deleted data. Let's see how to make it.
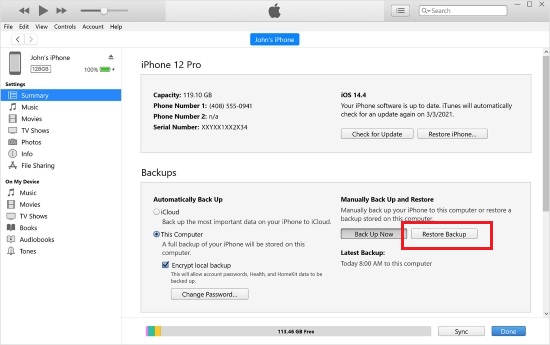
Step 1. Launch iTunes and connect your iPhone to the computer.
Step 2. Click on the device icon on the top-left corner of iTunes.
Step 3. Select the Summary option and hit on the Restore iPhone option.
How to recover blocked messages on iPhone via iCloud after/before unblocking
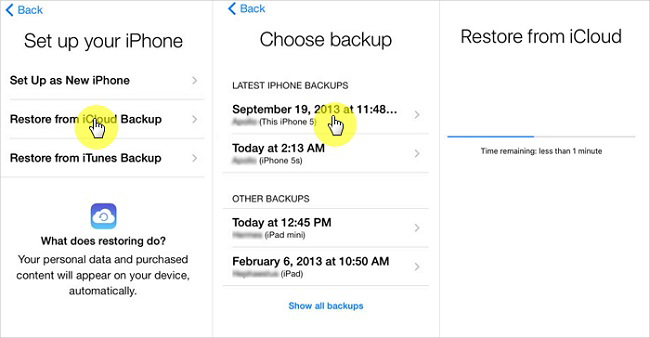
If you have turned on the backup feature on iCloud, you can also try using the iCloud backup to recover blocked messages before or after blocking. To use this method, the backup feature should be enabled on your iPhone, and you should know the Apple ID and the passcode.
Step 1. Launch Settings, and click on the Apple ID option.
Step 2. Click on the iCloud and select the iCloud Backup option.
Summary
In conclusion, to recover blocked messages on iPhone, you just have to pay attention to the above points. And lastly, we hope this how-to article could be helpful and if you have any other confusion about iOS data recovery, please be free to contact us or leave your comment below or try using TunesKit iPhone Data Recovery.
