Full Guide - How to Put iPad in DFU Mode
"I had some issues with my iPad, and I tried to fix them by putting it in recovery mode. However, some people suggest putting the iPad in DFU mode to get the thing sorted. How to put an iPad in DFU mode?"

Finding a more prolific and versatile mobile device than the iOS device is pretty hard as these devices offer fabulous quality and excellent features. However, some people complain that their device doesn't run appropriately whenever they decide to update iPhone or iPad devices. Instead, every application they tend to open misbehaves so often. However, you can avoid this situation by putting your device into DFU mode. This guide will reveal the step-by-step guide to putting the iPad in DFU mode.
Part 1: What is DFU mode on iPad?
If you're facing any iOS device issue that doesn't bother to get solved despite trying a few solutions, you can put it into DFU mode. It is a Device Firmware update that assists your iPhone to come into a normal situation after facing software glitches.
Using DFU mode, you can downgrade the iOS system, jailbreak, and un-jailbreak your iPhone.
Part 2: What is the difference between Recovery mode and DFU mode?
Telling the main difference between Recovery mode and DFU mode is pretty tough as both possess the same powers, but these two are different things altogether.
Using Recovery mode, you can update your iOS version and tackle minor iPhone issues with minimal effort. At the same time, DFU mode helps you upgrade and downgrade the iPad or iPhone. Moreover, DFU is an extreme thing, and it tends to help you get rid of more dangerous iPad or iPhone issues appropriately.
Part 3: How to put an iPad into DFU based on different models?
Many reasons force you to get the iPad into DFU mode as sometimes you don't like the latest iOS version make up the mind to downgrade the iOS version. In this regard, putting the iPad in DFU mode can help you put things in order.
Apart from downgrading the iOS version, DFU mode helps you fix several more issues easily.
Here's the step-by-step guide to know how to put the iPad in DFU mode.
How to enter DFU mode on iPad without Home button
Step 1: Navigate to the iTunes website and install it from there.
Step 2: Now, all you need to do is connect the iPad to the PC via a profound lightning cable.
Step 3: After connecting the iOS device to your computer, you'll only need to hit the iPad's Volume button and then release the button afterward.
Step 4: After clicking it, it would help if you released the iPad Volume Down button.
Step 5: All you need to do is press and hold the iPad's Volume Down and iPad Side button in this phase. After clicking the buttons, you will need to hold them for a couple of seconds.
Step 6: After a few seconds, you'll need to release your iPad's Power button, but you need to keep on holding the Volume Down button.
Leave the button when iTunes detects iPad. Your device is now in DFU mode, and you can fix any issue now

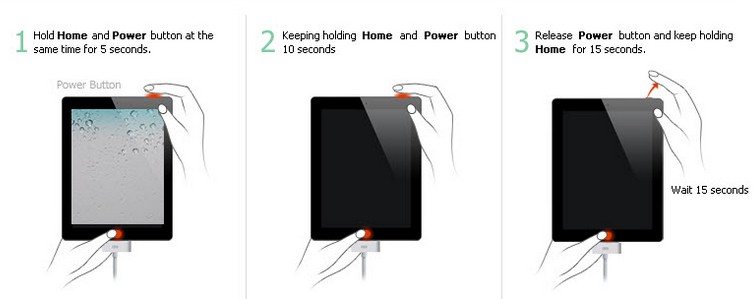
How to put iPad in DFU mode with Home button
Step 1: First, download iTunes and connect the iPad to your Windows PC.
Step 2: Next, you need to press the Home and power button after launching iTunes for 10 seconds. Remember, you'll also need to keep on holding the button for a while.
Step 3: Leave the iPad's Power button, but you should not leave the Home button for some seconds now.
At the end, you'll need to leave the button when your iTunes decides to detect your iPad.
After completing this process, you'll be able to fix any minor or major bug by putting the iPad in DFU mode.
Part 4: Use TunesKit iOS System Recovery to fix any issue
If you're using an iOS device, but it doesn't bother to function properly, you can look at TunesKit iOS System Recovery. It is a pretty popular iOS device problem-solving tool that allows you to restore your iPhone with one click. You can repair your device with no data loss using this extraordinary ordinary tool, courtesy of its mind-blowing Standard Repair feature.
Main Functions of TunesKit iOS System Recovery
- It comes with a 100% success rate.
- Using this tool, you can fix about 150+ issues with minimal effort.
- Available on both Windows and macOS
- One-click to enter or exit Recovery mode for free
- Support downgrading iOS versions
How to enter Recovery mode via TunesKit iOS System Recovery
Step 1Download the software
Before getting on with the things you're working on, you'll need to download Tuneskit iOS System Recover after navigating to its user interface. After installing the software on your PC, you'll need to start the program without wasting any time.

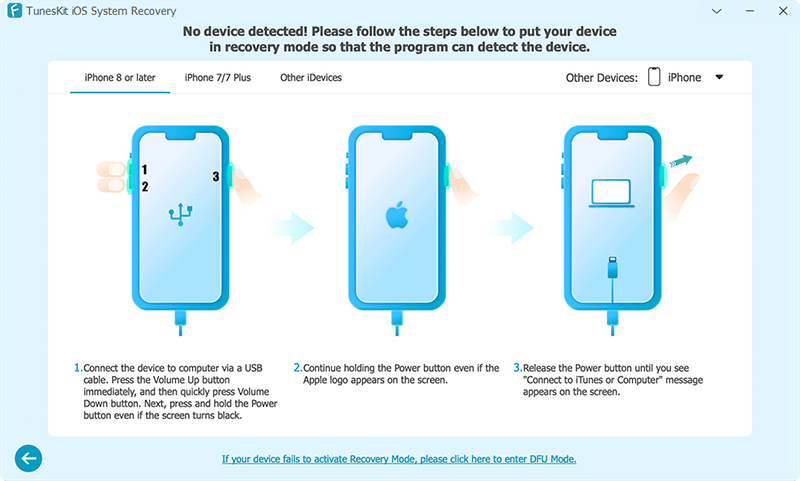
Step 2Select Enter Recovery Mode
Connect your device to your PC and navigate to the program's interface. Next, you'll only need to tap on entering Recovery Mode to serve your purpose. Now your device is in Recovery, you can also install the latest iOS version.
How to restore the iOS device using TunesKit iOS System Recovery
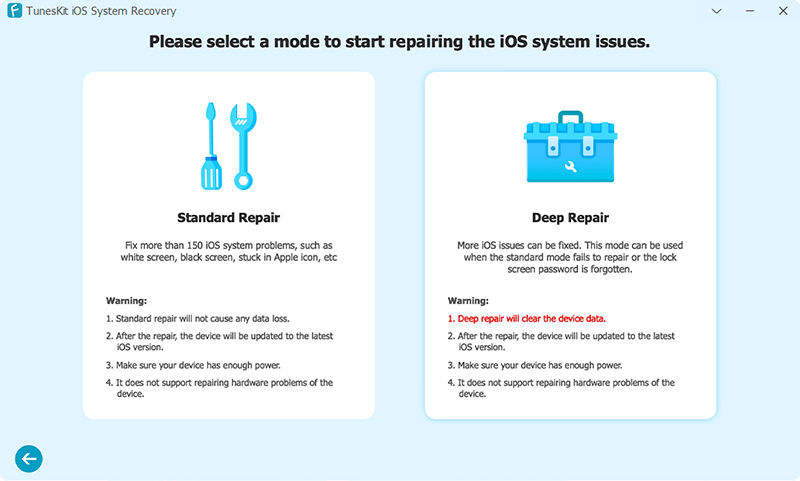
Step 1Select Standard Mode
Since you've already installed and launched TunesKit iOS System Recovery, we'll like to navigate to the business end. There will be two Recover Mode for you to use.
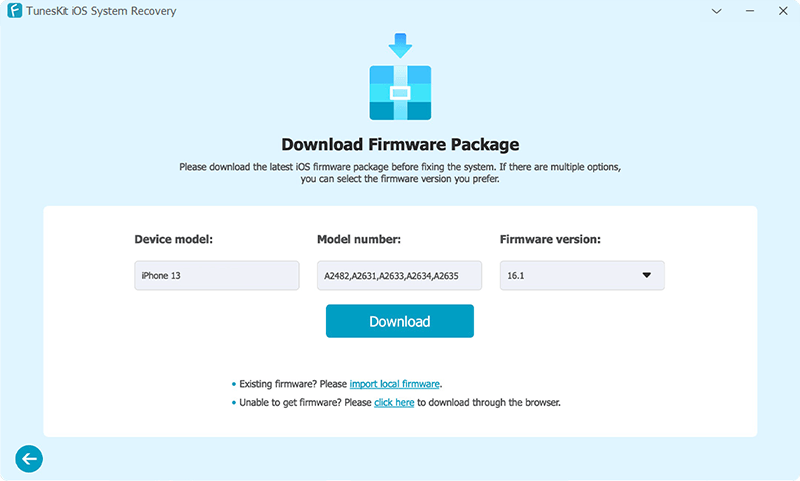
Step 2Download Firmware Package
Before repairing an iOS device, your last task is to get the favorable firmware package downloaded on your device.
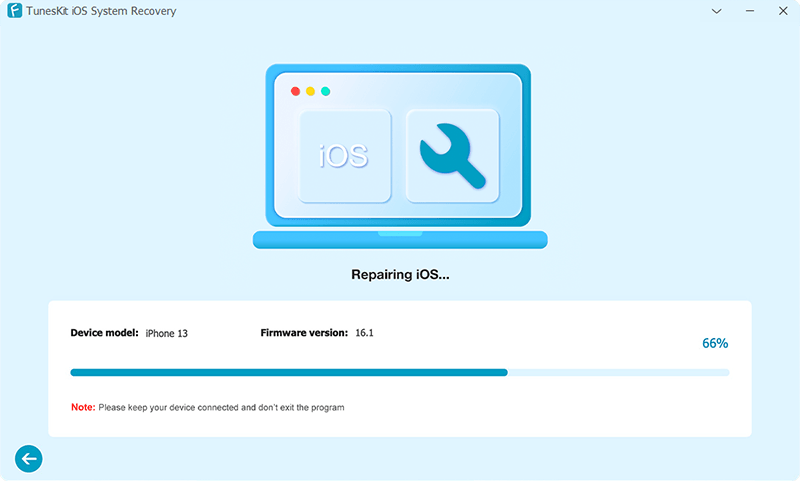
Step 3Repair your iOS device
All you need to do is select the'' Repair'' option and then start restoring the iPhone. It will only take a few minutes before putting all the things in your favor.
Conclusion
If you're struggling with any issue, you can get iPad into recovery mode. For this, you'll need to skim through this guide as we've highlighted the precise ways to get your job done. On the other hand, if you want to fix minor issues by putting the iPad into recovery mode, you can consult TunesKit iOS System Recovery. Apart from helping to put the iPad in recovery mode, TunesKit iOS System Recovery also assists you in fixing many iOS device issues with minimal effort.
