[2023 Full Guide] What Is iCloud Shared Photo Library?
Apple has introduced a lot of new features with iOS 16, and iCloud Shared Photo Library is one of them. This feature didn't occur when iOS 16 launched in September. It is available in October, coming with the iOS 16.1 update.
Have you used this new feature on your iPhone? Do you know how to use it properly? If you know little about this new feature, you are advised to read this post. We will not only show you how to use this feature, but also help you to fix some issues you may meet when you use iCloud Shared Photo Library.
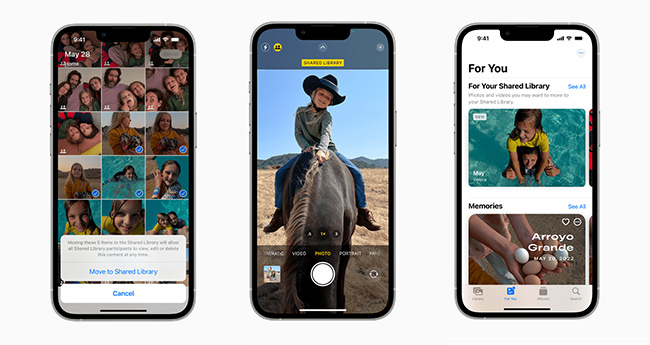
Part 1: What Is iCloud Shared Photo Library?
According to Apple, iCloud Shared Photo Library is an advanced feature that offers families a new way to share photos seamlessly with a separate iCloud library. This library supports up to 6 users to join in and share photos. Every user in the Shared Photo Library is allowed to add, edit, or delete the shared photos or videos. It's much more advanced than the current Photos Shared Album feature.
Part 2: How to Use iCloud Shared Photo Library on your iPhone
After knowing what photo library is, you may wonder how to use this feature on your iPhone. In this part, we will show you some basic usages of this useful function.
1. How to Set Up an iCloud Shared Photo Library
The first thing you need to know is how to set up a shared photo library. This feature is available on iPhone, iPad, and Mac. In the following, we'll show you how to set up an iCloud Shared Photo Library on your iPhone.
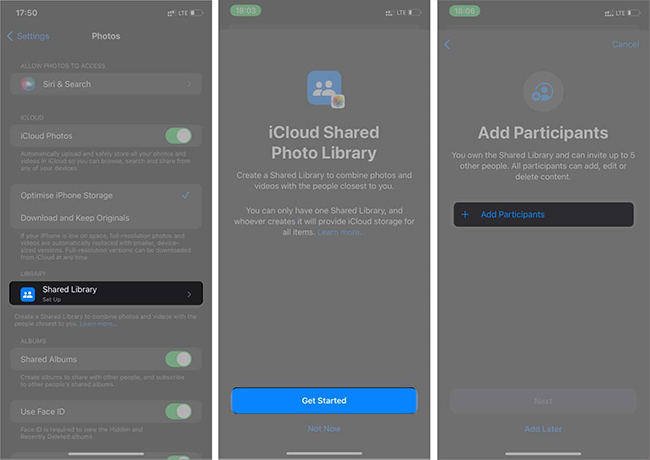
Step 1: Go to the Settings on your iPhone, and then choose Photos > Shared Library.
Step 2: Then, click on Get Started followed by Add Participants to choose people from your contacts.
Step 3: When you finish adding members, tap the Add button at the top right.
Step 4: Now, you can select your sharing preferences from three options, including All My Photos and Videos, Choose by People or Date, and Choose Manually. You can choose one of these options according to your needs.
Step 5: Tap on Next and you'll see the people you will share your library with.
Step 6: Click Next again to finish the creating process.
2. How to Save Camera Pictures to an iCloud Shared Photo Library
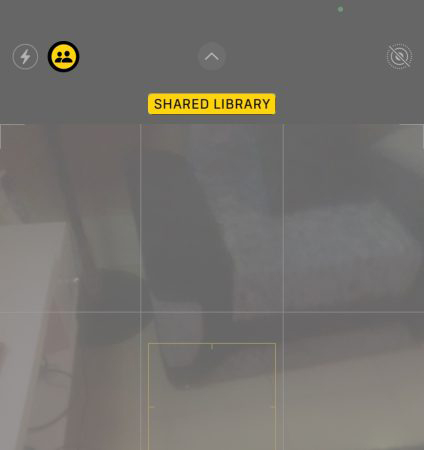
After you set up an iCloud library, you can choose where to save your photos or videos when you take them. Therefore, if you choose Shared Library when you take a photo or make a video, your iPhone will share your output automatically.
Step 1: Open your iPhone Camera, and then you can see the double profile icon in the top left corner.
Step 2: Tap on this icon, and you can toggle between Shared Library and Personal Library to store your photos and videos.
3. How to Delete an iCloud Shared Photo Library
If you want to delete an iCloud Shared Photo Library you create, you can follow the simple steps below to finish it.
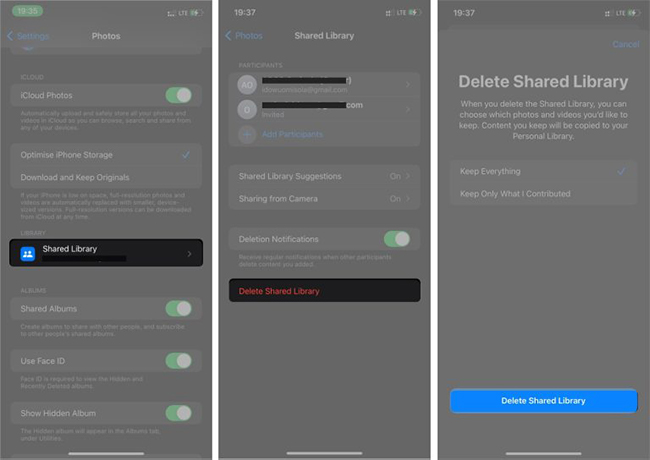
Step 1: Head to Settings > Photos on your iPhone.
Step 2: Choose Shared Library followed by Delete Shared Library.
Step 3: Tap on Delete Shared Library again to finish the deletion.
Part 3: How to Fix iCloud Shared Photo Library Not Showing
This photo library feature is a useful and convenient feature for Apple users. However, some users may meet such issue as iCloud Shared Photo Library not showing on their devices. This issue is mostly caused by iOS system errors. Therefore, when you meet this problem, you are advised to try our most recommended iOS system repair tool – TunesKit iOS System Recovery. TunesKit iOS System Recovery can help you fix various kinds of iOS system errors on iPhone/iPad/iPod/Apple TV, such as iOS update not showing up, iPhone photo cutout not working, iPhone won't turn on, etc. With this tool, you can easily repair your iOS devices within 4 simple steps. During the whole repair process, you don't need to worry about affecting the data stored on your iPhone.
Features of TunesKit iOS System Recovery:
- Fix iCloud Shared Photo Library not showing efficiently
- Fix your iPhone/iPad/iPod/Apple TV without data loss
- Provides four major sectors for users
- Easy-to-use and intuitive user interface
- Available on Windows and Mac computers
Here are the detailed steps to fix iCloud Shared Photo Library not showing with TunesKit iOS System Recovery.
Step 1: Run TunesKit iOS System Recovery on your PC after you install it. Then, keep your iPhone connected to your computer using a workable cable. After that, select the iOS System Repair option on the main interface.

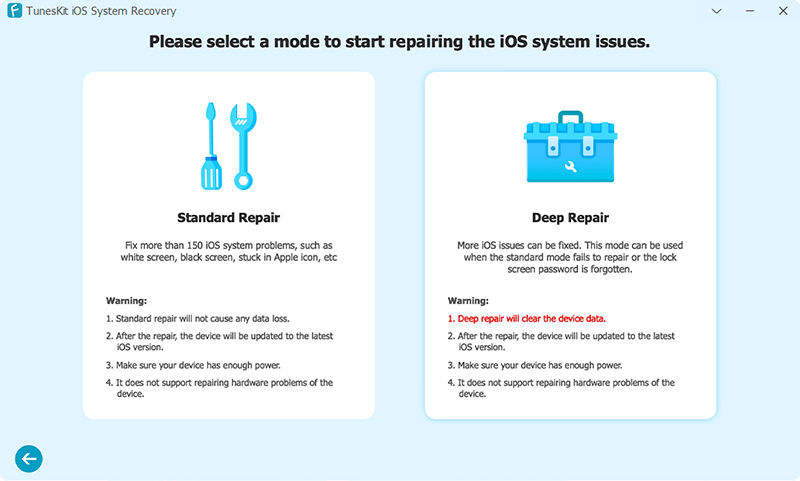
Step 2: In this section, there are two repair modes, including Standard Repair and Deep Repair for you to choose. In our view, Standard Repair is more suitable for you, because you won't lose any data with this mode. If you want to use Deep Repair, remember to save your iPhone data first.
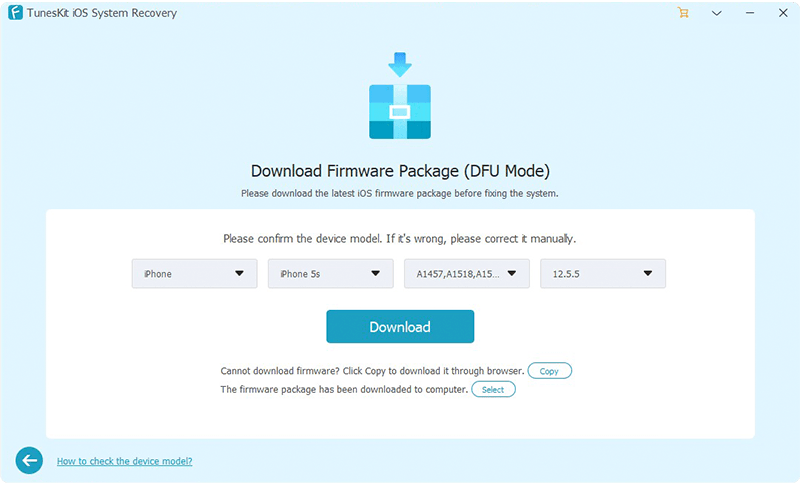
Step 3: Now, you are able to check the device information of your iPhone on the interface now. After you ensure that there is nothing wrong with the information, you can hit on the Download button to download firmware package.
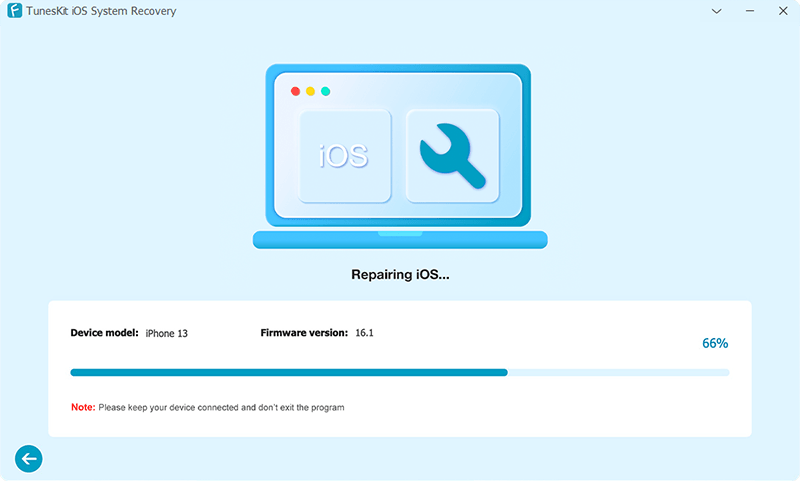
Step 4: After downloading and verifying the package successfully, you are allowed to start the fixing by tapping on the Repair button. Then, you need to wait for a while for the repair to finish.
Part 4: Other Questions about iCloud Shared Photo Library
Q1: What are the differences between iCloud Shared Photo Library and iCloud Shared Photo Album?
iCloud Shared Photo Library only allows up to 6 subscribers while iCloud Shared Photo Album allows up to 100 subscribers. However, iCloud Shared Photo Library enables you and five other participants to edit, add, or delete photos in it, which is not supported in iCloud Shared Photo Library. What's more, Photo Library supports smart filter while Photo Album doesn't have this feature.
Q2: How to remove a participant from iCloud Shared Photo Library?
You can open the Settings app on your iPhone and then choose Photos. Then, click on Shared Library, and choose the contact you want to remove. After that, choose Remove from Shared Library and hit on it again to remove the participant you choose.
Part 5: Conclusion
That's it! You must have learned how to use iCloud Shared Photo Library and how to fix this feature not showing on iPhone now. To fix this issue, you are suggested to use TunesKit iOS System Recovery. This professional tool can help you fix most of the system errors you meet easily and instantly.
