iTunes Stuck on Verifying iPhone Restore? Top 5 Methods
When using iTunes to restore our iPhone, we may meet unexpected issues like iTunes stuck on verifying iPhone restore. This issue usually occurs while you are restoring your iPhone or updating iOS via iTunes. A bad internet connection, outdated iTunes version, or antivirus can cause the issue. Wait for several minutes while iTunes verifying iPhone restore. You can confirm that you meet the problem if your iTunes keeps verifying for more than 10 minutes. When we face this issue, can we overcome it by ourselves? The answer is sure. In today’s tutorial, I will show you the best methods for iTunes stuck on verifying iPhone restore.
- Method 1: Update your iTunes to the latest version
- Method 2: Check your network and cable connection
- Method 3: Restore your iPhone in DFU mode
- Method 4: Shut down antivirus on your computer
- Method 5: The best solution of iTunes stuck on verifying iPhone restore - TunesKit iOS System Recovery
- Summary
Method 1: Update your iTunes to the latest version
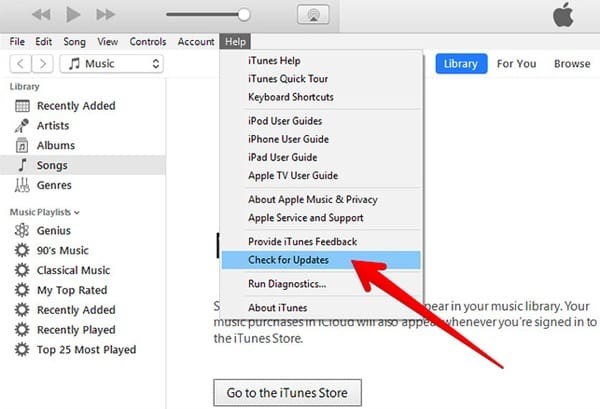
An outdated iTunes version will cause the issue that iTunes stuck on verifying iPhone restore. So, please keep your iTunes always the latest version. You can update your iTunes by clicking Help>Check for Updates.
Method 2: Check your network and cable connection

A poor network connection can be a probable reason for iPhone restore stuck on verifying. Both your computer and iPhone should be in a stable network connection. Besides, restart your modem and try to restore your iPhone via iTunes again.
Method 3: Restore your iPhone in DFU mode
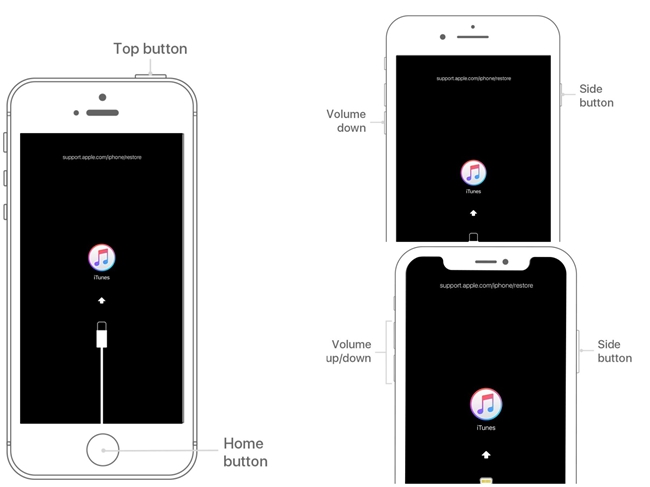
DFU mode means Device Firmware Update mode. DFU can restore your iPhone to factory settings. Ways entering DFU mode depend on the device you are using, so let’s see the detailed steps entering DFU mode.
For iPhone 6s or earlier: Connect your iPhone to the computer, then turn off the iPhone. Press and hold the Power button for 3 seconds. Hold the Power button and Home button simultaneously for 10 seconds. Release the Power button and keep holding the Home button for 5 more seconds. When you see the black screen, it means that you successfully put your iPhone into DFU mode.
For iPhone 7/7 Plus: Press and hold the Power button and Volume Down button simultaneously for 10 seconds. Then release the Power button and keep holding the Volume Down button for 5 seconds. You put your iPhone into DFU mode successfully when you see the black screen.
For iPhone 8 or later: Press and hold the Power button for nearly 3 seconds. Then hold the Volume Down button and Power button at the same time for 10 seconds. Release the Power button and keep holding the Volume Down button for 5 seconds. Now your iPhone turns into DFU mode successfully if you see the black screen.
When you put your iPhone into DFU mode, try to restore it via iTunes. The issue iTunes stuck verifying iPhone restore will not occur again.
Method 4: Shut down antivirus on your computer
Antivirus always protects our computer from virus attacks. But sometimes, it may mistakenly regard the iTunes process as a harmful process. Hence, when you face iPhone restore stuck on verifying, shut down antivirus can be an effective way.
Method 5: The best solution of iTunes stuck on verifying iPhone restore - TunesKit iOS System Recovery
The last method I recommend to you is TunesKit iOS System Recovery. It is a professional iOS system tool that can solve the question of iTunes stuck on verifying iPhone restore quickly and effectively. With the powerful feature, TunesKit iOS System Recovery can fix common iOS issues efficiently within several steps. If you face iPhone asking for the wrong Apple ID, iPhone boot loop, iPhone error 3014, etc., TunesKit iOS System Recovery is the most reliable assistant for you.
Characteristics of TunesKit iOS System Recovery:
- Fix iTunes stuck on verifying iPhone restore without data loss
- Repair different tvOS/iOS issues by yourself
- Provide Standard Mode and Advanced Mode
- Easy to use and user-friendly interface
- Fix your iOS device within several steps
Now, let’s see the detailed tutorial about how to fix iTunes stuck on verifying iPhone restore.
Step 1 Connect your iPhone to TunesKit iOS System Recovery

First of all, connect your iPhone to TunesKit iOS System Recovery via a working lightning cable. With this concise and friendly interface, you won’t meet any obstacles using TunesKit iOS System Recovery.
Step 2 Select mode to fix
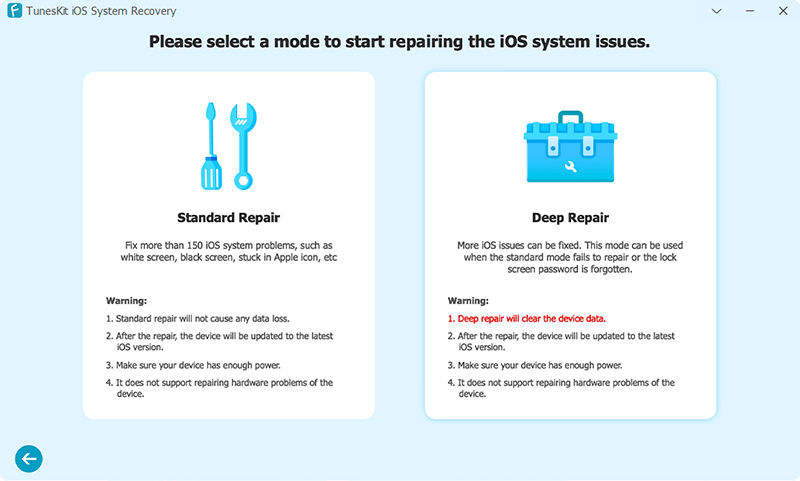
There are two modes provided for users to fix their iOS issues. Choose the Standard Mode to fix iTunes stuck on verifying iPhone restore. If Standard Mode does not work, use Advanced Mode instead. It is worth noting that Advanced Mode will erase all of your iPhone data.
Step 3 Download firmware package
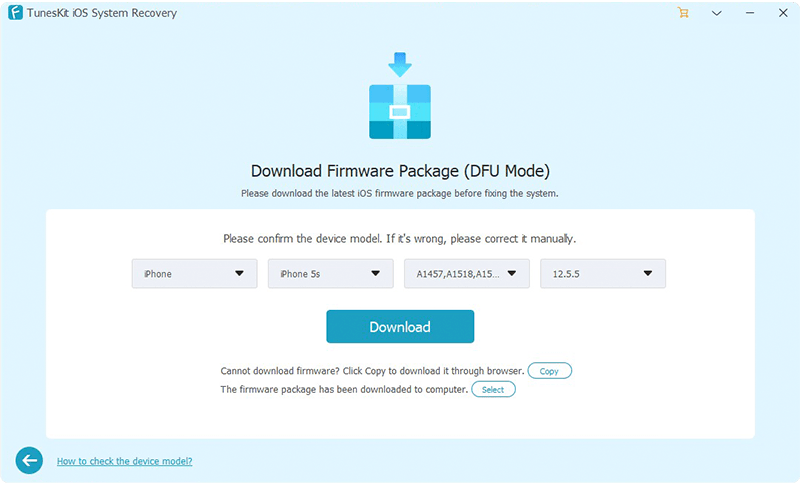
Before downloading, confirm that the device information given is correct. If not, please correct it manually.
Step 4 Fix iTunes stuck on verifying iPhone restore
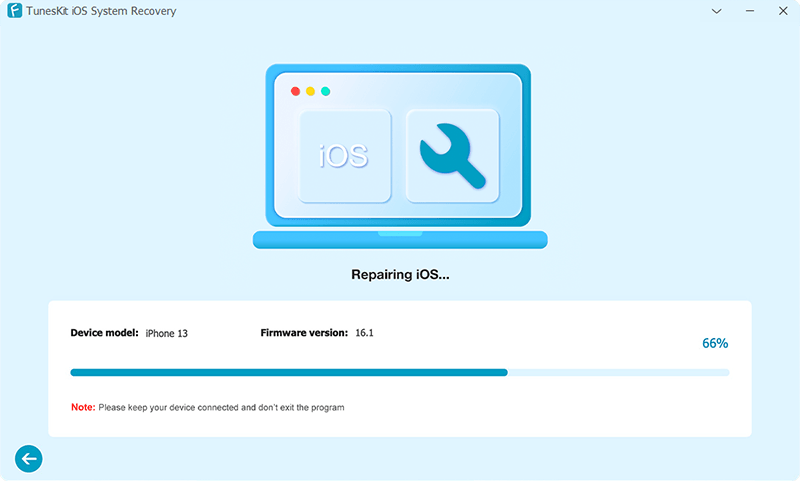
Waiting for the fixing process to finish, and then your iPhone will back to its normal state. Last but not least, don't forget to back up your iPhone data if you are going to use Advanced Mode.
Summary
In today’s sharing, I show you the best 5 methods for fixing the issue iTunes stuck on verifying iPhone restore. It is unavoidable that iPhone occurs problems in daily use. Using TunesKit iOS System Recovery can protect you from most iPhone issues, such as iPhone control center not working, iPhone stuck on activation lock, or iTunes error 1611. What’s more, it is user-friendly, and you can enjoy a bulk of iOS repair tutorials on the TunesKit iOS System Recovery website.
