How to Fix iTunes Could Not Connect to This iPhone?

iTunes is a powerful toolkit program for iPhone users that own PCs. It can be used to transfer files, update iOS, download media, and repair the system, etc. However, when trying to connect your iPhone to the computer, you might see a notification saying "iTunes could not connect to this iPhone" and fail to do whatever you want in the first place. To help those who are bothered by the problem, we have concluded the best solutions to the iPhone recognition problem of iTunes.
Part 1: Probable Causes for iTunes Could Not Connect to iPhone
Before we go to the solution part, we must first get to know why iTunes fails to recognize the iPhone. So here are the most likely causes for the problem, and we can find the solution to each of them.
1. Connection problems. The USB cord and the ports on your iPhone and the computer should be intact for the iTunes to properly recognize the phone.
2. The computer is not trusted by the iPhone devices. This happens often when you are connecting your iPhone to the computer for the first time.
3. The iPhone or the computer is offline.
4. iTunes is out of date.
5. System malfunctions.
Part 2: Solutions to iTunes Could Not Connect to iPhone
When this iTunes recognization error occurs, don't be panic. Just follow these solutions to fix this problem.
2.1 Check the USB Cord and the Ports on iPhone and Computer
The first and easiest solution is to check the USB cord and the ports on your iPhone and computer. Sometimes a USB cord can only be used to charge iPhone, not to connect to iTunes. If there are visible damages on your USB cord, then it is even more likely that the USB cord is broken. Besides, broken ports on your iPhone will also result in iTunes' failure to recognize iPhone. So make sure to keep the USB port intact and clean.
To test the USB cord and port, do the following:
• Test USB cord: Use a new functional USB cord and see if the iPhone can be recognized; if not, do the next step.
• Test computer port: Connect your iPhone to another functional computer and see if the iPhone can be recognized; if not, do the next step.
• Test iPhone port: Connect another functional iPhone to your computer.
2.2 Repair All System Errors Leading to iTunes Recognition Failure
In many cases, the iTunes fails to recognize iPhone results from iOS system issues. To resolve these iOS issues, we recommend using TunesKit iOS System Recovery. This is a powerful tool to repair iOS. It can help you get rid of most iOS problems, like iTunes could not connect to this iPhone, or iTunes error 1009, etc. Commonly, it won't even cause any data loss when repairing the phone.
TunesKit iOS System Recovery really values the experience of its users, and therefore, it provides the free service of putting your iPhone into or out of the recovery mode. Being an amazing program, TunesKit iOS System Recovery is highly user-friendly.
Step-by-step Tutorial to Use TunesKit iOS System Recovery
Step 1: Download and launch the program. Connect your iPhone to the computer, then press the "Enter Recovery Mode" button to put your iPhone into the Recovery mode. This is available even in the free trial. Press the "Start" button to continue.

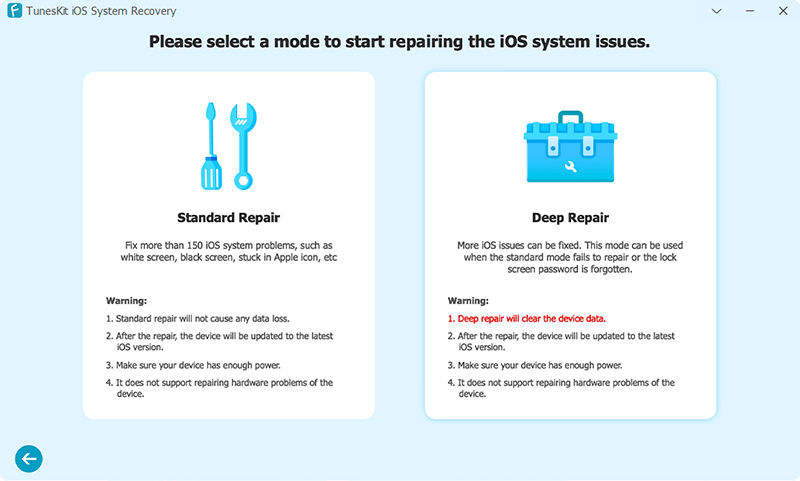
Step 2: A mode selection window will be shown on the screen. Click on the "Standard Mode" button to repair your iOS without any data loss. Then press the "Next" button.
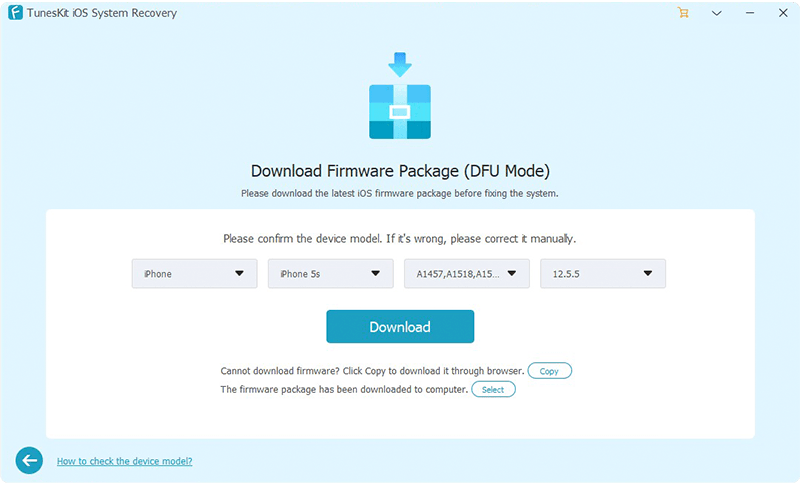
Step 3: Some basic info of your device will be detected and shown on the screen. What you need to do is to check and ensure that all is correct, then press the "Download" button to download the firmware that matches your device.
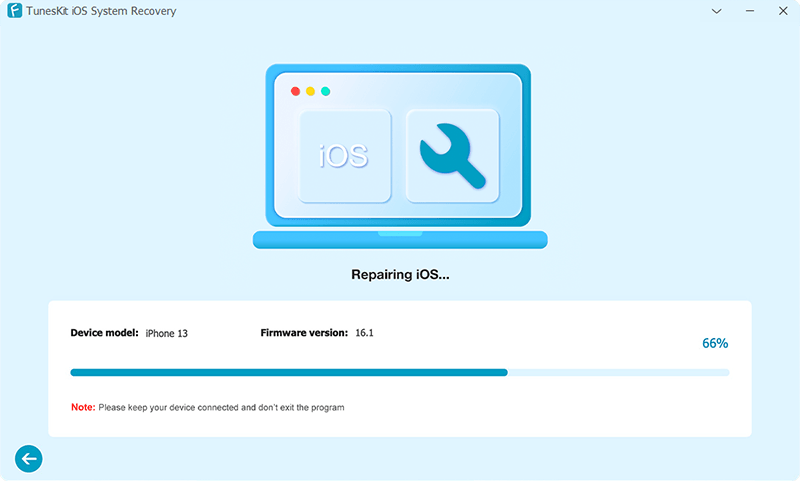
Step 4: When the firmware is downloaded, hit the "Repair" button to unzip the firmware and start repairing the iPhone. By the time the whole process completes, your iPhone should be recognized by iTunes properly.
2.3 Trust the Computer
If this is the first time that you connect your iPhone to the iTunes on this computer, then you will definitely see a notification pops out on the iPhone screen as shown in the screenshot below. You should tap on the "Trust" to trust the computer so that it would gain access to your iPhone.

2.4 Update iPhone iOS
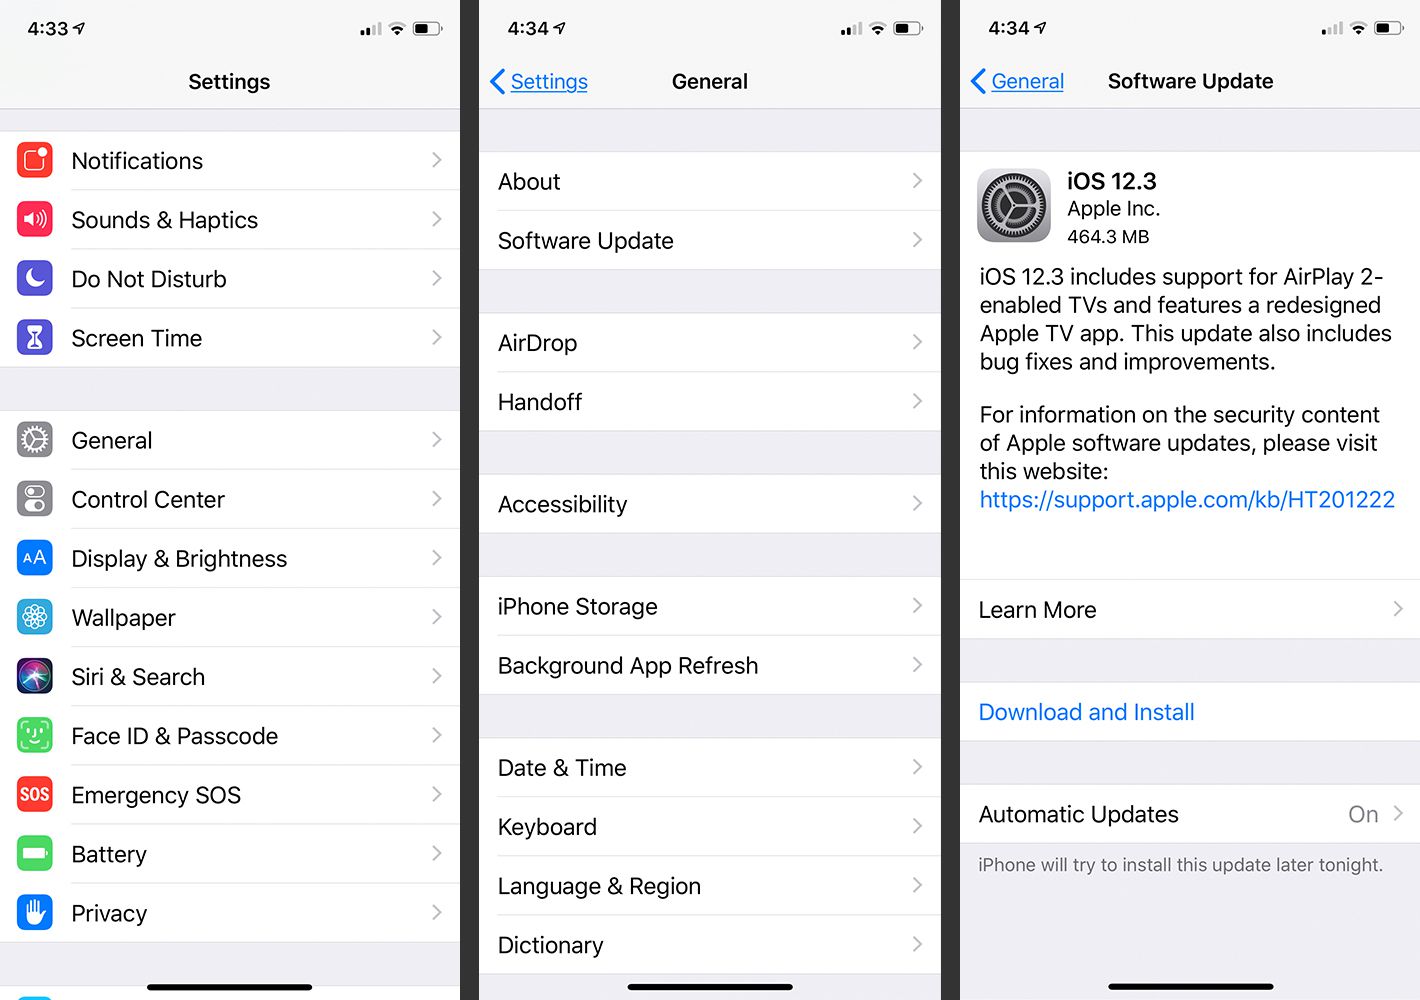
An outdated iOS system can affect the connection between the computer and your iPhone. Plus, a new iOS update package usually contains bug fixes, which will get rid of the bug on your iPhone. Therefore, it is necessary to keep your iOS up-to-date. The update notification should constantly appear on the iPhone screen when an update is available, and you just need to confirm the update. If not, follow the steps below to update your iOS.
Step 1: On your iPhone, go to the Settings> General > Software Update.
Step 2: Your iPhone will check whether there is an available update. If so, press the "Download and Install" button.
Step 3: When the update package is downloaded, press the "Install" button and wait until the update is installed. Then, check whether your iPhone can be recognized by iTunes.
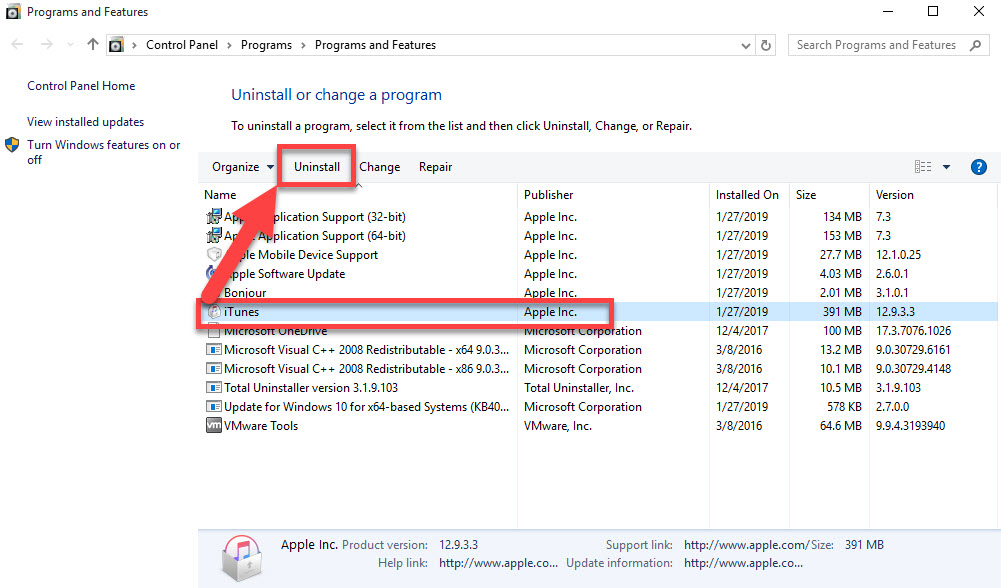
2.5 Uninstall and Reinstall the Latest iTunes
What is probably ignored by many is that iTunes might be problematic. An outdated iTunes version can lead to the iPhone recognition failure because old iTunes is not compatible with your iPhone. Therefore, it worths trying to uninstall iTunes and reinstall it from the Microsoft Store.
Step 1: Go to Start menu > Control Panel > Programs > Programs and Features..
Step 2: Select iTunes and right-click it. Click on the "Uninstall" option and wait until the process finishes.
Step 3: Go to the Microsoft Store page and search for iTunes. Find it and press the "Install" button.
Part 3: Summary
After reading this guide, you must be aware of the causes of iTunes failure to recognize your iPhone and its solutions. If those fixes listed above cannot get rid of the problem for you, don't hesitate to resort to the Apple support.
