iPhone Won't Delete Voicemails? Fix it Here
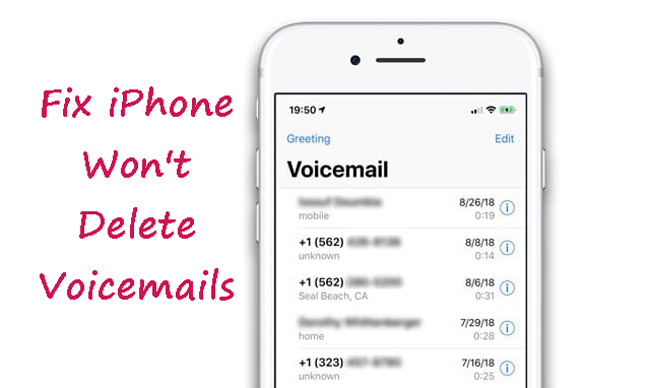
iPhone voicemail won't delete problems are prevalent. Most people delete their voicemails after listening to them; however, for reasons that are as yet unknown, your Voicemail on the iPhone may refuse to delete. And even if you erase it, it will reappear after some time. The good news is that there are a few options to choose from. If you can't update your iPhone's apps, several things may be wrong, and the update procedure takes forever. Use these simple and practical troubleshooting steps to fix the problem of iPhone apps not updating. If you have an iPhone 11 or SE (2nd generation), you can use the methods in this post to get around the problem.
To preserve space on your iPhone, you usually erase voicemails after listening to them, but sometimes, no matter how many times you try, you can't delete a Voicemail. Alternatively, if it is deleted, it is automatically restored. If you find yourself in a similar circumstance, you can benefit from this Article's information. Listed below are several possible solutions to the problem of an iPhone voicemail won't delete those refuses to delete.
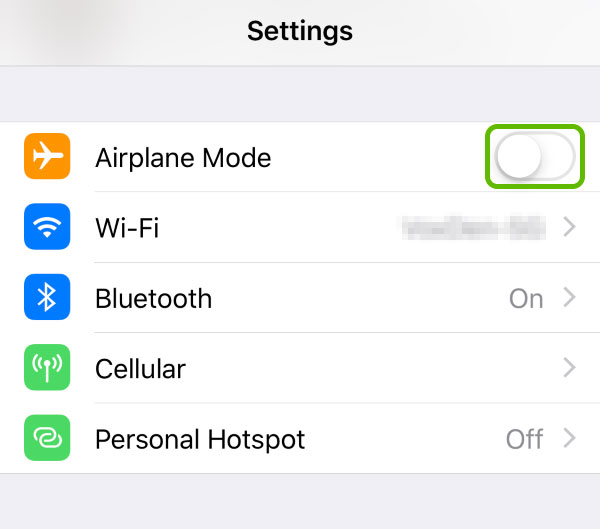
Solution 1. Set Your Phone to Airplane Mode
If your iPhone doesn't delete voicemails, try this simple fix. This method has been used successfully by several people to delete voicemails. Take note of these guidelines:
Step 1: You'll see a brand-new tab open in your browser.
Step 2: Tap the Airplane mode on that window.
Step 3: In the Phone App, hit Voicemail and voicemail messages won't delete on iPhone you've received.
Step 4: Disable the "Airplane" on your phone or tablet. They will not be retrievable from your deleted voicemails.
Solution 2. Remove from the Internet
Delete your iPhone's voicemails to see if that fixes the issue. You may have to delete the messages directly from the server or network if the Airplane mode option doesn't help. Take note of these guidelines:
Step 1: On your iPhone, open the Phone App by pressing and holding the home button.
Step 2: Tap the Keyboard symbol at the bottom of the screen. You'll see a phone dialer pop up.
Step 3: You can now call your phone number by using the dialer on your phone. You'll be able to listen to your Voicemail on this device. For Verizon Wireless, dial "*86" or hold down the "1" key. For AT&T, dial "*86" or hold down the "1" key.
Step 4: Press 1 to listen to your once you've gained access to your voicemail messages won't delete on iPhone.
Step 5: Play your newest messages first, and then your older ones, before moving on to the next. It's also possible to remove voicemails during the phone call.
Solution 3. Resetting Your iPhone
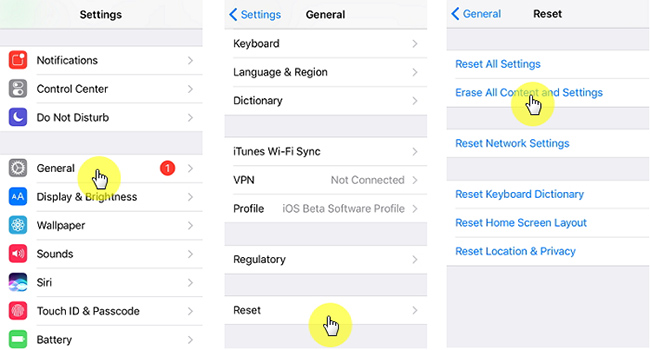
There is just one technique that will work if none of those abovementioned procedures have worked, and that is resetting your iPhone. A factory reset of your iPhone deletes everything, including any data you may have stored on it. You should make a backup of your data before continuing.
Step 1: Open the Settings App on your iPhone.
Step 2: Tap on Erase All Content and Settings in General > Reset.
Step 3: Enter your passcode to confirm your activity. Then select Erase iPhone from the menu that appears. Resetting your Apple ID and password may also be necessary.
Step 4: You can now delete all of your old voicemails.
It's possible that even after you've correctly deleted your Voicemail messages, they still show in your iPhone's Storage after a while. There is a good chance that the mail will return to your mailbox as they are still there. Deleted communications can be recovered by doing a message purge. What you need to do is follow these instructions:
Step 1: The Voicemail icon can be found in the lower right corner of your iPhone's screen by tapping the Phone symbol.
Step 2: here are two ways to clear Voicemail messages that have been erased, one of which is to visit the Deleted Messages section and remove all of them.
Step 3: Your erased Voicemail messages will be removed if you pick the Clear All option in the Clear Voicemail section.
Solution 4. Update Your iOS Version
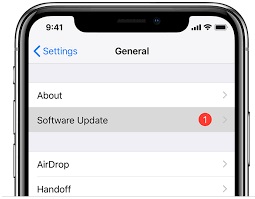
Have you checked to see if your iPhone is running the most recent version of iOS? The iPhone won't delete Voicemail issue may be solved by this. You can do so by following the procedures outlined below.
Step 1: Connect your gadget to the Internet via Wi-Fi and power it up.
Step 2: Look at the options in Settings > General > Software Update.
Step 3: Click "Download and Install".
Step 4: Press the Install button to begin the upgrade process.
Step 5: To proceed, you may be asked to enter your passcode.
Solution 5. Fix iPhone Voice Mail Won't Delete TunesKit iOS System Recovery
Hope that the iPhone won't delete voicemails is now fixed after using the above 4 methods. If not, you can take the assistance of TunesKit iOS System Recovery. TunesKit iOS System Recovery is a professional and hassle-free iOS fixing program that helps users fix normal iOS issues like iPhone keeps crashing, iPhone stuck in Apple Logo, iPhone white screen of death, etc. When you encounter issues, you can use TunesKit iOS System Recovery within several clicks.
Key Features of TunesKit iOS System Recovery:
- Fix iPhone voicemail won't delete with simple steps.
- Supports other devices including iPhone, iPad and iPod.
- Compatible with all iOS versions including the iOS 15.
- One-click to enter or exit recovery mode.
- Easy fixing steps and user-friendly interface.
Beneath, a detailed step will show you how to use TunesKit iOS System Recovery:
Step 1Installation and Connection
Download and launch TunesKit iOS System Recovery on your iPhone and connect your iPhone to your computer. Click on the Start button when TunesKit iOS System Recovery detects your iPhone.

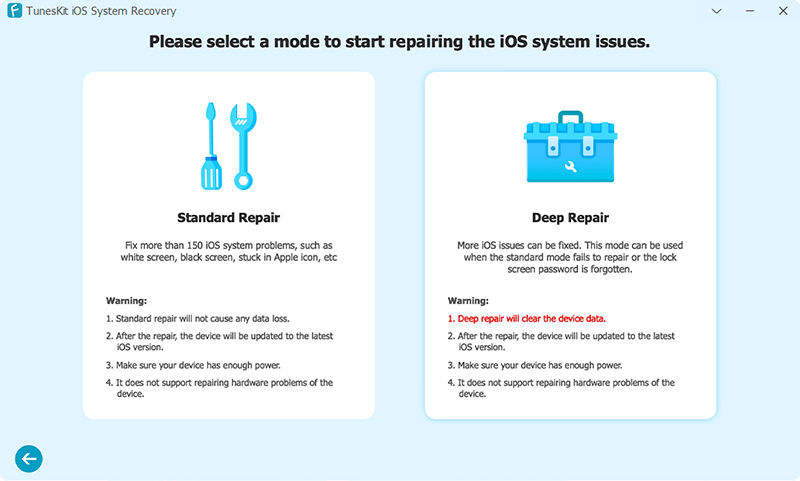
Step 2Choose the Repair Mode
TunesKit iOS System Recovery offers two different modes for users to choose from. Choose the Standard mode to fix iPhone won't delete Voicemails issue.
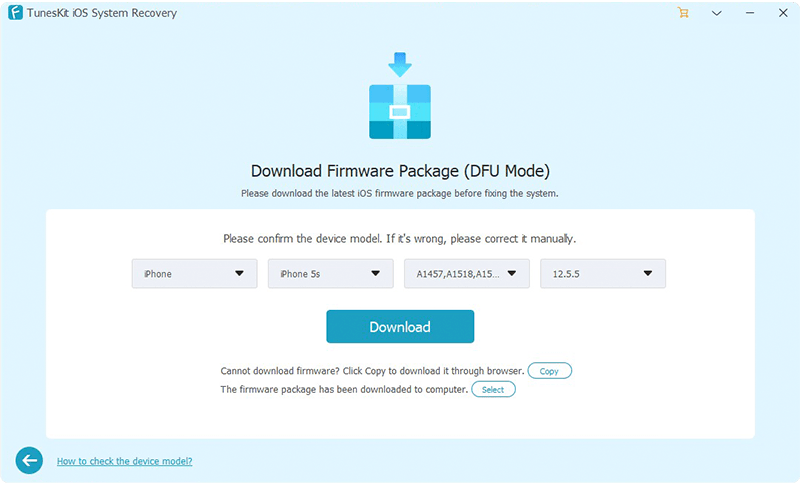
Step 3Download and Verify the Firmware
Ensure that all the given information about your iPhone is correct. If not, please correct it manually. Then, click on the Download button.
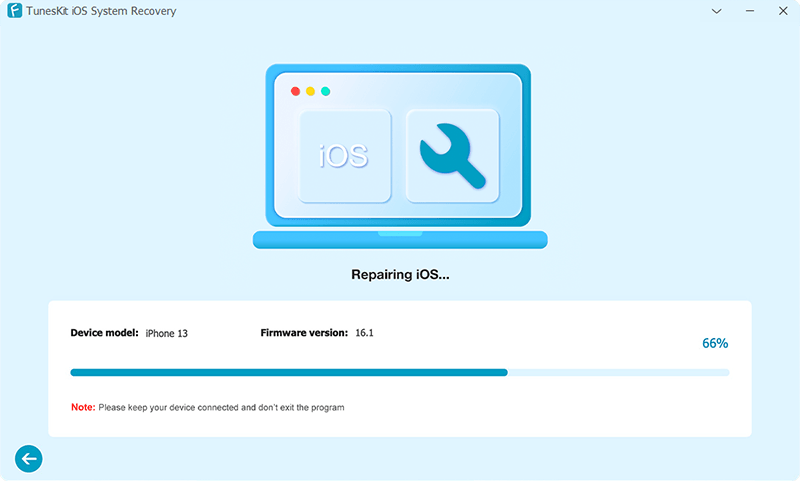
Step 4Start Fixing iPhone Voivemail Won't Delete Issue
TunesKit iOS System Recovery will start to fix your iPhone as soon as the downloading process is done. It won't take too long.
Conclusion
That's all you need to know to get your iPhone to delete voicemails. The information in this Article should have provided you with all the assistance you need to get out of this jam. With the solutions mentioned above, you may be able to resolve the issue. Sharing the information with others is also a great way to help those experiencing the same problems.
