Easily Solved: iPhone Stuck on Searching
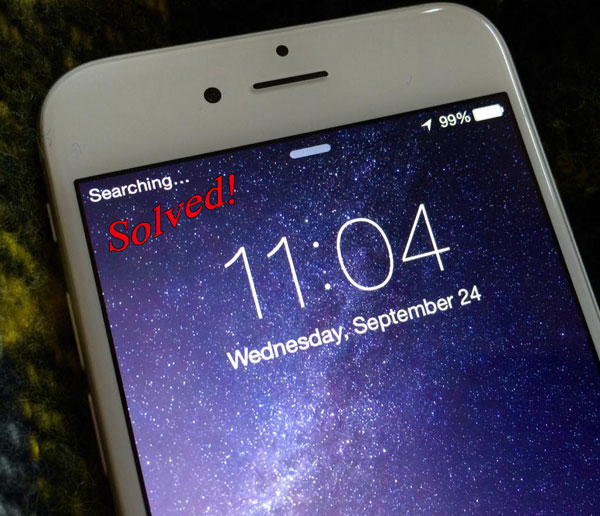
Does the "searching" occur on the left corner of your iPhone's top screen? If it does, then your iPhone may get stuck on searching. Well, this would be much troublesome as you cannot gain access to any programs that require network connection. But fortunately, this is not a complicated issue and there are several workable methods to get rid of it. There is no need to say more, let's get straight to the reasons behind your iPhone stuck on searching for service explained and apply the fixes introduced in the second part.
Part 1: The Reasons for iPhone Stuck on Searching
You might be wondering that why your iPhone is stuck on searching. Well, most common causes are listed below and you can have a look at them.
1. An improper SIM card installation or it turning inactive.
2. iPhone is not within the coverage area of network provider.
3. iPhone network problems or incorrect internet connection settings.
4. Physical damage or software errors.
5. iOS glitches.
Video Guide
Part 2: Useful Ways to Solve iPhone Says Searching
Tip 1: Check Coverage Area
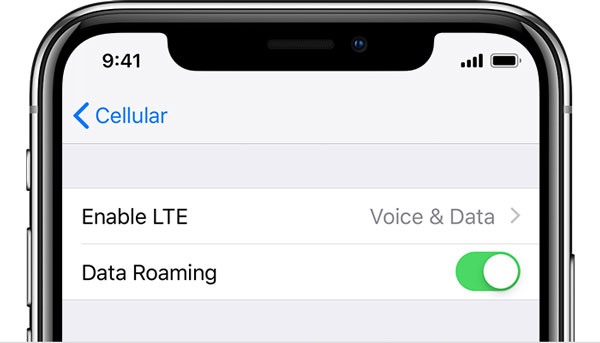
First of all, you have to make sure that you are not out of the coverage area. To check that, please go to Settings and visit Cellular, then switch it on. Similarly, the roaming is also needed to be enabled. So under the Cellular Data tab, choose to open Data Roaming.
Tip 2: Reinstall SIM Card
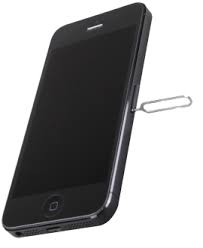
Then, to avoid any SIM card errors giving rise to iPhone says searching matter, you are also suggested to close your device and take out the SIM card. After a while, put it in the tray in a correct way and open your iPhone to see whether the searching problem is removed.
Tip 3: Force Restart iPhone
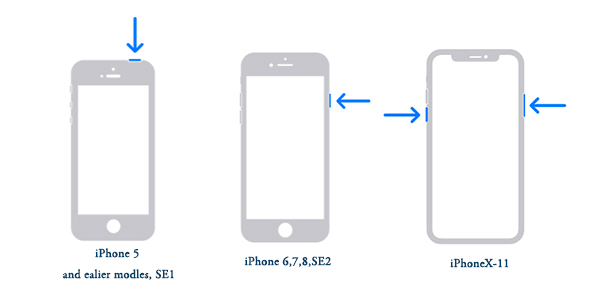
Force rebooting iPhone is among various easy solutions to resolve iPhone stuck on searching for service. You could do as follows.
For iPhone X/11, hold down the Side and the Volume buttons at the same time until the Slider appears, then drag on the slider to switch off the iPhone, finally press the Side button to switch it on.
For iPhone SE (2nd) /8 /7/6, press down the Side button until the Slider appears and pull on the slider to power off your iPhone, finally hold the Side button to power it on.
For iPhone SE (1st) / 5 and older, hold down the Top until the Slider appears, then drag on the slider to turn off the iPhone, finally press the Top button to turn it on again.
Tip 4: Reset Network Settings
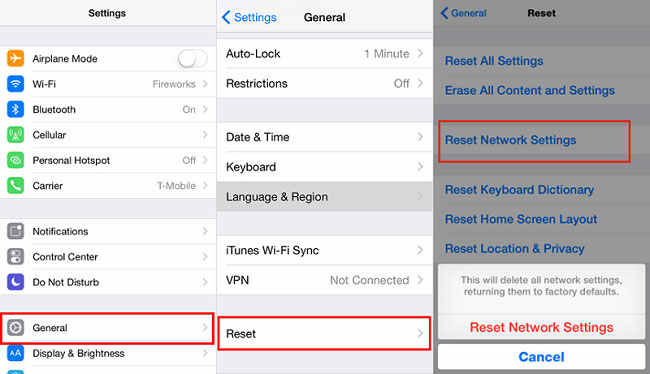
To ensure that iPhone internet connection is running well and there are no other network settings changed to lead to iPhone stuck on searching. You could head to iPhone's Settings > General > Reset and tap on Reset Network Settings. This would not delete data on your device rather remove some bugs.
Tip 5: Update iPhone Carrier Settings
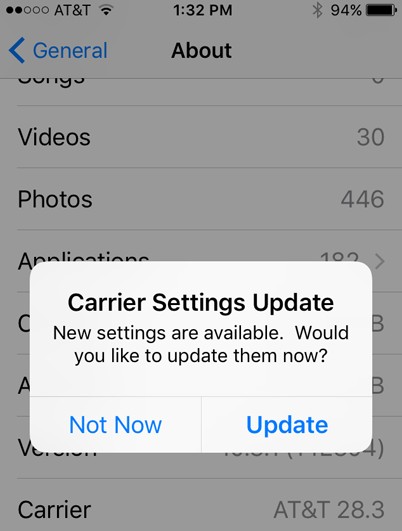
Alternatively, updating iPhone carrier settings is necessary to fix iPhone says searching. In this way, you can visit Settings on your device' main screen, then navigate to General > About option. If the message of new carrier settings needed to be updated pops up, then click on Update button to complete the process. Finally check out whether your iPhone is back to normal.
Tip 6: Use iPhone Repair Tools
If you are still feeing bothered by your iPhone stuck on searching trouble, then it seems that the above methods don't work for you. In such a case, it's time to rely on professional iPhone repair software such as TunesKit iOS System Recovery. What makes this program stands out is that it won't cause you any data loss while getting numerous common and complex problems resolved with the fastest speed and an almost 100% success rate. Apart from that, TunesKit iOS System Repair can be used to fix other iOS devices including iPad and iPod issues efficiently.
Other Features of TunesKit iOS System Recovery
- Resolve other iPhone stuck matters like iPhone stuck on recovery mode, etc.
- Fully compatible with all iOS versions.
- One-click to enter/exit recovery mode for free.
- Available for both Windows and Mac platforms.
- Support downgrading iOS versions.
Now let us tell you how to use this tool to fix your iPhone stuck on searching.
Step 1 Launch TunesKit
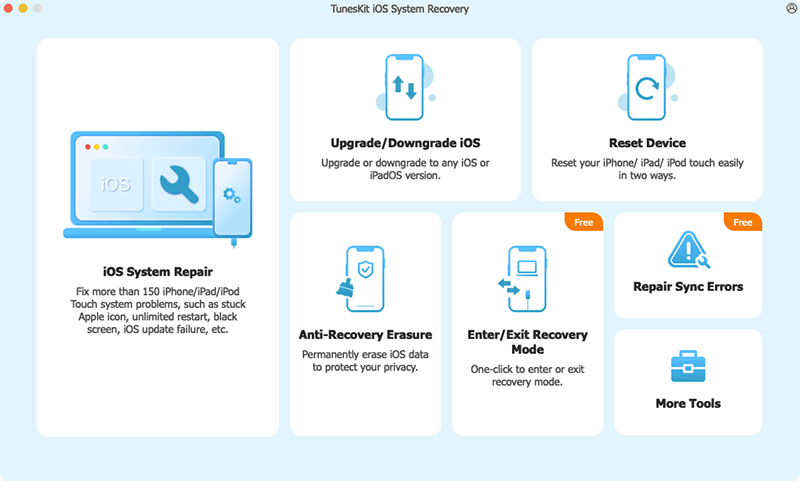
To begin with, you are supposed to connect your iPhone with your PC. Run TunesKit and enter the Recovery Mode with a simple click. Next, click the blue Start button to the next step.
Step 2 Choose the Standard Mode
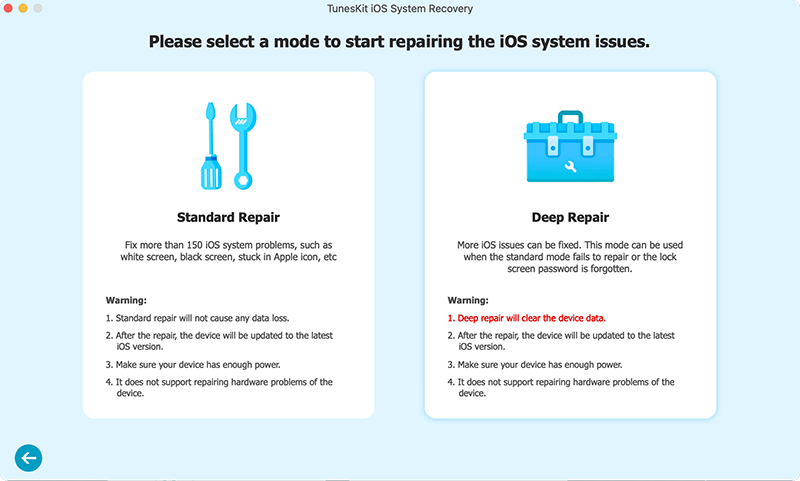
There are two modes offered on this page. Select the Standard Mode to fix your iPhone stuck on searching without any data loss. Tap on the Next button.
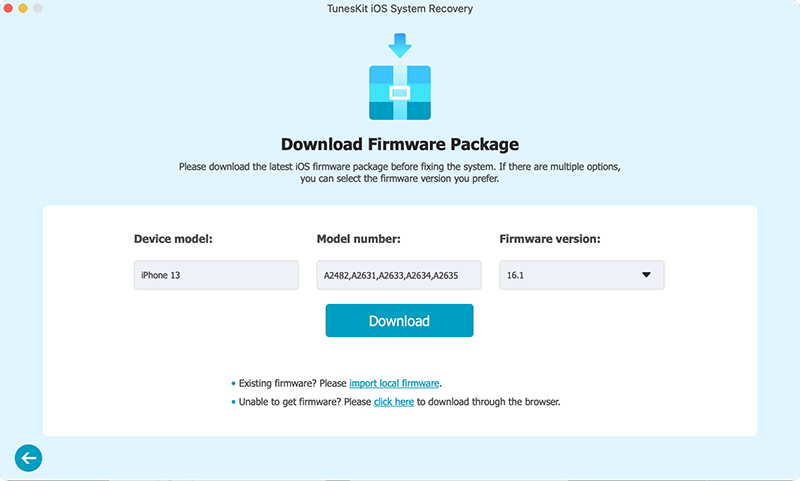
Step 3 Download the firmware package
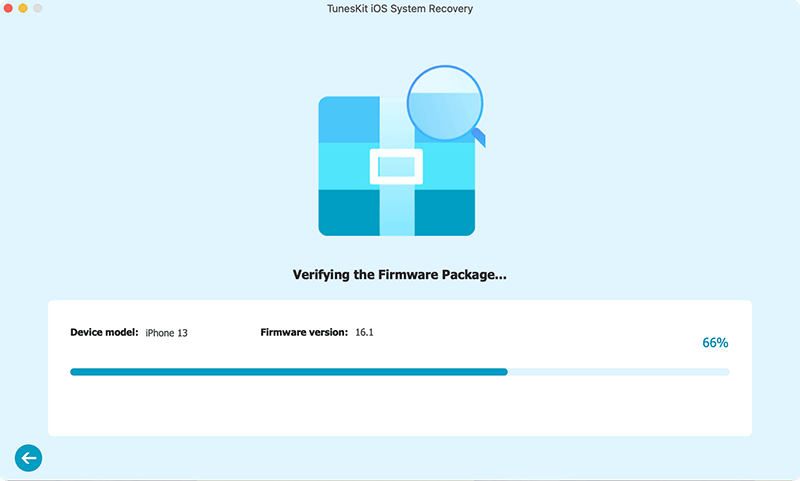
Read the information of your iPhone and correct the wrong ones. Tap on the Download button in order to download and verify matched firmware package.
Step 4Fix the iOS
Click Repair button to unzip the firmware package and fix the iOS. When the process is done, you iPhone stuck on searching problem is removed.
Tip 7: Restore iPhone via iTunes
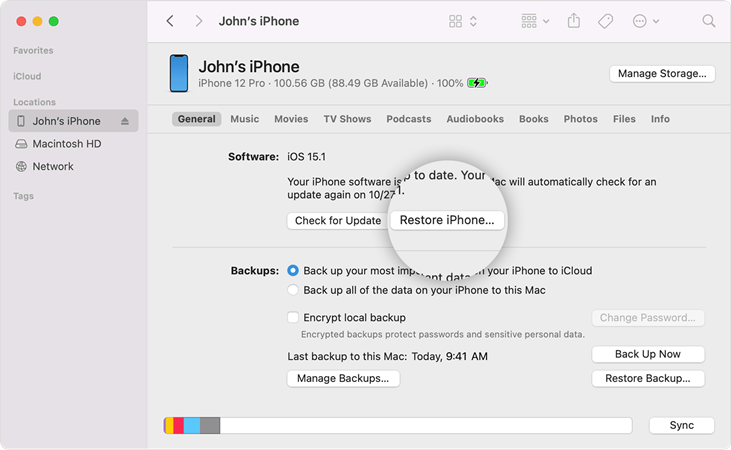
Of course, you could use iTunes app to restore your iPhone, thus solving iPhone stuck on searching problem. But this takes risks in removing all data on the device, so you had better back them up before proceed in following steps.
Step 1: Connect your iPhone to your computer and launch the latest iTunes.
Step 2: When the app detects your device, go to Summary option.
Step 3: Hit on Restore iPhone button.
Part 3: Conclusion
If there is any wrong with the above 7 tips to fix iPhone stuck on searching, you are free to contact us or give your comment here. And if you are would not like to resolve this problem by yourself, then you could go to authorized Apple stores to seek professional suggestions. In conclusion, hope you can completely settle the trouble down.
