iPhone Keeps Going to Voicemail
Whenever calls are not able to reach your iPhone, they will be sent to your voicemail. However, sometimes you may find that the call to your iPhone keeps going to voicemail no matter you want to answer or not. That might lead to serious outcomes, as you may end up missing the calls from your families, friends, or even your boss. Don't worry, in this article, we will explain the possible causes and how to stop iPhone calls go straight to voicemail.
1. Check iPhone Signal If iPhone Goes Straight to Voicemail
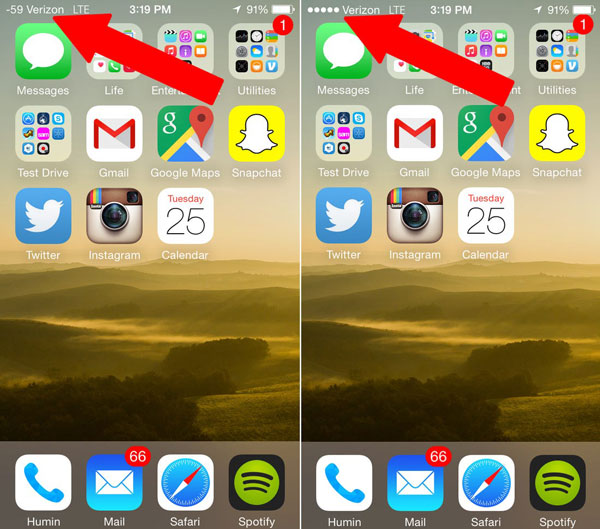
If the iPhone just send the calls straight to the voicemail for some time, then it is most likely that there are some problems with the phone signal in that area or during that time. Next time you are in that area or using your phone in that period, you should pay attention to the signal icon on the top of your iPhone screen. If you find the signal is bad by then, it would be helpful to contact the carriers or remove possible signal barriers there.
2. Turn Off the Airplane Mode
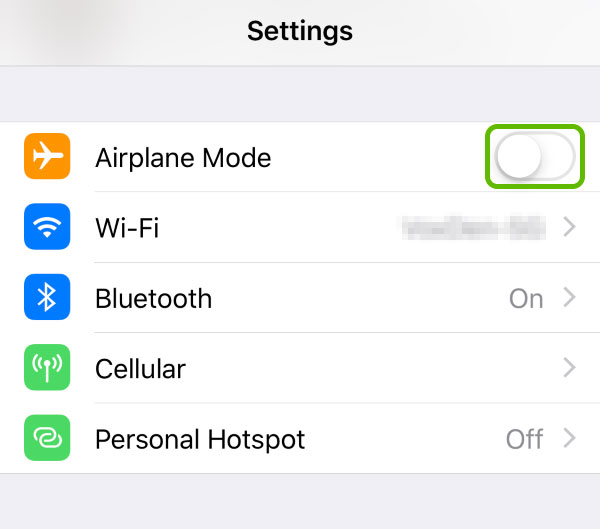
When you are in the Airplane mode, your connection to the cellular network will be cut off, and the calls just cannot reach you. Your iPhone will move all the calls to your voicemail. To turn off the Airplane Mode, you can go to the home screen and open the control center, tap it back to grey. Alternatively, you can also go to the Settings menu to disable it.
3. Disable the Do Not Disturb Mode
In many cases, the calls going straight to voicemail on iPhone is because of the Do Not Disturb feature. It is a feature specially designed to prevent you from being bothered in your working or rest hours. When your iPhone is locked, all the calls, text messages notifications, and alerts will be silenced in the Do Not Disturb Mode. The calls will be sent straight to the voicemail without telling you. When the feature is on, you will see a card shown below.
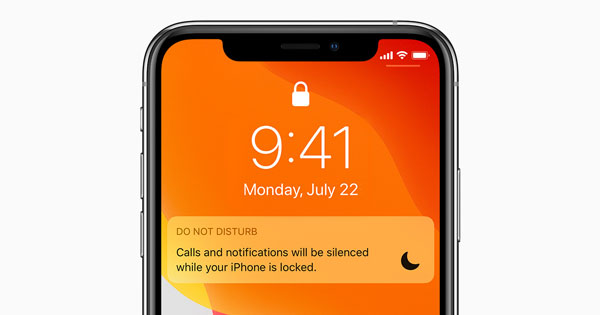
To turn off the Do Not Disturb, just call out the control center and tap on the Do Not Disturb icon.
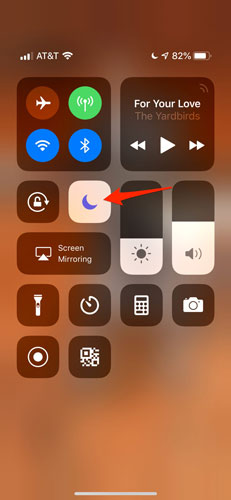
It should also be noticed that this feature can be scheduled in the Settings. If you still want it to function at a certain period, or you want to allow a few contacts to reach you only, you can adjust the Do Not Disturb settings.
To do that, go to the Settings > Do Not Disturb. Here you can find all the customizable options for the Do Not Disturb, including schedules and allowed contacts. You are free to change those settings as you pleased.
4. Fix the Possible System Error or Bug Causes
If all the previous 3 solutions fail to work out, there is a high probability that the phone calls are hindered by certain system errors or bugs. While those things are not easy to identify and solve, TunesKit iOS System Recovery can get rid of them efficiently and easily.
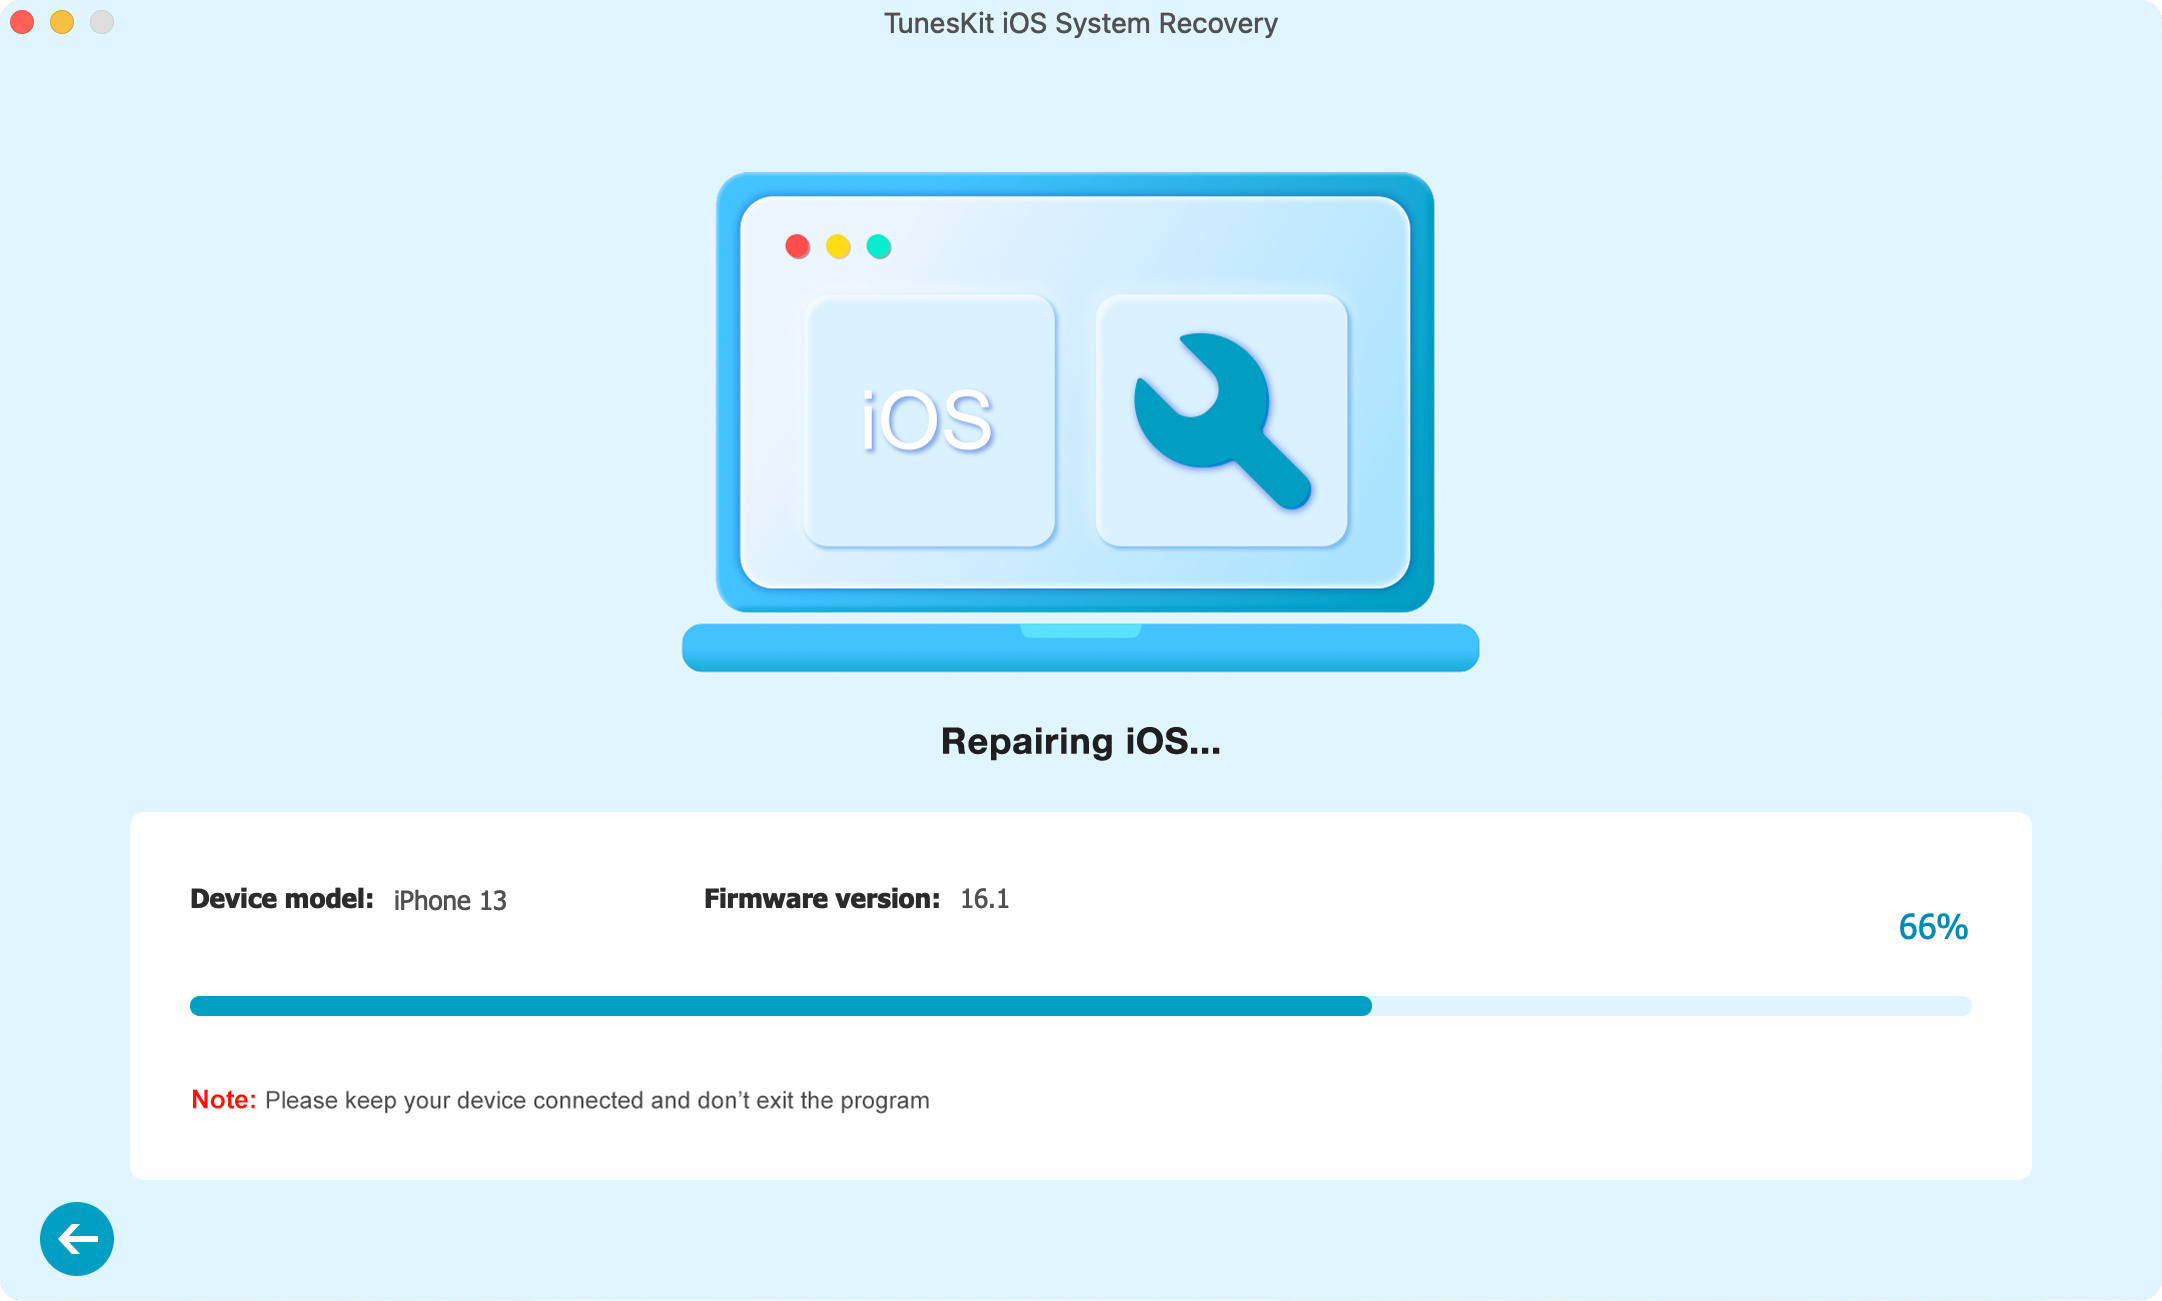
TunesKit iOS System Recovery is a highly user-friendly and effective iOS repair tool. With this tool, you can just click a few buttons and fix reboot loop, etc. iOS system issues appear on your iPhone, iPad, iPod, and Apple TV at your home. Besides, TunesKit iOS System Recovery provides the free featuring of putting the iPhone into or out of the recovery mode.
Step-by-step Tutorial to Use TunesKit iOS System Recovery.
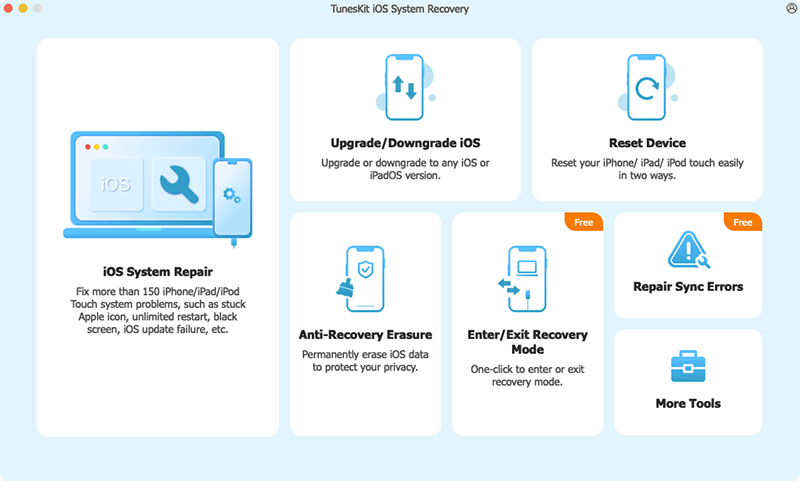
Step 1: Install TunesKit iOS System Recovery and launch it. Use a USB cable to connect your iPhone to your computer. In the pop-out window, press the "Enter Recovery Mode" button, and the phone will be ushered into the recovery mode, which is essential to the repairing process. Press the "Start" button to continue.
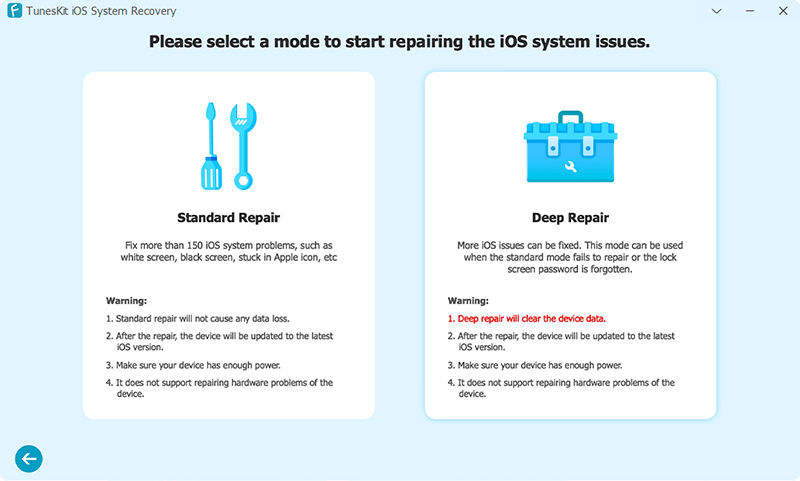
Step 2: Two repairing modes will be displayed on the screen. Click on the "Standard Mode" box so that your iPhone will be fixed without any data loss (The "Advanced Mode" will erase all the data). Then press the "Next" button to proceed to the next window.
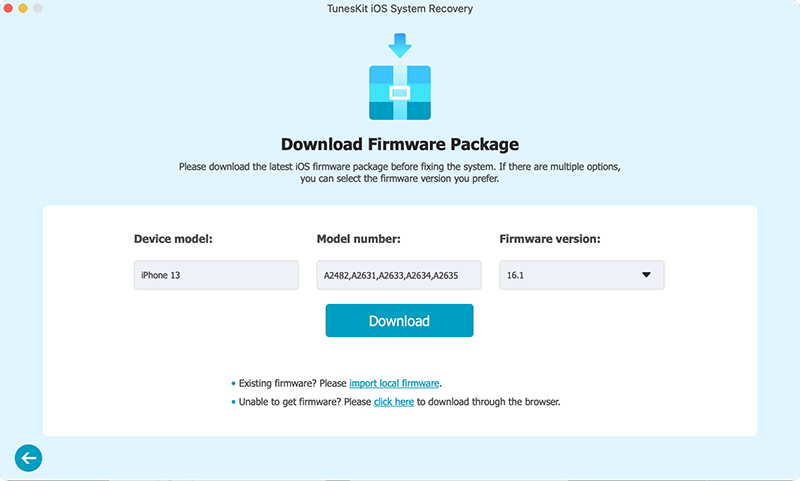
Step 3: The program will detect and show some basic info of your device. Please check and ensure that all is correct, then click the “Download” button to download the matching firmware.
Step 4: Once the firmware is downloaded, the final step is to push the "Repair" button to unzip the firmware and start the repairing process. By the time it completes, unplug the phone and you can check whether the calls can be properly answered.
5. Check the SIM Card and SIM Card Tray
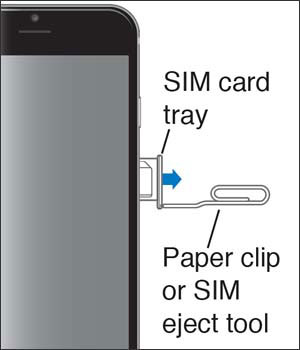
What we have been stressing is that the iPhone calls going straight to voicemail problem is essentially a signal problem. It results from calls that cannot reach your phone properly. A problematic SIM card can be another one of the most major culprits. To make sure that your SIM card is alright, eject the SIM card from the tray with the eject tool, which should be sent to you along with your phone when you got the phone package.
Aside from checking damages on the SIM card, make sure the SIM card tray is free from damages. All SIM card gadgets should be unharmed for the phone to maintain a stable connection to the network. If you find damages on them, ask the carriers for a new SIM card replacement.
6. Resort to Apple Support
If the previous solutions all fail to resolve the problem, then Apple Support is the last option you should resort to. The technicians there can diagnose the issue and implement the solutions in more precise ways. Besides, Apple Support authorized outlet is the only reliable agency to fix the hardware problems, including SIM card damage we just mentioned.
Also, before you restore your iPhone to fix the voicemail issue, we suggest you do it only after getting permission from Apple Support. Do ask them in detail about how to back up your data and how to restore safely.
7. Summary
The iPhone keeps going to voicemail issue is well illustrated in this article. You must have known why it happens and how to get rid of it easily by now. We hope that this guide is helpful and that you can receive calls on your iPhone properly.
