iPhone Camera Shaking When Taking Pictures? Solved!
"Whenever I try to take a picture, my iPhone's camera tends to shake up. This issue stops me from taking clear photos. How would I get this thing sorted? All suggestions will be greatly appreciated."
Every iPhone user loves clicking snaps as the iOS device has outstanding camera features. However, many people also complain about the iPhone camera shaking when taking pictures issue. It isn't the issue of a single user. Instead, thousands of users have been struggling with this issue. Luckily, we'll tell you how to stop the iPhone camera from shaking here.
Part 1: Why is My iPhone Camera Shaking When Taking Picture?
If your iOS device gets shakes whenever you try to take your videos or pictures, there can be a few reasons behind this fuss.
- Optical Image Stabilization (OIS) Malfunction: Modern iPhones have OIS, which uses tiny internal motors. If damaged (especially after a drop), these motors can jitter uncontrollably, causing the camera to shake.
- Magnetic Interference from Accessories: Magnetic phone cases or lens attachments can interfere with the OIS mechanism, leading to unexpected vibrations.
- Software Bugs or Glitches: Outdated iOS versions or app-specific issues (like in Snapchat or Instagram) may cause the camera to behave erratically.
- Background App Conflicts: Apps running in the background might trigger camera resources or cause instability during image capture.
- Hardware Damage: If your iPhone was recently dropped or exposed to moisture, internal hardware like the camera module or logic board could be affected.
Part 2: 8 Methods to Fix iPhone Camera Shaking When Taking Pictures
After knowing the reasons why this problem occurs, let's check out the 8 proven ways to fix iPhone camera shaking.
Solution 1: Clean Camera's Lens
If you're facing "iPhone camera shaking," the first thing you'll need to do is clean your camera's lens. Sometimes, the dust enters into the camera's placement and affects the stability of your camera.
You can clean the camera by using a tissue. Moreover, you should avoid using any liquid cleaner as it can cause water to enter your iPhone. After cleaning the camera, jump onto the next solution if the issue persists.
Solution 2: Repair iOS SystemHOT
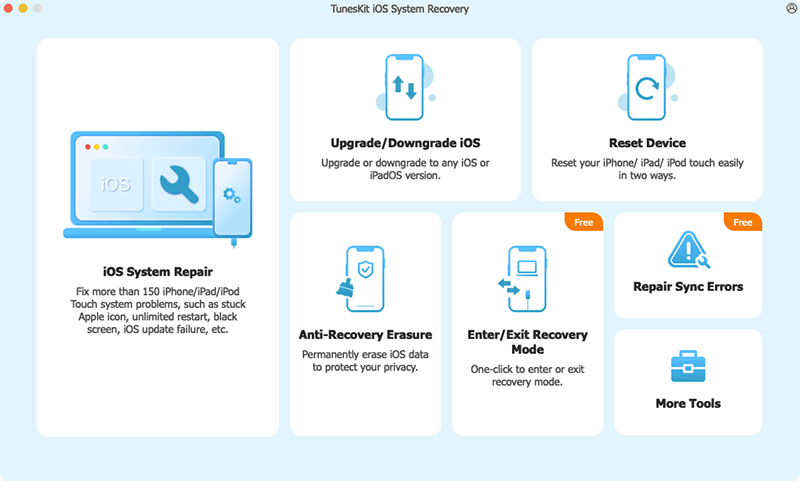
At times, the shaking issue with the iPhone camera is caused by problems within the system. Then you could take the excellent services of TunesKit iOS System Recovery. It is an outstanding third-party tool that helps you fix more than 150 iOS device issues like iPhone front camera not working, iPhone keeps deleting messages, Bluetooth keeps disconnecting from iPhone, etc. Moreover, you won't lose your data if you repair your device with its Standard Repair.
Features of TunesKit iOS System Recovery
- Fix iPhone camera shaking issue within several steps
- Repair 150+ iOS/iPadOS system problems
- Freely enter/exit the recovery mode automatically
- Supports the latest iOS System including iOS 18
- Available on both Windows and Mac platforms
- Factory reset iPhone & iPad with ease
- Downgrade iOS without jailbreak
Step 1Connect iPhone to PC
First of all, you'll need to download TunesKit iOS System Recovery software on your computer and launch it. After starting the program, connect your iOS device to the computer and hit the iOS System Repair and Start icon to proceed ahead.
Step 2Choose Standard repair
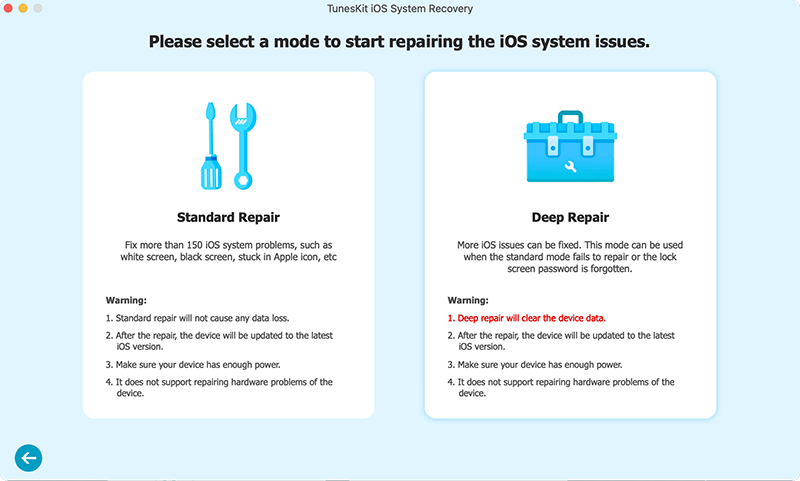
Now, select the mode of the repairing process. Selecting Standard Repair would be a wise idea if you don't want to lose data during iPhone fixing.
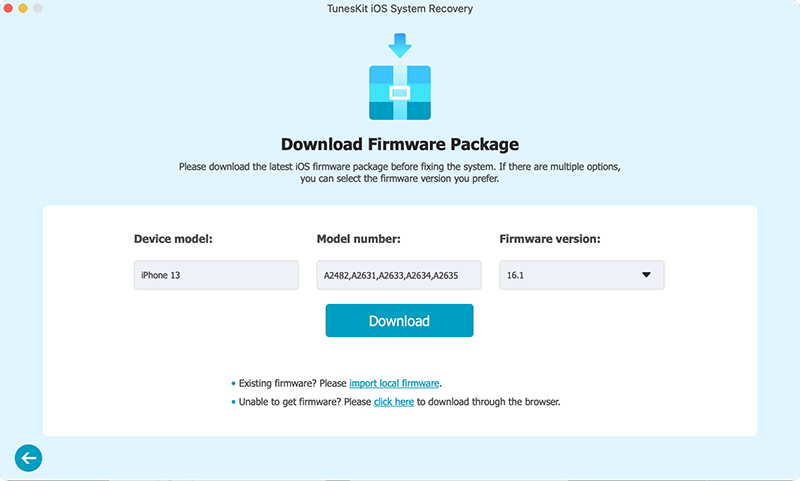
Step 3Download firmware package
After deciding the repair mode, you'll need to choose the firmware version and hit the Download button to download the appropriate firmware package.
Step 4Fix iPhone camera shaking when taking photos with ease
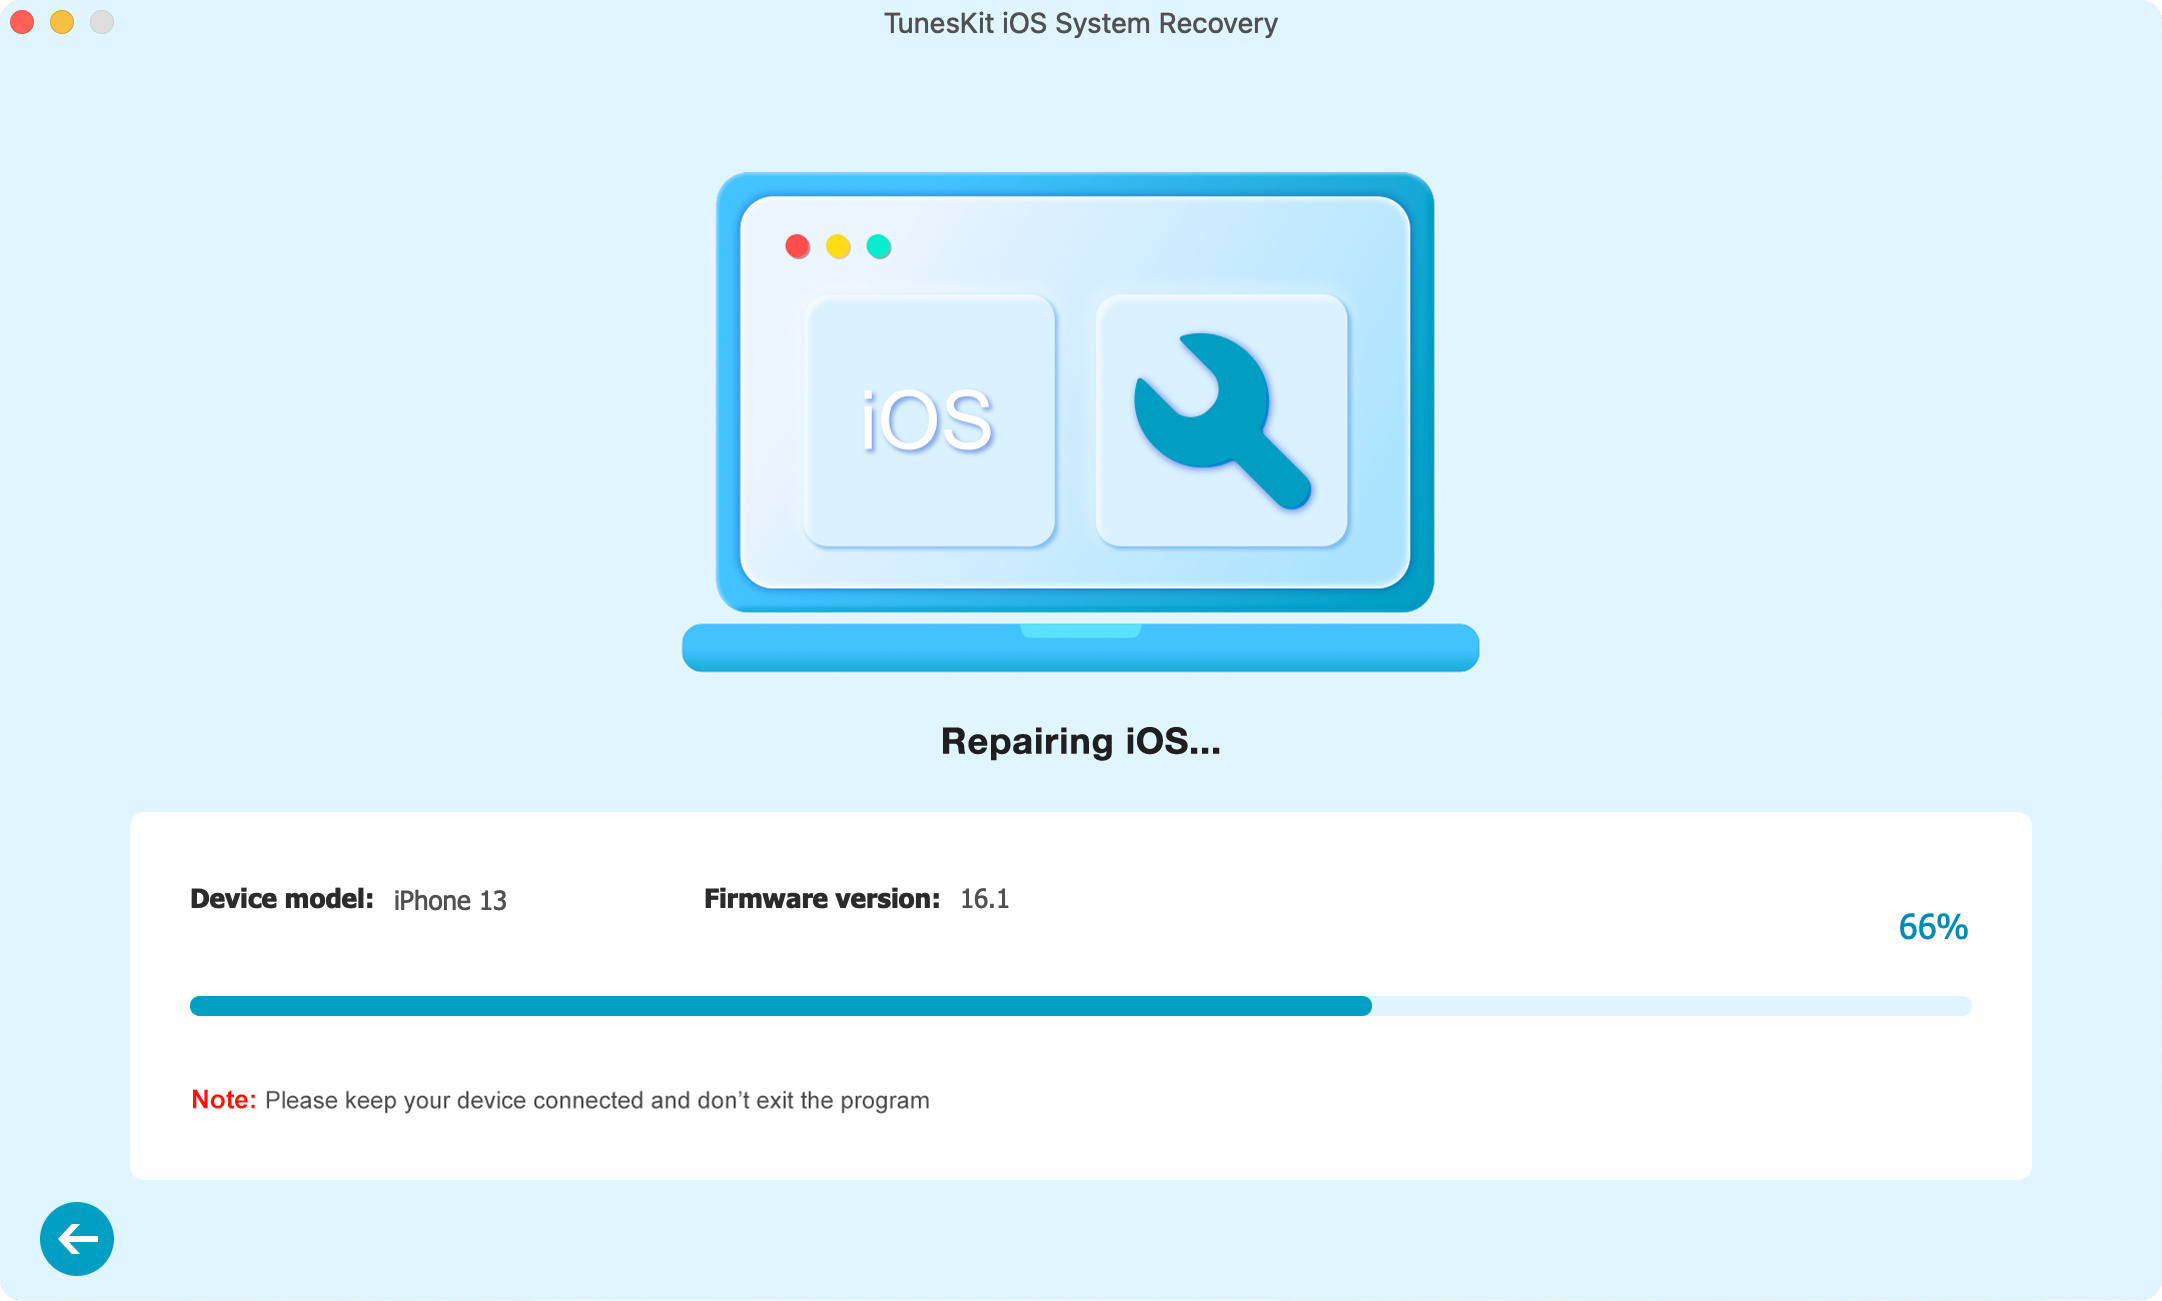
After having an appropriate firmware download, you can hit the Repair button to start the process. It will take some minutes before it makes your job done. After the repair is complete, your iPhone will restart, you can check if the iPhone camera shaking issue is resolved.
Solution 3: Restart iPhone
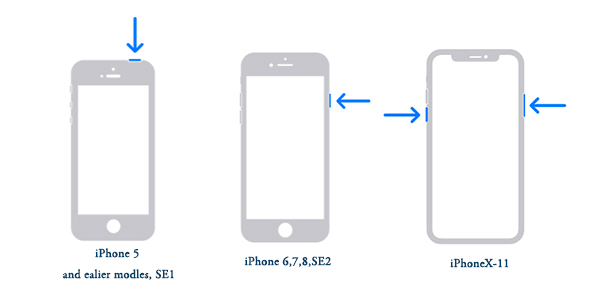
You can try restarting your device if you've been facing any trouble iphone camera shaking when taking picture. Restarting a device is the most common yet effective way to fix many iOS issues.
iPhone X or later models: Press and hold the Volume Down and Side button until you see the power slider. Please slide to power off. Wait a while and press the power button to reboot. It will take a few moments before your iPhone gets turned off and turned on again.
For iPhone 6/7/8: Drag your power slider after pressing the side button. Later, you'll be able to turn on your iPhone.
Solution 4: Reset All iPhone Settings
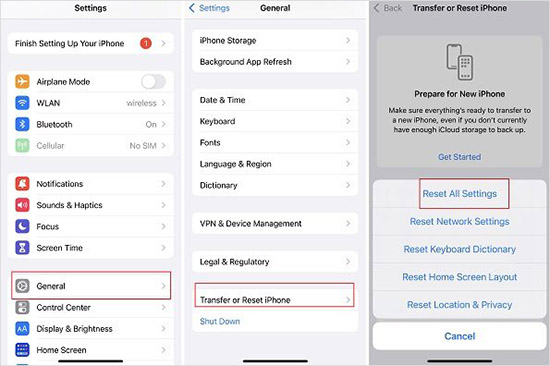
Despite cleaning your camera your device, if you're looking for an iPhone camera shaking fix, you must try resetting your iPhone settings. Doing so can help you eliminate the issue you must be facing. Here's the guide to reset your iPhone settings.
Step 1: Launch iPhone Settings app and navigate the General setting option.
Step 2: Now, you'll need to hit Reset All Settings After resetting your settings, you'll need to check whether the issue you were facing has been fixed or not
Solution 5: Update iOS Version
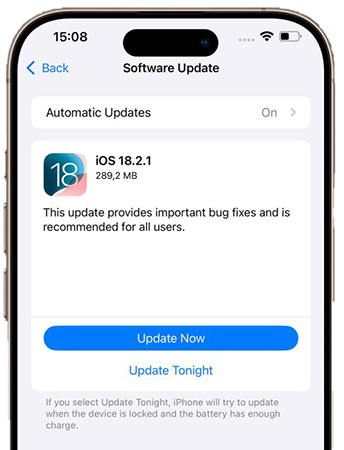
If still, your iPhone camera shaking when taking photos, you need to ensure the iOS version you're currently using is the latest one. Sometimes, you don't pay attention whenever a new iOS update comes, which might cause issues with your iPhone functions. Here's the guide to update iPhone if available.
Step 1. Launch iPhone settings and hit the General setting option.
Step 2. Now, you'll need to select Software Update and download the latest update from there.
Solution 6: Restore iPhone via iTunes
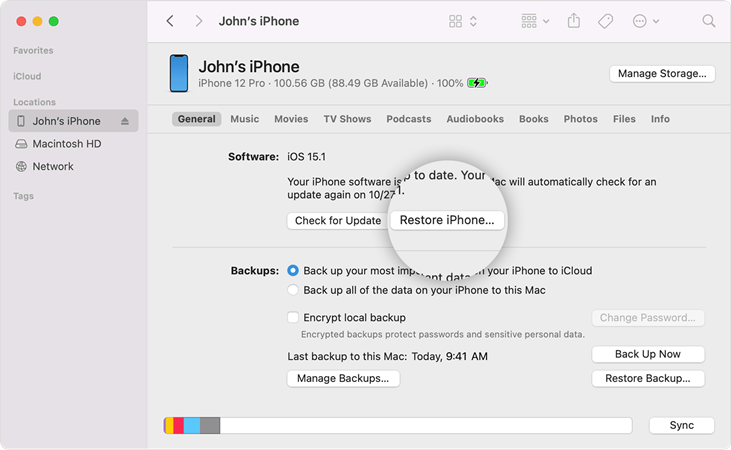
Before going for a third-party tool, you need to restore your device via iTunes to see how it goes. Most of the time, restoring iPhone through iTunes solves many issues.
Step 1. Launch iTunes and connect the iOS device to your PC.
Step 2. You'll need to hit the device icon after iTunes detects the iOS device.
Step 3. Now, you can hit the Restore iPhone icon on the screen to get your job done. After restoring your device via iTunes, you need to use your camera and see the outcome of the restoration process.
Solution 7: Add a Magnet to Phone Case
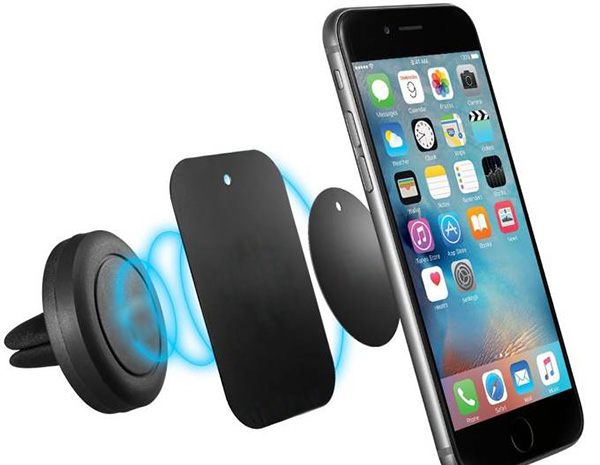
Whenever your camera becomes disabled, it can cause an iPhone camera shaking when taking photos issue. To get rid of this issue, you can try using a magnet. What a Magnet can do is balance the gyroscope and makes everything smooth. You can glue a Magnet in the iPhone camera's backside.
Solution 8: Contact Apple Support for Help
If your iPhone camera is physically damaged or malfunctioning, it may result in shaky images. In this case, you may need to contact Apple Support or visit an authorized service provider for assistance.

Part 3. FAQs about iPhone Camera Shaking
-
1. How can I tell if the camera shaking is hardware or software related?
If the issue persists after a system update, restart, and appears across all apps, it’s likely hardware. If it's only in one app or started after an iOS update, it might be software.
-
2. How do I explain the problem to Apple Support clearly?
Record a short video showing the camera shaking in the Camera app (and possibly others), note when it started, and if any damage occurred. Mention model, iOS version, and troubleshooting steps already tried.
-
3. Is this problem common after iOS updates?
Occasionally, camera-related bugs appear after major iOS updates. If shaking started right after an update, try restarting, resetting camera settings, or waiting for a patch update.
Part 4. Summary
After reading this guide, you'll be able to fix the iPhone camera shaking when taking pictures issue. All the methods we've discussed above can be pretty helpful. However, TunesKit iOS System Recovery is the best option you've got. Apart from being user-friendly, it makes your job done with minimal effort. Just click the download button below and try it free! If you have any questions, let us know in the comments below.
