Don't Cry Over iPhone Audio Skipping! Try These Proven Fixes
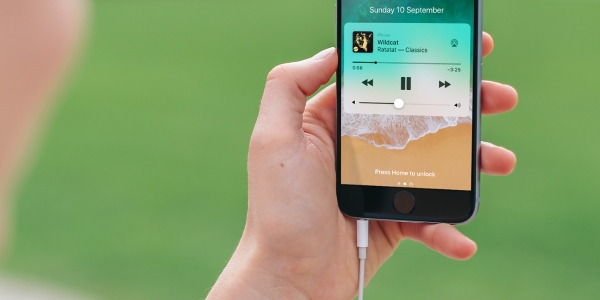
There have been tons of reports from iPhone owners that they have been experiencing issues during using music playback. It's really an awkward spot when it skips the tracks that you specifically like to listen to. The complaint states that the audio constantly skipping/stuttering/glitching playing various kinds of media. Others also said that the audio sounds robotic and lag triggering it to be out of sync from video. As a music-goer, I know how terrible it is when the iPhone is randomly skipping tracks.
There are 8 ways to fix the iPhone audio skipping issue in the content below. This is a not so tedious list of problems to solve. Therefore, it is not very tiring to try one by one according to the following steps, and it is worth mentioning that there are shortcuts to take. No more words, let's check out the working fixes.
Fix 1. Soft Restart Your iPhone
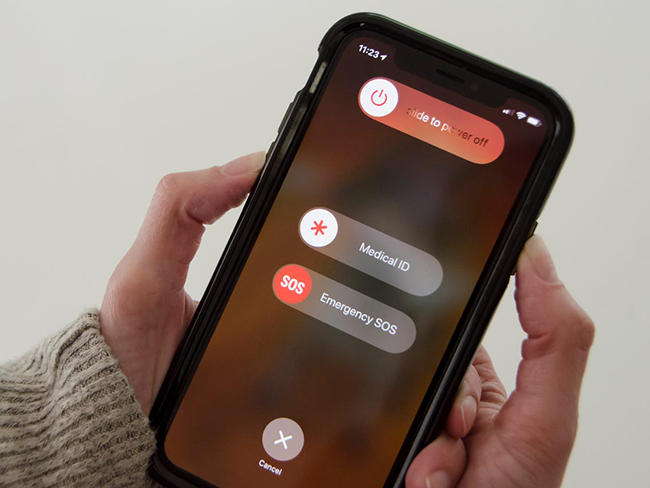
There is a simple workaround but worked for some users. It turns out that when you perform a soft reset or simply reboot your iPhone, the problem goes away. For starters, here's how you can reboot your iPhone:
Step 1. Continue to press the Sleep/Wake button and the Lower Volume button. On the iPhone X and later models, you'll find the Sleep/Wake button on the right side of the phone.
Step 2. When you see the Slider, rest your finger on it and then swipe to the right.
Step 3. To turn your device back on, press and hold the Power button again until you see the Apple logo appear.
Note: If you're using an iPhone SE or an iPhone 8 or earlier, hold down the Sleep/Wake button until the slider appears to shut down your iPhone.
Fix 2. Force Restart Your iPhone
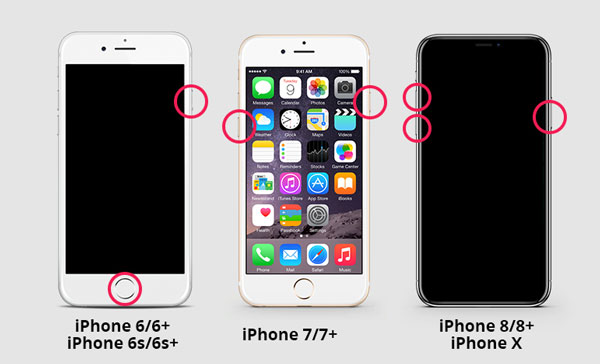
Another procedure you can use to reset your iPhone is to do what Apple officially calls a "force restart".
For iPhone 8 or later models,
· Press and quickly release the Volume Up button, follow up by the Volume Down button.
· Press and hold the Power button until you see the Apple logo.
For iPhone 7 or iPhone 7 Plus,
· Keep pressing the Power button and the Volume Down button at the same time until the Apple logo appears.
For iPhone 6S or earlier model,
· Hold the Power button the Home button together until you see the Apple logo.
Fix 3. Relaunch Problematic App
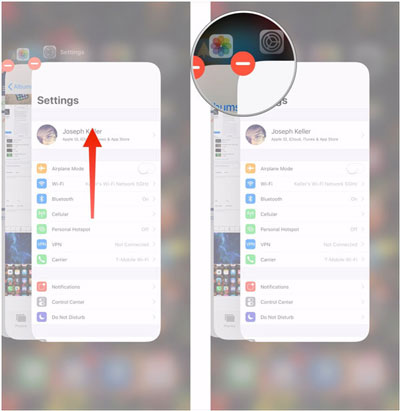
Apps on your iPhone might occasionally start to behave erratically. That's why you'll find the stabilizing iPhone audio skipping. You can choose to launch the built-in App Switcher. It allows you to manage all of the apps on your phone. This way you can fix temporary issues that may occur in your app.
Step 1. On iPhone X or later: Swipe upward from the bottom edge of the screen, pause slightly near the middle of the screen, and then lift your finger; On iPhone with Home button: Double-press the Home button quickly.
Step 2. You can swipe left or right to look through to choose the audio playing app and click on the red icon.
Step 3. Tap on the app once again to relaunch it and play audio to check if it works as expected.
Fix 4. Update the APPs
If precious steps can't solve the problem, try to update the apps. In the new version, the developer regularly fixes bugs, improves its stability and compatibility, and introduces the newest features. So, it's essential and useful to ensure the apps are updated. Here is the way to do so. Let's have a look!
To manually update apps on iPhone:
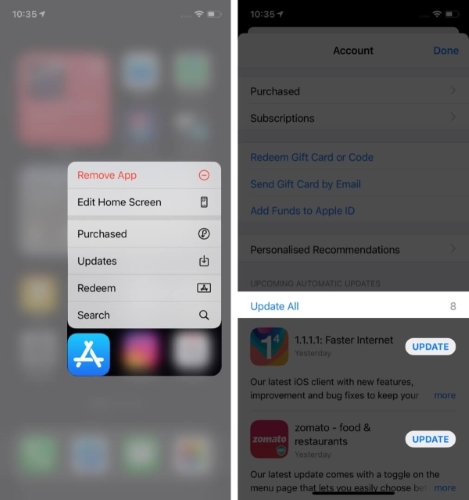
Step 1. On the iPhone Home screen, long-press the App Store.
Step 2. Choose Updates → Update All or UPDATE near the individual apps.
To automatically update apps on iPhone:
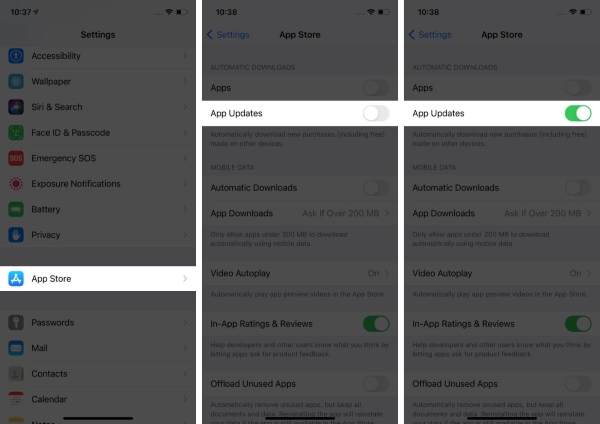
Step 1. Head to the iPhone Settings directly.
Step 2. Click on App Store
Step 3. Under Automatic Downloads, toggle on App Updates.
Fix 5. Re-install the Specific App
After applying the above methods, does the audio still keep skipping or pausing constantly? If yes, don't panic. Try to delete the app and install it once again to resolve iPhone audio skipping problem. Delete and install a new one can restore any of your third-party apps to their initial state. A new app usually fixes any problems you might be having. But note that reinstalling an app will erase all of its settings.
Delete the app:
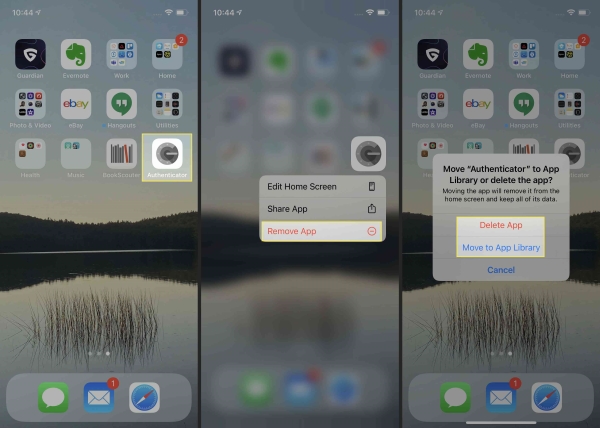
Step 1. Long-press the app icon that you want to remove
Step 2. Select Remove App command.
Step 3. When you receive a prompt, tap Delete to confirm.
Redownload the app:
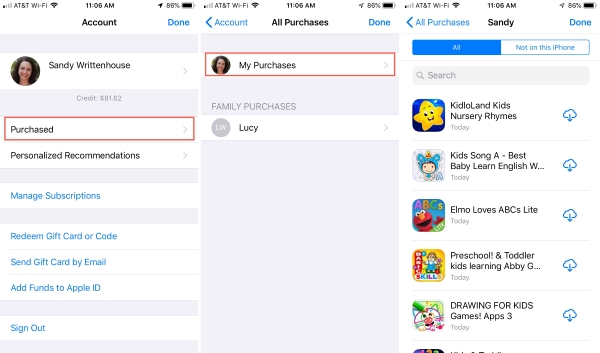
Step 1. Open App Store on your iPhone.
Step 2. Tap the profile icon in the top right corner.
Step 3. Choose Purchased then My Purchases.
Step 4. Do redownload an app, tap the cloud arrow symbol for the app.
Fix 6. Restore iPhone Using iTunes
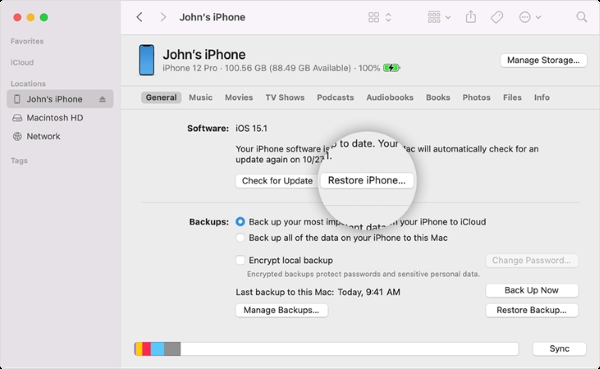
Another proven solution for the problem is to restore your iPhone. For most iPhone software problems, this has proven to be an effective solution. This procedure, however, results in the loss of data. So, it usually discourages many iPhone users from using it. Before you proceed to restore our iPhone using the following steps, back up your data first.
Step 1. Open the iTunes app on a computer.
Step 2. Plug an Apple USB cable into your iPhone.
Step 3. Once you have chosen the "Restore iPhone..." option, wait for the process to complete.
Step 4. Start your iPhone and see if song skipping continues.
As an alternative to restoring your iPhone, you can use the following third-party application that helps you resolve your problem without compromising the security of your data.
Fix 7. Fix iPhone Audio Skipping with Software [Hot]
iPhone audio skipping may trigger by an iOS issue. Under this circumstance, using a third-party program is one of the simplest ways to fix software issues or bugs on your iPhone. TunesKit iOS System Recovery is the amazing one for you to clear up all your annoyances of iOS after comparing it with others. Besides being able to fix 150+ possible iOS issues, it doesn't affect your data at all. In more, it can fix iPhone boot loop, iPhone won't update or any other iOS issues with ease. Yes, it's compatible with all the iOS devices from iPhone, iPad, iPod touch, and Apple TV.
Characteristics of TunesKit iOS System Recovery:
- Fix iPhone audio skipping only 4 steps
- Repair different tvOS/iOS issues quickly and safely
- Provide Standard Mode and Advanced Mode
- Easy-to-use and user-friendly interface
- Fix your iOS devices without data loss
Let's download this feature-rich tool and follow the step-by-step guide to repair stabilizing iphone audio skipping issue.
Step 1Install and Launch the Program on Your Computer; Connect iPhone to PC
Firstly, get TunesKit iOS System Recovery on a computer and connect your iPhone to the computer via USB cable. Click the Start option to proceed.

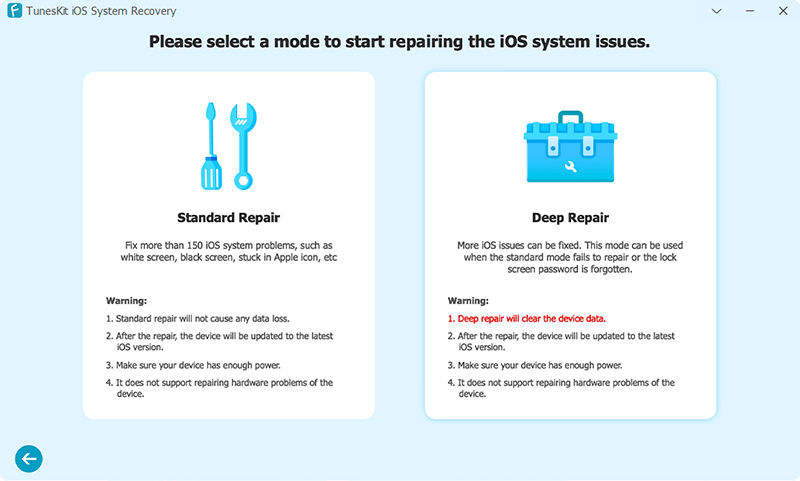
Step 2 Select Standard Mode
After the device gets recognized, choose Standard Mode. Click Next to proceed.
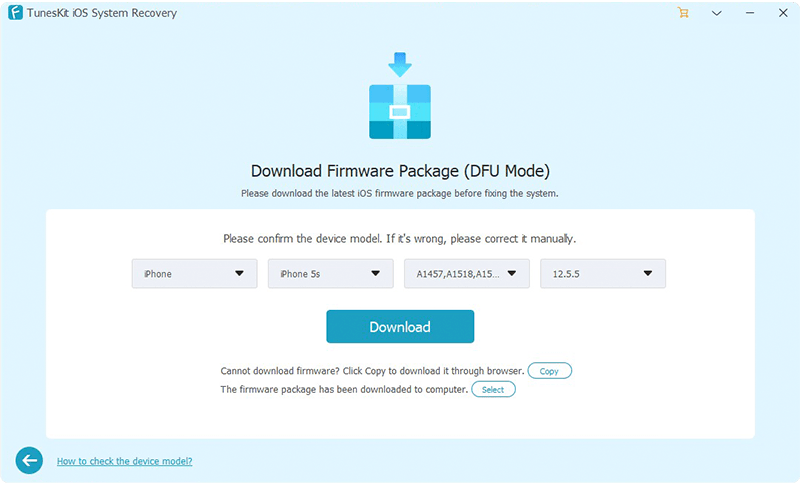
Step 3Automatically Download the Firmware
This program will automatically detect your iPhone and show you the device information. Check and confirm. Select the "Download" button to enable the program to download the firmware.
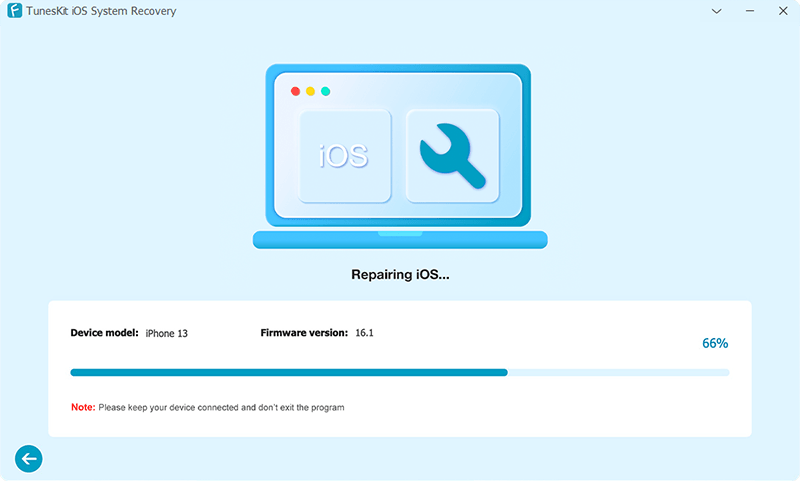
Step 4Start to Repair Your iPhone Device
Within a few minutes of the firmware download, the program will repair your iPhone. Click the Repair button to initiate the next process. Do not disconnect your iPhone from the computer during the process.
Fix 8. Have Apple Check Your iPhone
You might need an Apple-certified technician if you can't do the last method by yourself. The technician needs to ensure that a corrupted iOS system isn't responsible for the problem. Once the hardware on your phone has been tested, if the problem persists, they may need to check the hardware. Apple stores are equipped to provide all of these services.
Summary
It might surprise you to learn there are actually a couple of ways to go about fixing iPhone audio skipping. Now you're ready to listen to your favorite music. Compare with other methods, using TunesKit iOS System Recovery, you can service your device yourself, straight-forwardly, and reliably. I hope this guide was helpful and answered what you were looking for. If you have any queries, write them down in the comments below and hit submit to contact us.
