Top 8 Ways to iMessage Needs to Be Enabled to Send This Message
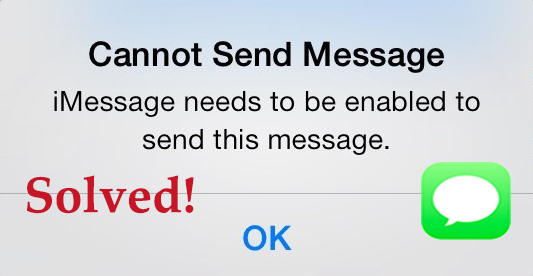
iMessage is an essential manner for people to keep in touch with their families and friends. With this virtual instant message, people will not lose contact with others. But some users have complained that iMessage tended to be abnormal. In detail, iMessage can not send messages and it requires users to enable it to send the message. Problems accompany solutions, so users do not need to be uneasy. Here, in this tutorial, you will learn some efficient solutions for iPhone iMessage needs to be enabled when sending messages.
Fix 1: Ensure iMessage Is Working
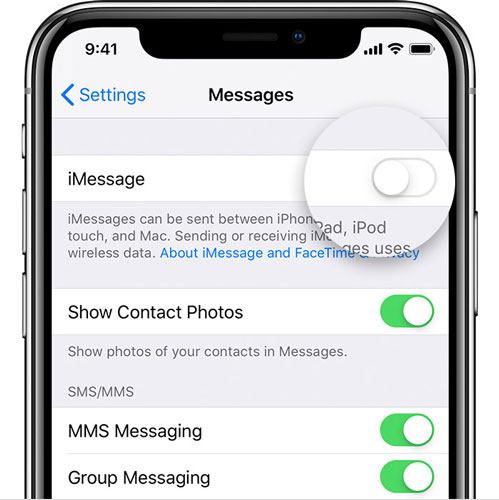
If you are using and sending iMessage rather than SMS/MMS, you need to check iMessage is enabled. To make a review, you can go to Settings. Then, scroll down the screen to tap Messages and then iMessage. You should make sure the iMessage button is green. If it is grey, tap the button to turn it on. If the iMessage is already on, you can turn it grey and then enable the option again. If done, check if iMessage needs to be enabled to send this message repeatedly.
Fix 2: Check Send & Receive
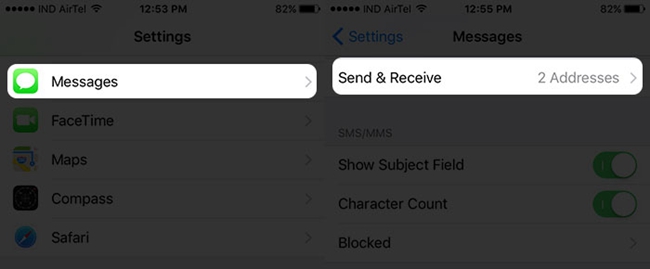
One of the related reasons for the iMessage issue may be wrong settings. The Send & Receive option is one of the factors. So never hesitate to check it. To do this, just go to Settings > Messages. After tapping, scroll down to select and tap Send & Receive. On the following screen, make sure that your address is listed under You Can Be Reached By iMessage At.
Fix 3: Sign out and in with iMessage Account
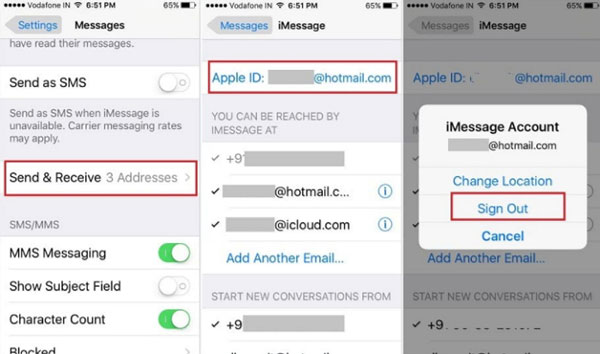
You can also log out with your iMessage account, if you can remember or save the account password. To make a logout, go to Settings > Messages > Send & Receive. On the next page, tap your Apple ID account. Next, iPhone will show that you can sign out with your account, Now, just tap the Sign Out option. And then sign in to your iMessage account to check if iPhone says iMessage needs to be enabled.
Fix 4: Force Quit the Messages App
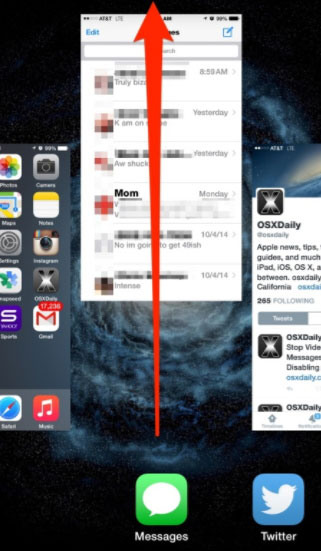
It is a well-known fix to close and force quit the particular app when it is facing issues. First, you need to open the App Switcher. To open it, double-press the Home button, while you should swipe up from the bottom if you are using iPhone with a Face ID. Second, find the card showing Messages and dragging the card up. Then, open the Messages app again.
Fix 5: Check iMessage Server Status
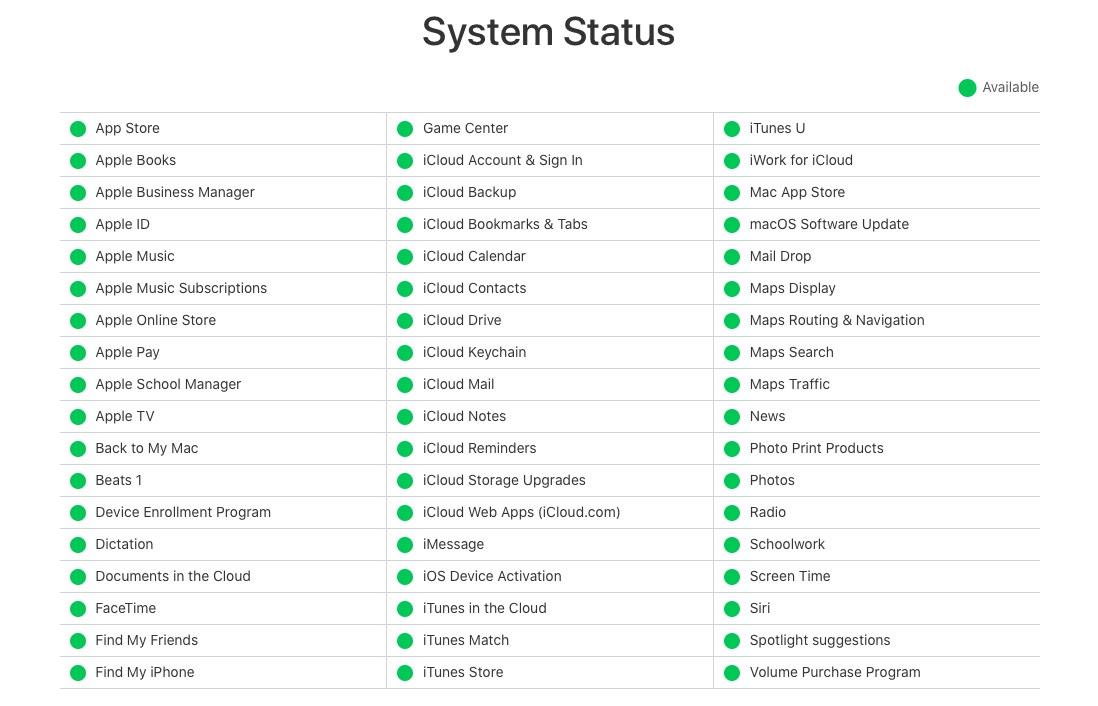
When the iMessage server is down, users may face iMessage needs to be enabled and can not send messages. To check this, you can visit the Apple System Status website. If the iMessage dot is green, this means that the server works fine. And you need to try other methods.
Fix 6: Fix iPhone Bugs Without Data Loss
Except for the iMessage app bug, the iPhone system glitches may also be an aspect affecting the iMessage operation. To fix the system bug, there is a versatile tool named iOS System Recovery Software. It can turn your device back to normal for good. In this sense, you can use TunesKit iOS System Recovery to fix iMessage needs to be enabled to send this message.
TunesKit is a professional software developer, whose iOS System Recovery tool is widely recognized by users. TunesKit iOS System Recovery equips itself with a fast processing rate. Moreover, it can preserve users' data and keep its device intact. In total, more than 50 iOS-related issues including iPhone frozen screen, black screen, red screen, etc., can be fixed by TunesKit. Apart from this function, it can enter/exit recovery mode with one click and downgrade iOS.
Characteristics of TunesKit iOS System Recovery:
- Fix iMessage needs to be enabled to send this message without data loss
- Repair different tvOS/iOS issues at home
- Fix iOS system issues at a fast speed
- Easy to use with friendly interface
In this part, you will learn how to use TunesKit to fix the iMessage issue.
Step 1: First, launch TunesKit on your computer. Then, use a USB to make a connection between iPhone and the computer. If the iPhone is detected, you can choose to click Enter Recovery Mode and then Start.

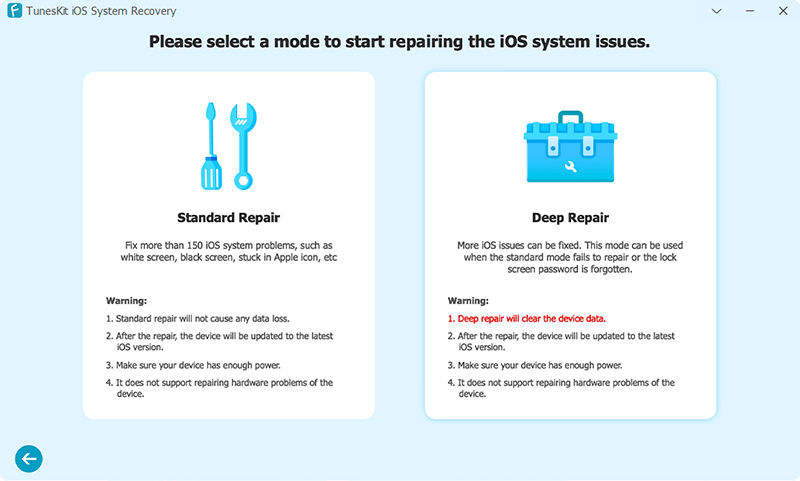
Step 2: Second, it is time to select a repair mode from Standard Mode or Advanced Mode. You can refer to the detailed information shown. Here, we recommend you to select Standard Mode, thus avoiding data loss. Then, click Next. But if you have backed up your iPhone, you can also choose Advanced Mode.
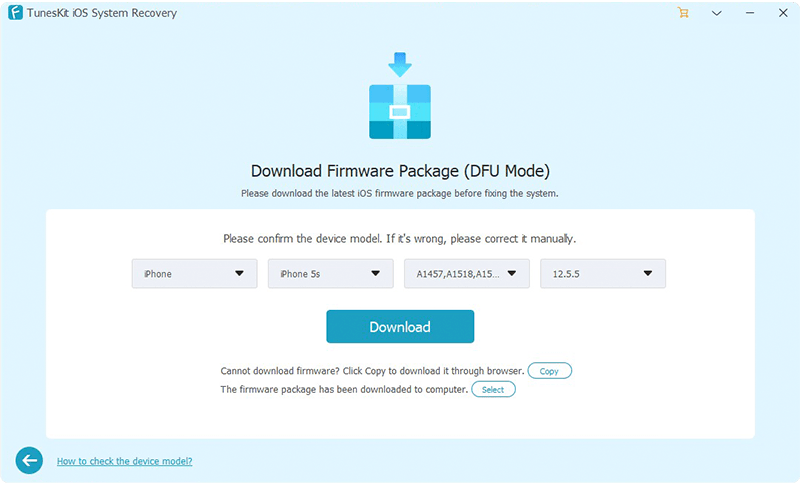
Step 3: Last, you need to download the firmware package. Before downloading, you can review the device information. Then, click Download. If done, you need to repair the device by clicking Repair. Wait for several minutes, and your device will be fixed soon.
Fix 7: Reboot Your iPhone
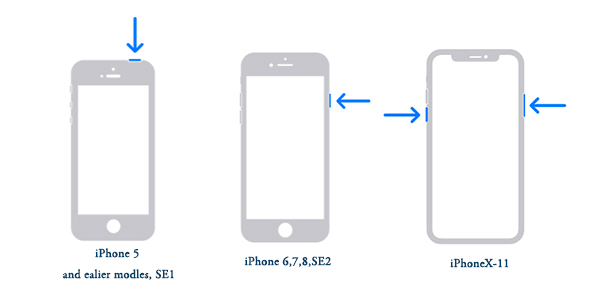
There is another quick and easy solution: restarting your device. Next, there is detailed information for rebooting the device of all models.
For iPhone X, 11, or 12: Press and hold the side button and either Volume up or down button at the same time. When Slide to Power off appears, release the buttons and drag the slider to let the device power off automatically. Wait for a minute and then turn your iPhone on by pressing the side button before you see the Apple logo.
For iPhone SE (2nd generation), 8, 7, 6 or earlier: Press and hold the Power/top button. When Slide to Power off appears, release the buttons and drag the slider to turn off the device. Wait for a minute, and then press the Power/top button again until the Apple logo occurs on iPhone.
Fix 8: Reset Network Settings
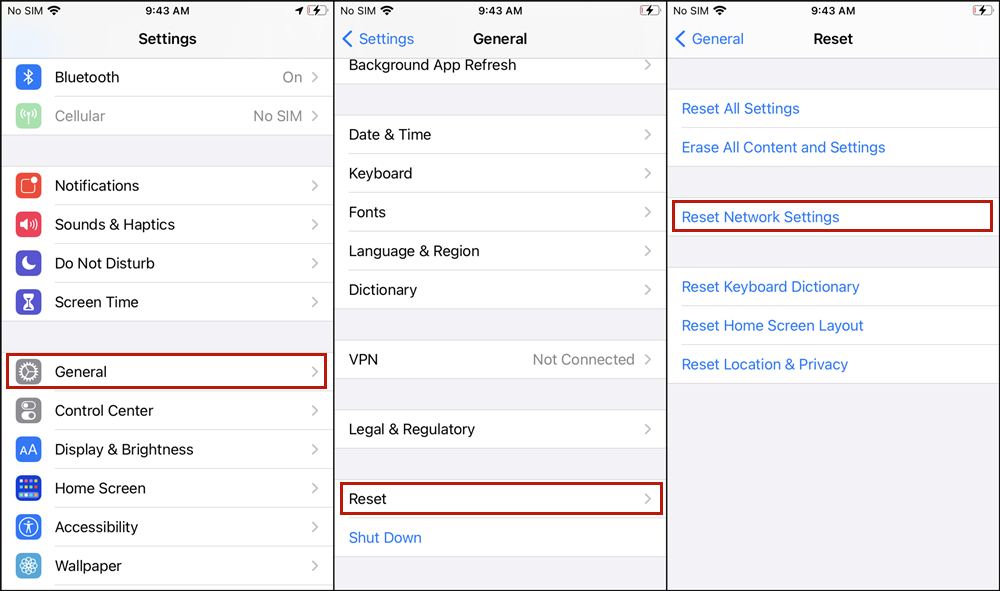
There is the final way. That is to say, you can reset network settings on your iPhone. Do not worry, as this will not erase all your data. To reset the option, just tap Settings > General > Reset > Reset Network Settings.
Final Words
Without searching on Google hither and thither, you can get the top 8 ways for iMessage needs to be enabled to send this message from this article. We sincerely hope that you can fix the issue within several minutes.
