[Latest Tutorials] How to Turn Off Safe Search on iPhone?
As the internet becomes increasingly vast and diverse, many users seek to filter out explicit content for various reasons, including protecting minors or simply personal preference. However, there may come a time when you need to disable these filters, such as Safe Search, to gain unrestricted access to search results. If you're an iPhone user, you might find that your web searches are being filtered by default. Whether you're researching sensitive topics that require unfiltered results or you're an adult who doesn't need these restrictions, turning off Safe Search on your iPhone is a straightforward process. In this article, we'll provide a step-by-step guide on how to turn off safe search on iPhone, allowing you to browse the web freely.
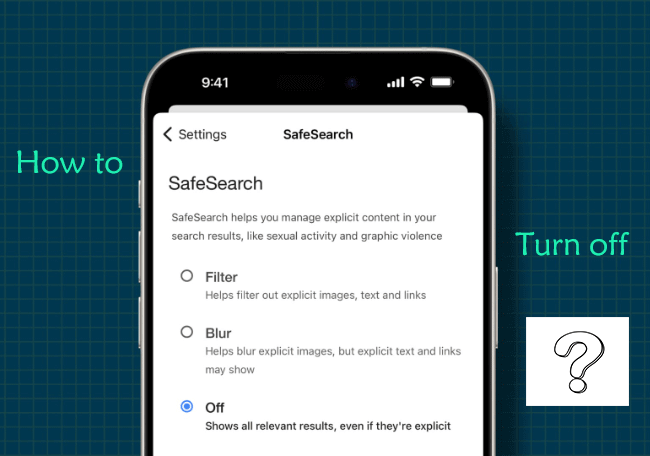
Part 1. What is Safe Search on iPhone?
Safe Search is a feature offered by many search engines, including Google and Bing, that acts as a filter to block explicit images, videos, and websites from search results. On the iPhone, Safe Search can be enabled through web browsers like Safari or through search engine apps you may have downloaded.
Part 2. Top 3 | How to Turn Off Safe Search on iPhone
To turn off Safe Search on your iPhone, you'll need to modify settings within the specific app or browser you're using, as there isn't a universal Safe Search setting for iPhone. Here are top three ways to turn off Safe Search on your iPhone.
Way 1: Adjust Screen Time settings on iPhone
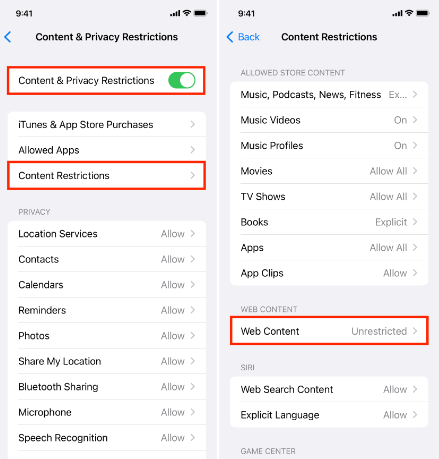
Step 1: Open the Settings app, then select Screen Time.
Step 2: Scroll down to choose Content & Privacy Restrictions option.
Step 3: Select Content Restrictions, then enter your Screen Time passcode.
Step 4: Select Web Content option. To search the web without any filters, simply choose Unrestricted.
Way 2: Turn off Safe Search in Safari
If you're using Safari, the default browser on iPhone, Safe Search is not a browser-specific feature but is tied to the search engine settings you've chosen within the app. Here's how to adjust those settings:
Step 1: Open Safari and navigate to your preferred search engine's homepage (e.g., google.com).
Step 2: Once there, find the Settings or Preferences option, which is usually located at the bottom of the page or within the menu represented by three dots.
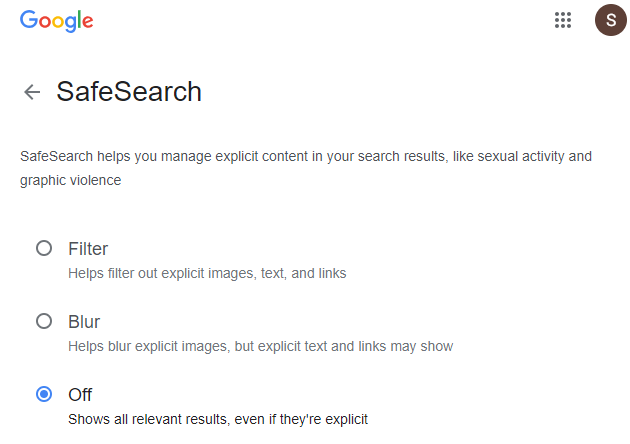
Step 3: Tap on Search Settings, then locate the Safe Search filters and select the option to turn it off.
Step 4: Save or confirm your changes, and you should now be able to search without the Safe Search filter.
Way 3: Turn off Safe Search in Search Engine Apps
If you're using a search engine app on your iPhone, such as the Google app, the process may differ slightly:
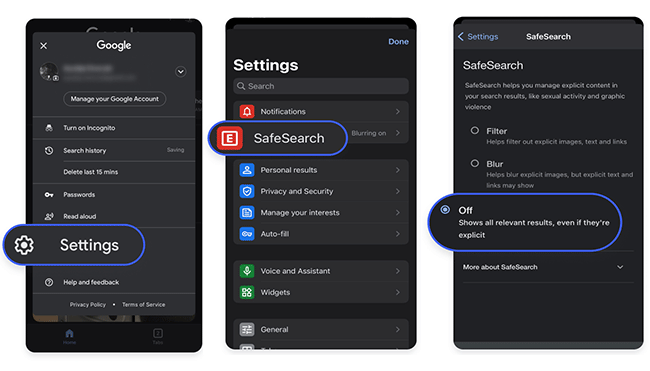
Step 1: Launch the Google app on your iPhone.
Step 2: Look for the Settings section within the app, which can often be found by tapping on your profile picture from the top right.
Step 3: Navigate to Safe Search option.
Step 4: Switch off the Safe Search toggle or select the option to turn off it. Make sure to save your changes.
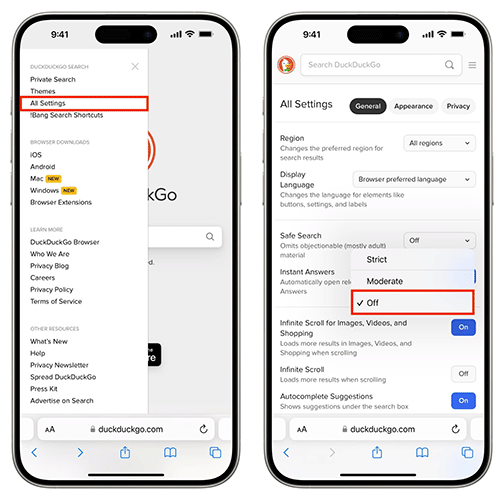
You can also turn off safe search on DuckDuckGo, here's how.
Step 1: Open DuckDuckGo app on your iPhone, and click on the three horizontal lines (hamburger menu) in the top-left corner.
Step 2: Tap on All Settings to access the full settings menu.
Step 3: Locate the Safe Search option and switch it from Moderate/Strict to Off.
Part 3. iPhone SafeSearch Won't Turn Off? Quick Fix!HOT
If you can't turn off Safe Search on your iPhone, then this is often the result of an iOS glitch. You can take advantage of TunesKit iOS System Recovery to address this issue without losing data. It is an all-in-one iOS repair tool that can solve over 150+ iOS system errors. Such as iPhone stuck on Apple logo, iPhone camera icon missing, and SafeSearch won't turn off issues. In addition to the iOS system repair function, it also allows your iPhone/iPad/iPod touch to enter or exit recovery mode, no need to jailbreak to downgrade iOS, and factory reset your iOS device.
Highlights of TunesKit iOS System Recovery
- Fix iPhone/iPad SafeSearch won't turn off without data loss
- Repair 150+ iOS issues in mintues by yourself
- Provide Standard Repair and Deep Repair
- Easy to use with friendly interface
- Downgrade iOS without jailbreak
- Enter or exit recovery mode for free
- Factory reset your iDevices without passcode
Now let's use TunesKit iOS System Recovery to fix iPhone SafeSearch won't turn off issue.
Step 1Link iPhone to PC
Install the TunesKit iOS System Recovery software on your Windows or Mac computer. Then, using a reliable USB data cable, link your iPhone to the computer. Launch this program and select iOS System Repair on the main interface, then choose Start to move on.

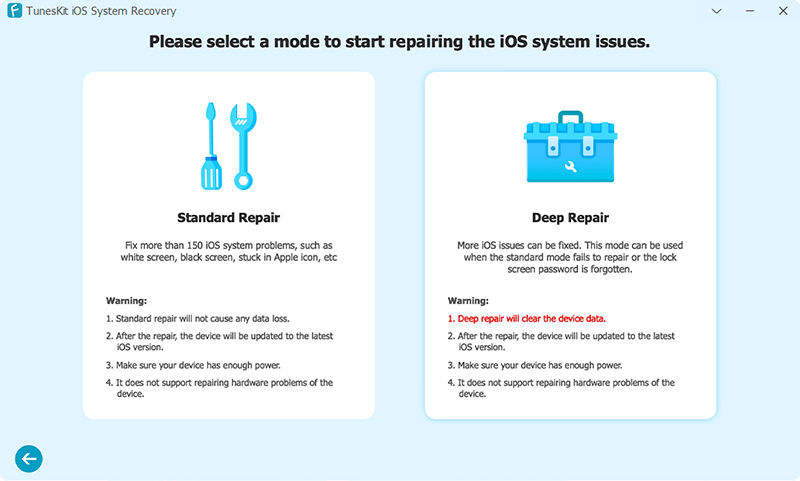
Step 2Choose a Repair Mode
Standard Repair keeps the data on your device intact. Deep Repair fixes more complex iOS bugs but erases all data. You can make a choice based on your needs.
Step 3Set iPhone to DFU mode and download firmware package
Follow the on-screen instructions to set your iPhone to DFU mode. Once your iPhone is in DFU mode, you need to select the appropriate firmware version and then click the Download button to get started.

Step 4Fix iPhone SafeSearch won't turn off in minutes
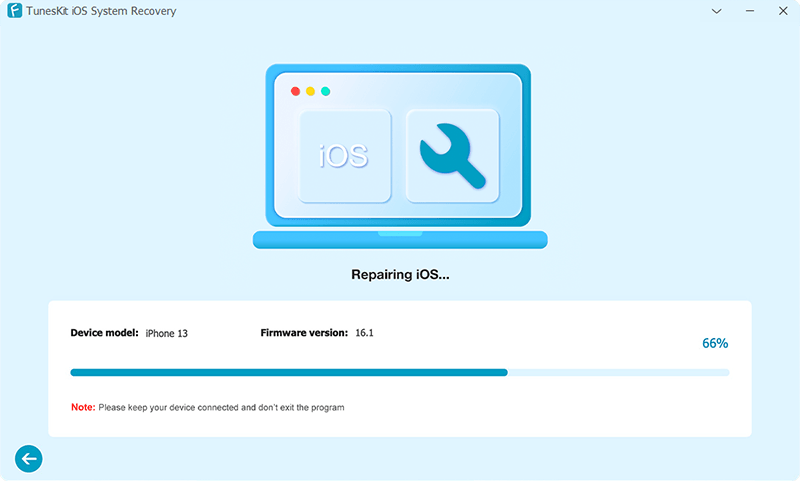
After the firmware package download is complete, press the Repair button to initiate the repair procedure. The process is expected to take a few minutes to finish. TunesKit will fully fix your iPhone's system problems that causes iPhone SafeSearch won't turn off.
Part 4: Conclusion
Well, you should know how to turn off safe search on iPhone after reading this article. Whether you're using Safari or a dedicated search engine app, adjusting the settings to suit your browsing needs is quick and easy. However, always remember that turning off Safe Search means you may encounter explicit content. Use this feature responsibly and consider re-enabling it if you share your device with others who may require filtered content. Last but not least, if you are experiencing the problem of iPhone Safe Search won't turn off, TunesKit iOS System Recovery is the ultimate solution to solve this issue without data loss.
