How to Fix iTunes Error 1611? 6 Fixes Here!
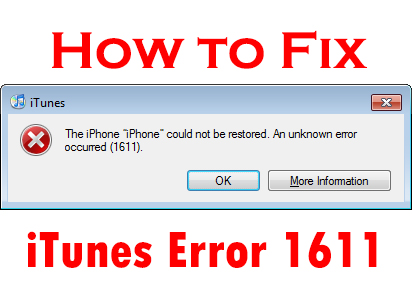
iTunes is a widely used tool among iOS users, which can update your iOS system version or restore your iOS devices. But have you run into error 1611 when you try to restore your iOS device via iTunes? The pop-up window shows suddenly and stops your process, informing you that there is an iTunes error 1611. To solve your problem, I post this passage for you to solve this issue, including what error 1611 is, and how to fix it quickly and safely.
What is iTunes error 1611 and how to fix it
An iTunes error 1611 usually comes with a hardware issue with your iOS devices. If you are using the wrong USB cable, or there is an issue with the dock in your iOS device that will occur an error 1611. Here are some tips about fixing.
Fix 1: Use the MFi Lightning cable

A lightning cable without MFi Certified or a broken Lightning cable may cause the iTunes error 1611. MFi stands for Made For iPhone/iPod/iPad. When you meet the error 1611, confirm that your iOS accessories are MFi certified. If not, it is worth changing as an iOS user.
Fix 2: Update iTunes version
An old version of iTunes may not be compatible with the latest iOS version. Update your iTunes in time when you run into iTunes error 1611.
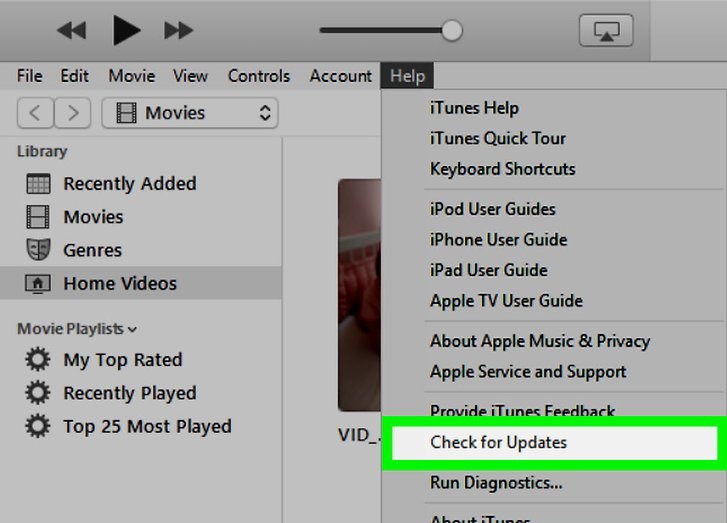
You are able to update your iTunes via the main interface. You can update your iTunes via Help>Check for Updates. For the Mac user, you can update your iTunes from Mac App Store. It is a wise choice for you to keep your iTunes always the latest version so that you can enjoy the best service and prevent your iOS device from bugs.
Fix 3: Remove security software
Uncertified security software in iOS will cause the iTunes error 1611 because it will prevent your iOS device connect with iTunes. To be honest, iOS is a high security operating system and there is no need to install security software. Try to remove it and iOS can protect your phone very well.
Fix 4: Put your iPhone into DFU mode to fix iTunes error 1611
DFU stands for Device Firmware Update. Compared to Recovery Mode, DFU Mode can be used to restore your iOS device in the premise of Recovery Mode not working. In other words, DFU Mode is able to fix the more complicated issue.
For iPhone 8 or later version:
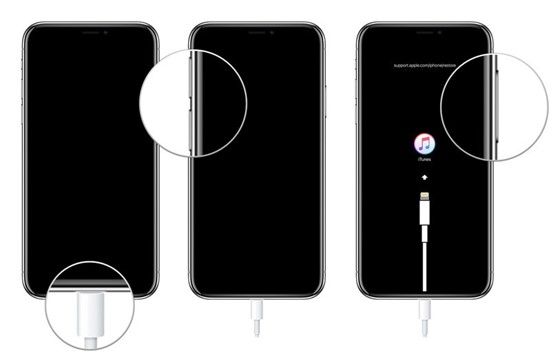
Step 1: Connect your iPhone with your computer through a USB cable;
Step 2: Press the Volume Up button, and press the Volume Down button quickly. Hold Side button and release it when you see the screen turns black;
Step 3: Press and hold the Side button and Volume Down button at the same time for 5 seconds;
Step 4: Release Side button and keep holding Volume Down button for 5 seconds;
Step 5: Once your iPhone entered DFU Mode, the screen will stay black.
For iPhone 7/ iPhone 7 Plus:
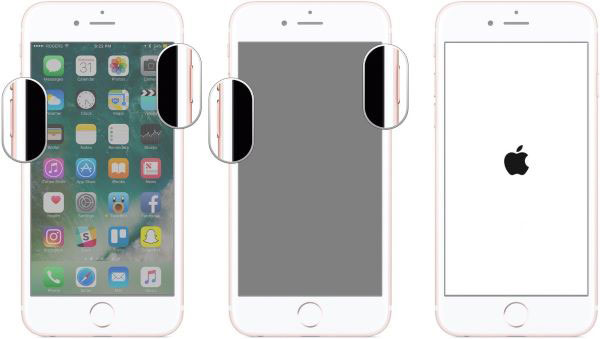
Step 1: Hold Side button and Volume Down button at the same time for 8-10 seconds;
Step 2: Release Side button and keep holding the Volume Down button for 5 seconds;
Step 3: If you put your iPhone into DFU Mode successfully, the screen will stay black.
For iPhone 6s and below:
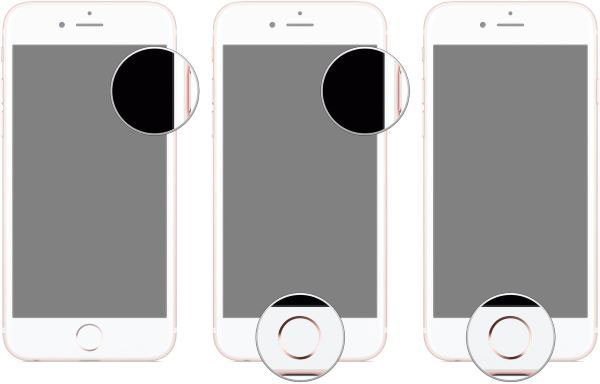
Step 1: Hold Side button and Home button at the same time for 10 seconds;
Step 2: Release Side button and keep holding Home button for 5 seconds;
Step 3: Your iPhone will stay black though you put it into DFU Mode successfully.
Fix 5: Contact Apple Support
If the above methods are not working, try to contact Apple Support. You can get help from the professional Apple staff and they will help you solve your issue.
Fix iTunes error 1611 via TunesKit iOS System Recovery
When you read here, it means that the above methods are failed to fix iTunes error 1611. I think there should be some problems with your iOS software. So, is there another way to restore your iPhone or fix iTunes error 1611? TunesKit iOS System Recovery can do a good job for you. In purpose to fix tough issues of iOS devices, TunesKit iOS System Recovery can solve your problem quickly and easily. Issues like iPhone stucks on connect to iTunes, iPhone screen ghost typing, iPad stuck in boot-loop can be fixed effectively. What's more, the fixing is data lossless and you don't need to worry about the loss of your device data.
Key Features of TunesKit iOS System Recovery
- Fix iOS operating system issues
- Two repairing modes: Standard Mode and Advanced Mode
- Supports different iOS devices like iPhone, iPad and iPod
- Compatible with all iOS versions including the iOS 14
- Easy-to-use and beginner-friendly
- Fix iTunes error 1611 in several steps
Let's see the step-by-step guide.
Step 1 Connect iOS device with computer

The first step is to connect your iOS device with your computer. Hit the Start button to the next step.
Step 2 Select mode
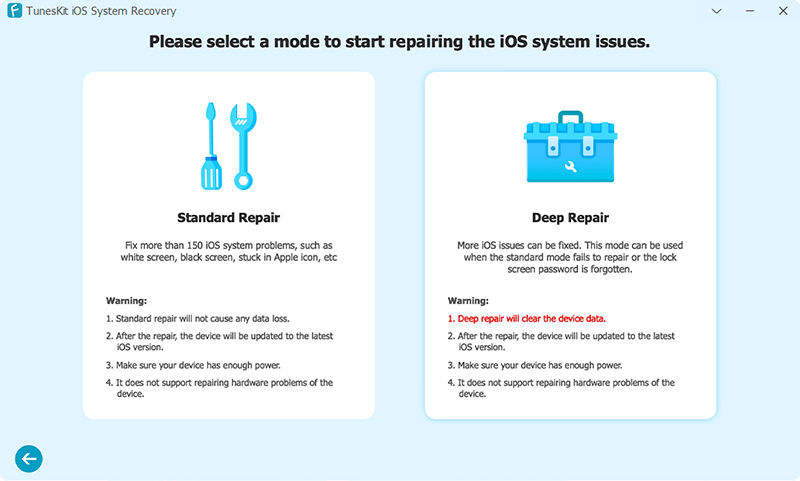
In TunesKit iOS System Recovery, you can choose two different options to fix your iOS devices. Both the modes can solve your problem. But remember, Advanced Mode will erase all of your data and choose it in the premise of Standard Mode not working.
Step 3 Download firmware package
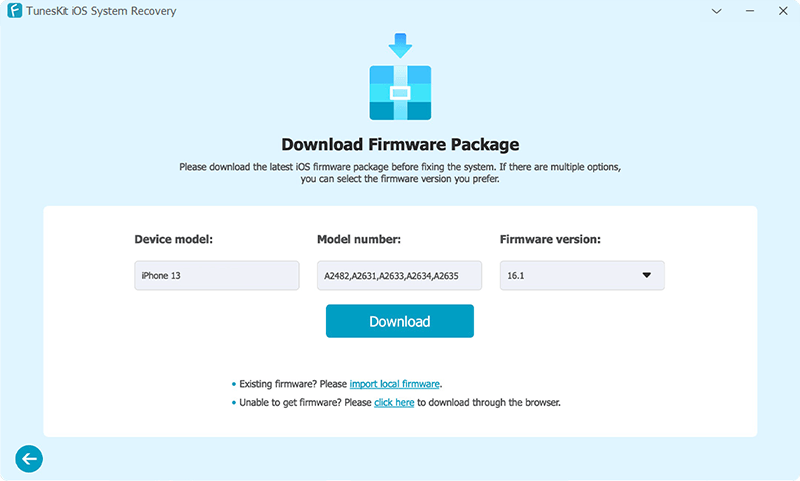
Download the firmware package to begin the fixing. Before downloading, confirm the device model information is correct, if not, correct it manually.
Step 4 Fix iOS
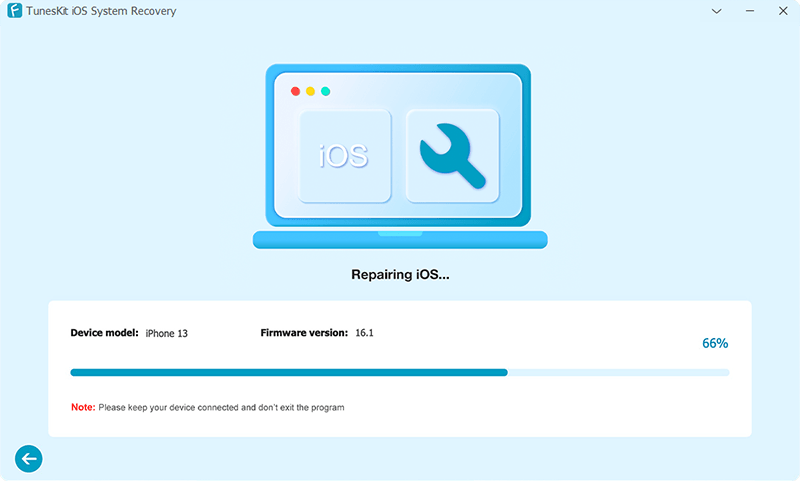
Having done the downloading, TunesKit will fix your iOS device. It can be fixed quickly, and your iOS device will be normal again when the fixing process is done.
The bottom line
Facing the iTunes error 1611, you can use different methods to fix it. There are effective ways for you to fix it by updating your iTunes, restoring your iPhone in DFU Mode, or contacting Apple Support. It is a common situation to meet the iOS issue. Learning how to fix the issues is necessary for us. For normal users, prepare an iOS system recovery tool can solve most of the problems. TunesKit iOS System Recovery is a suitable tool for you. With it, you don't need to worry about iPhone stucks on the Apple logo, iPhone frozen on the lock screen, VPN not working on iPhone, or Twitter not working on iPhone. Whenever you meet the issue, TunesKit iOS System Recovery can fix it without data loss.
